
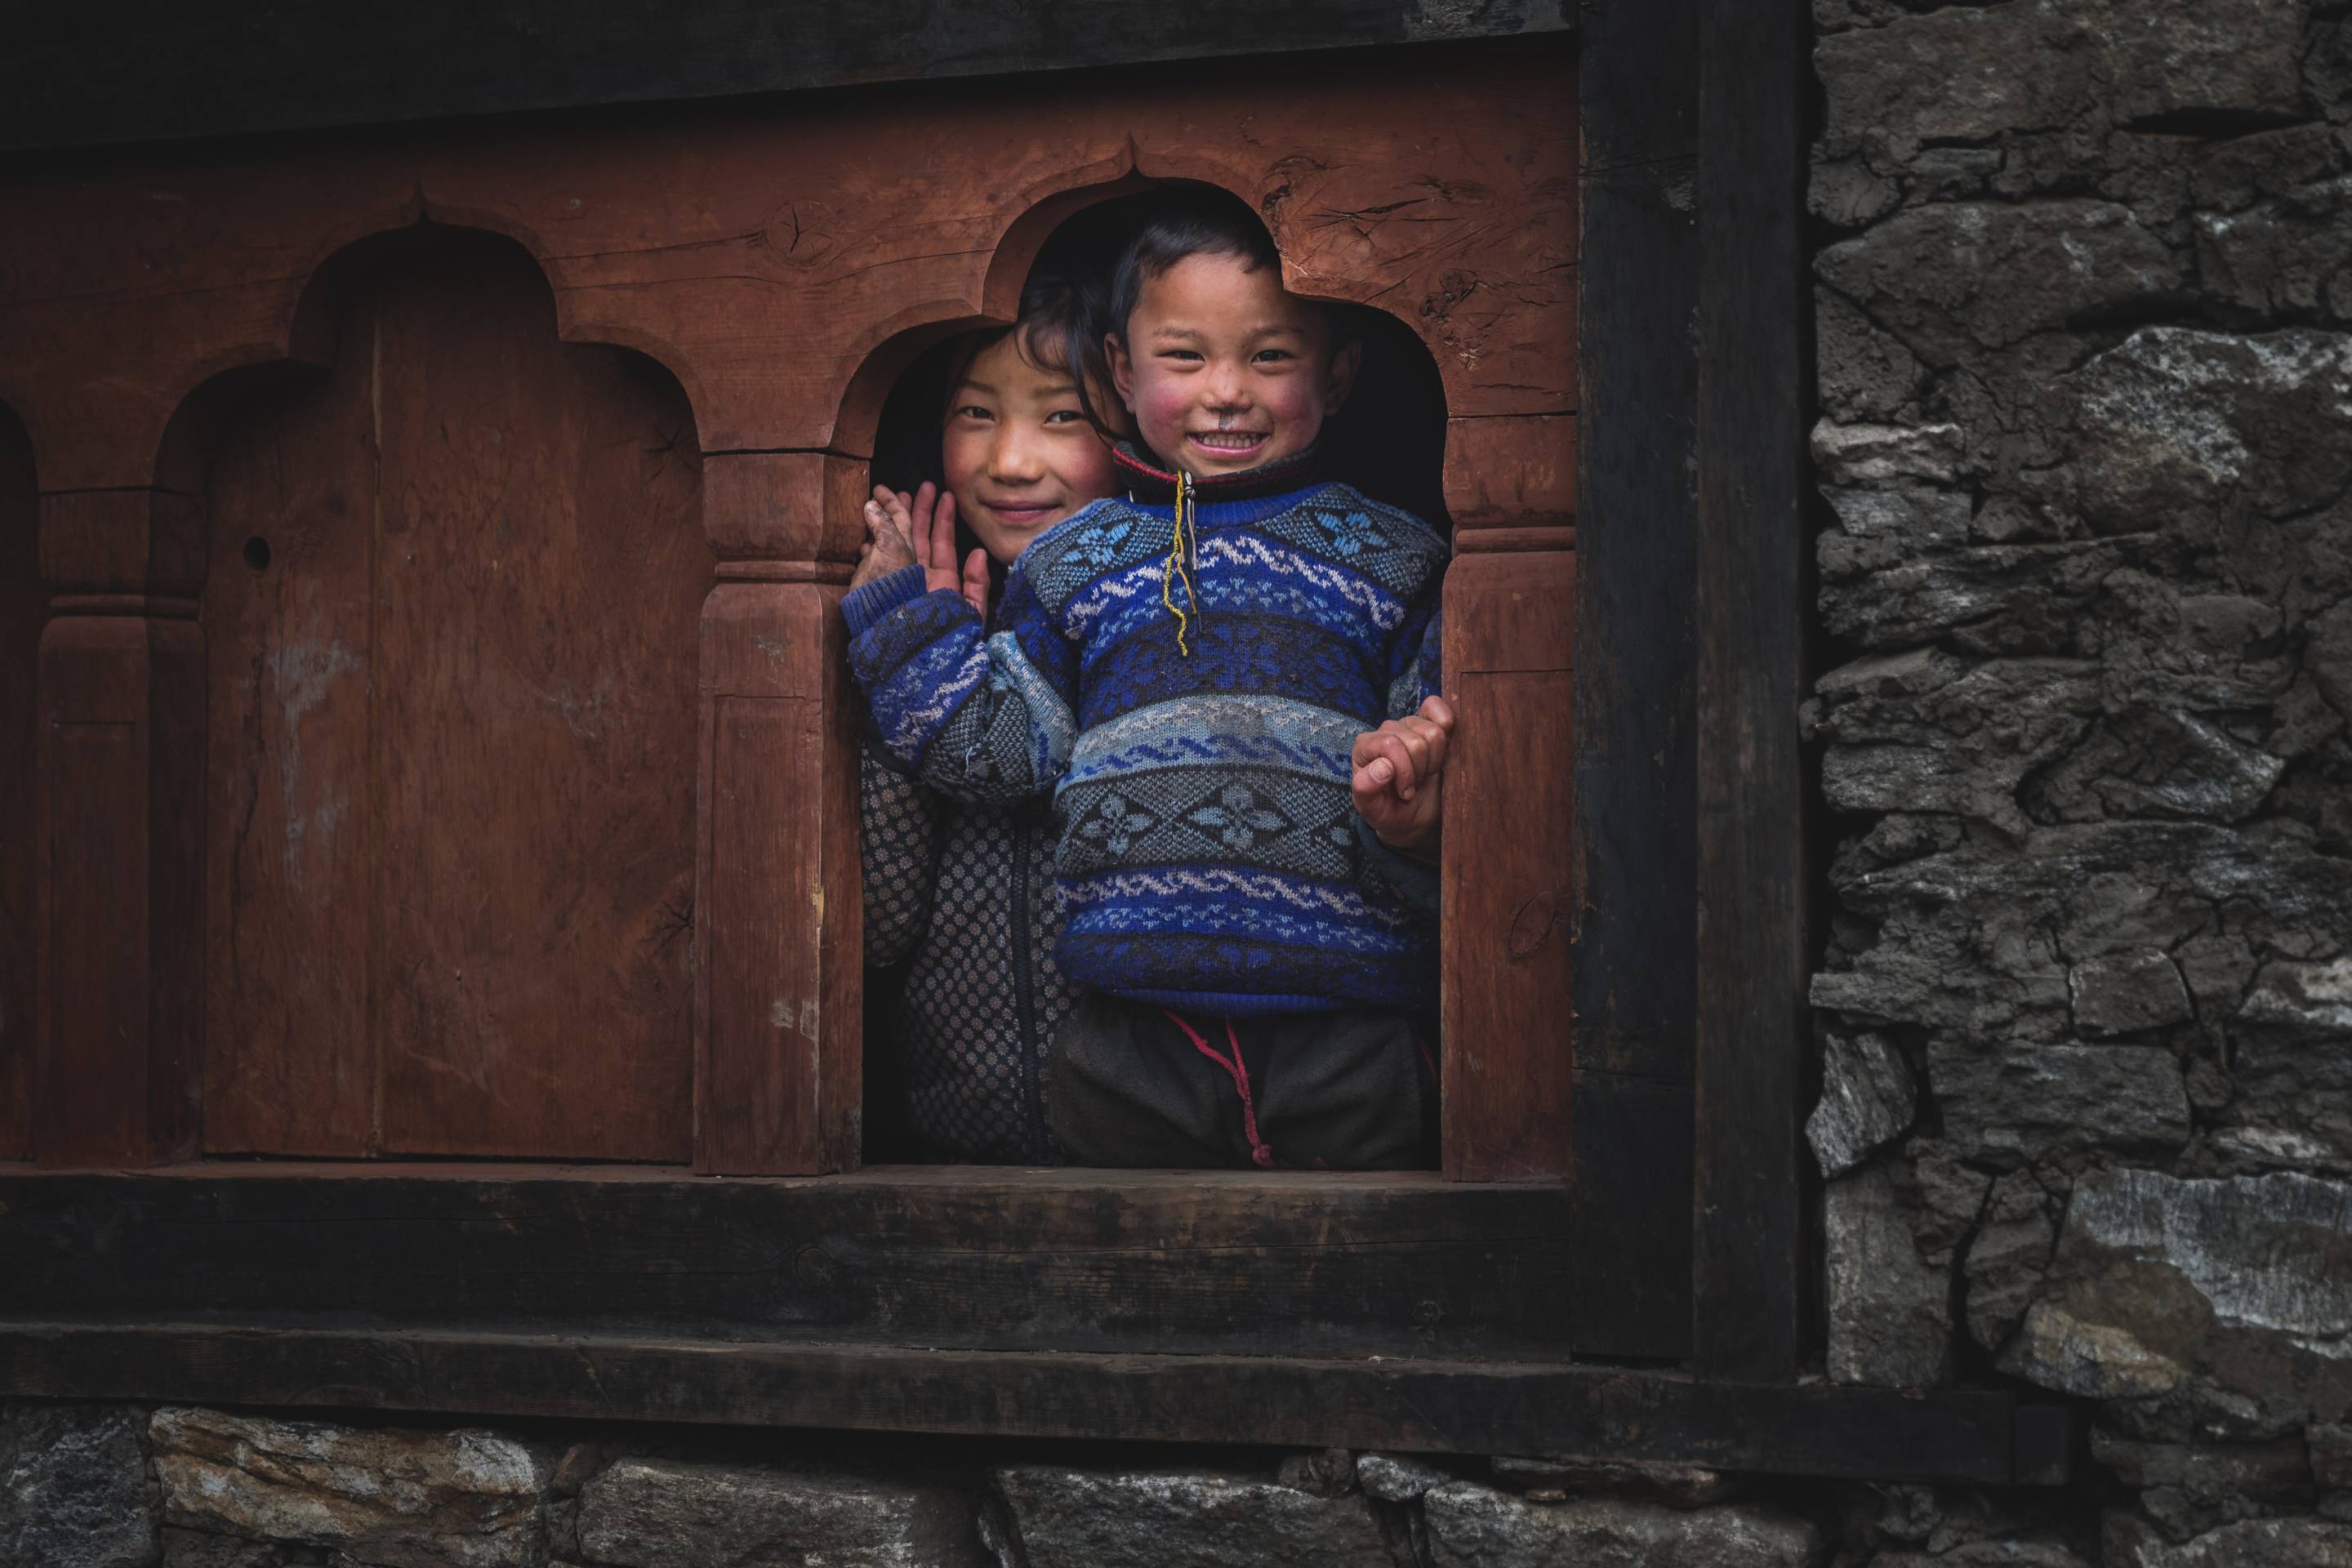
Losar: Bhutanese New Year Celebration
This past February while on Assignment for MyBhutan, I was fortunate enough to be in the Bumthang district of Bhutan during their New Year’s festival known as Losar. It is a festival that reinforces communal ties, strengthens family values and celebrates the amazing cultural traditions of Bhutan. Everyone celebrates differently doing things such as feasting, attending family gatherings, dancing or playing traditional sports like archery and darts.
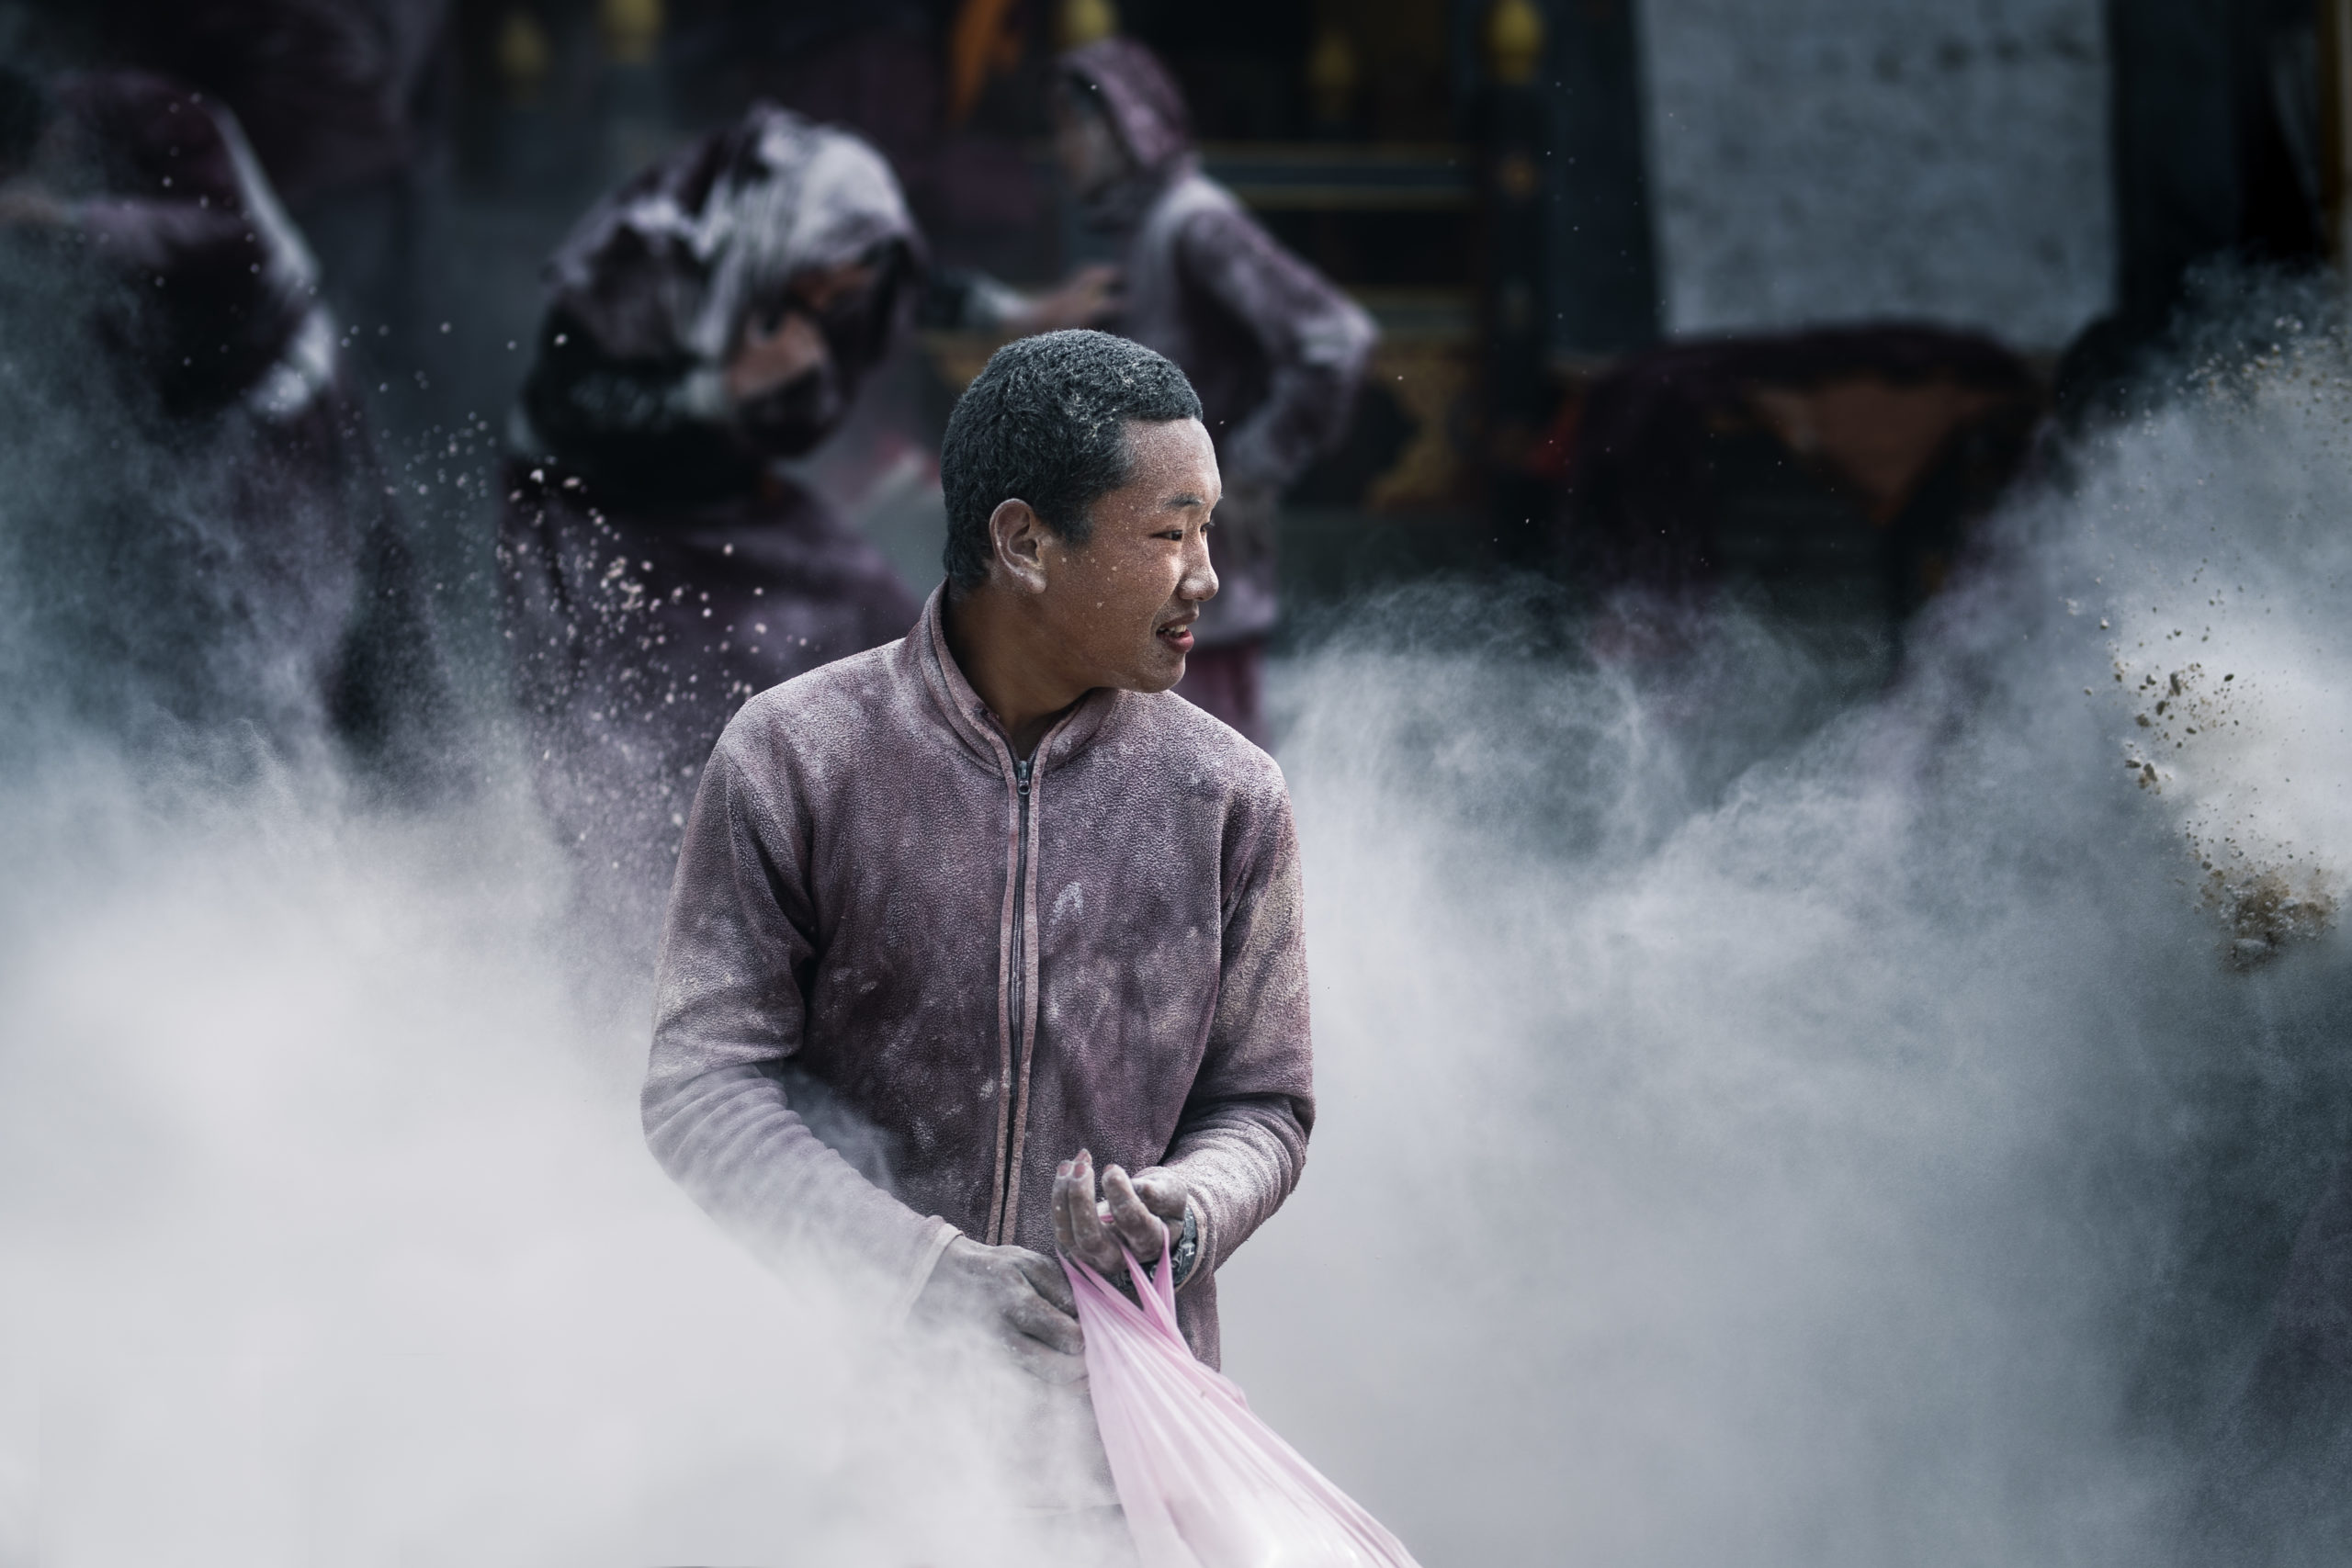
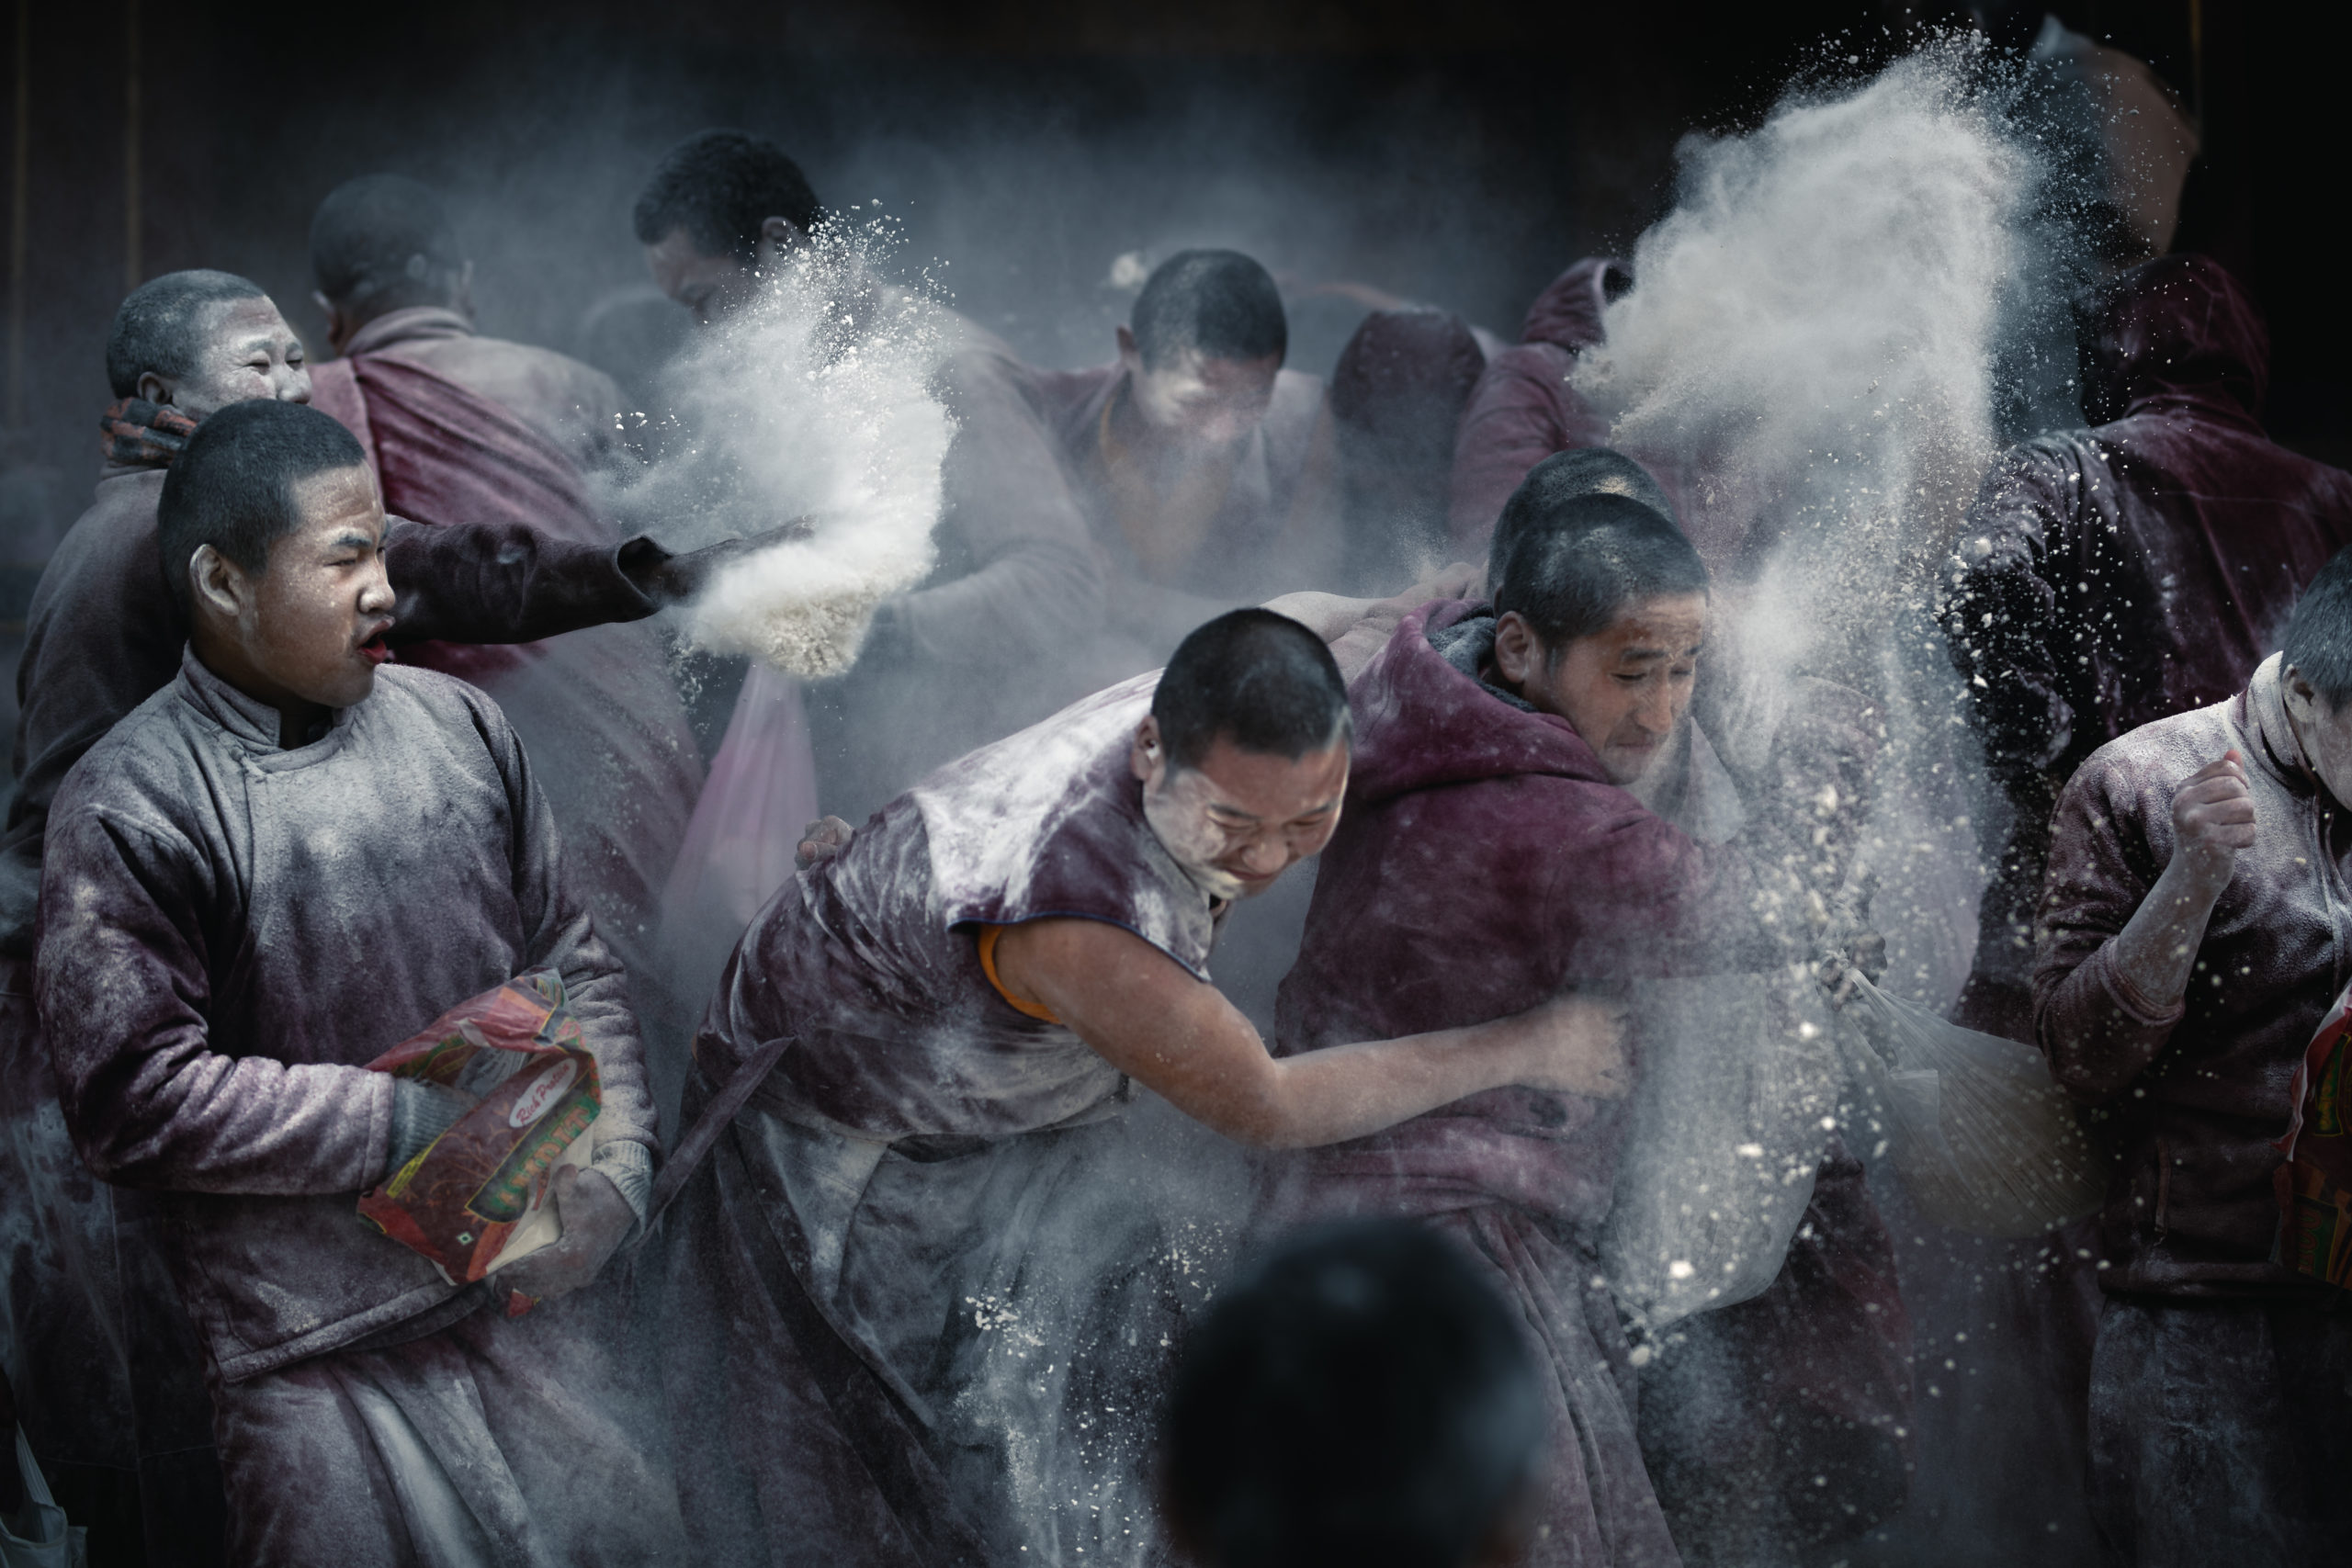
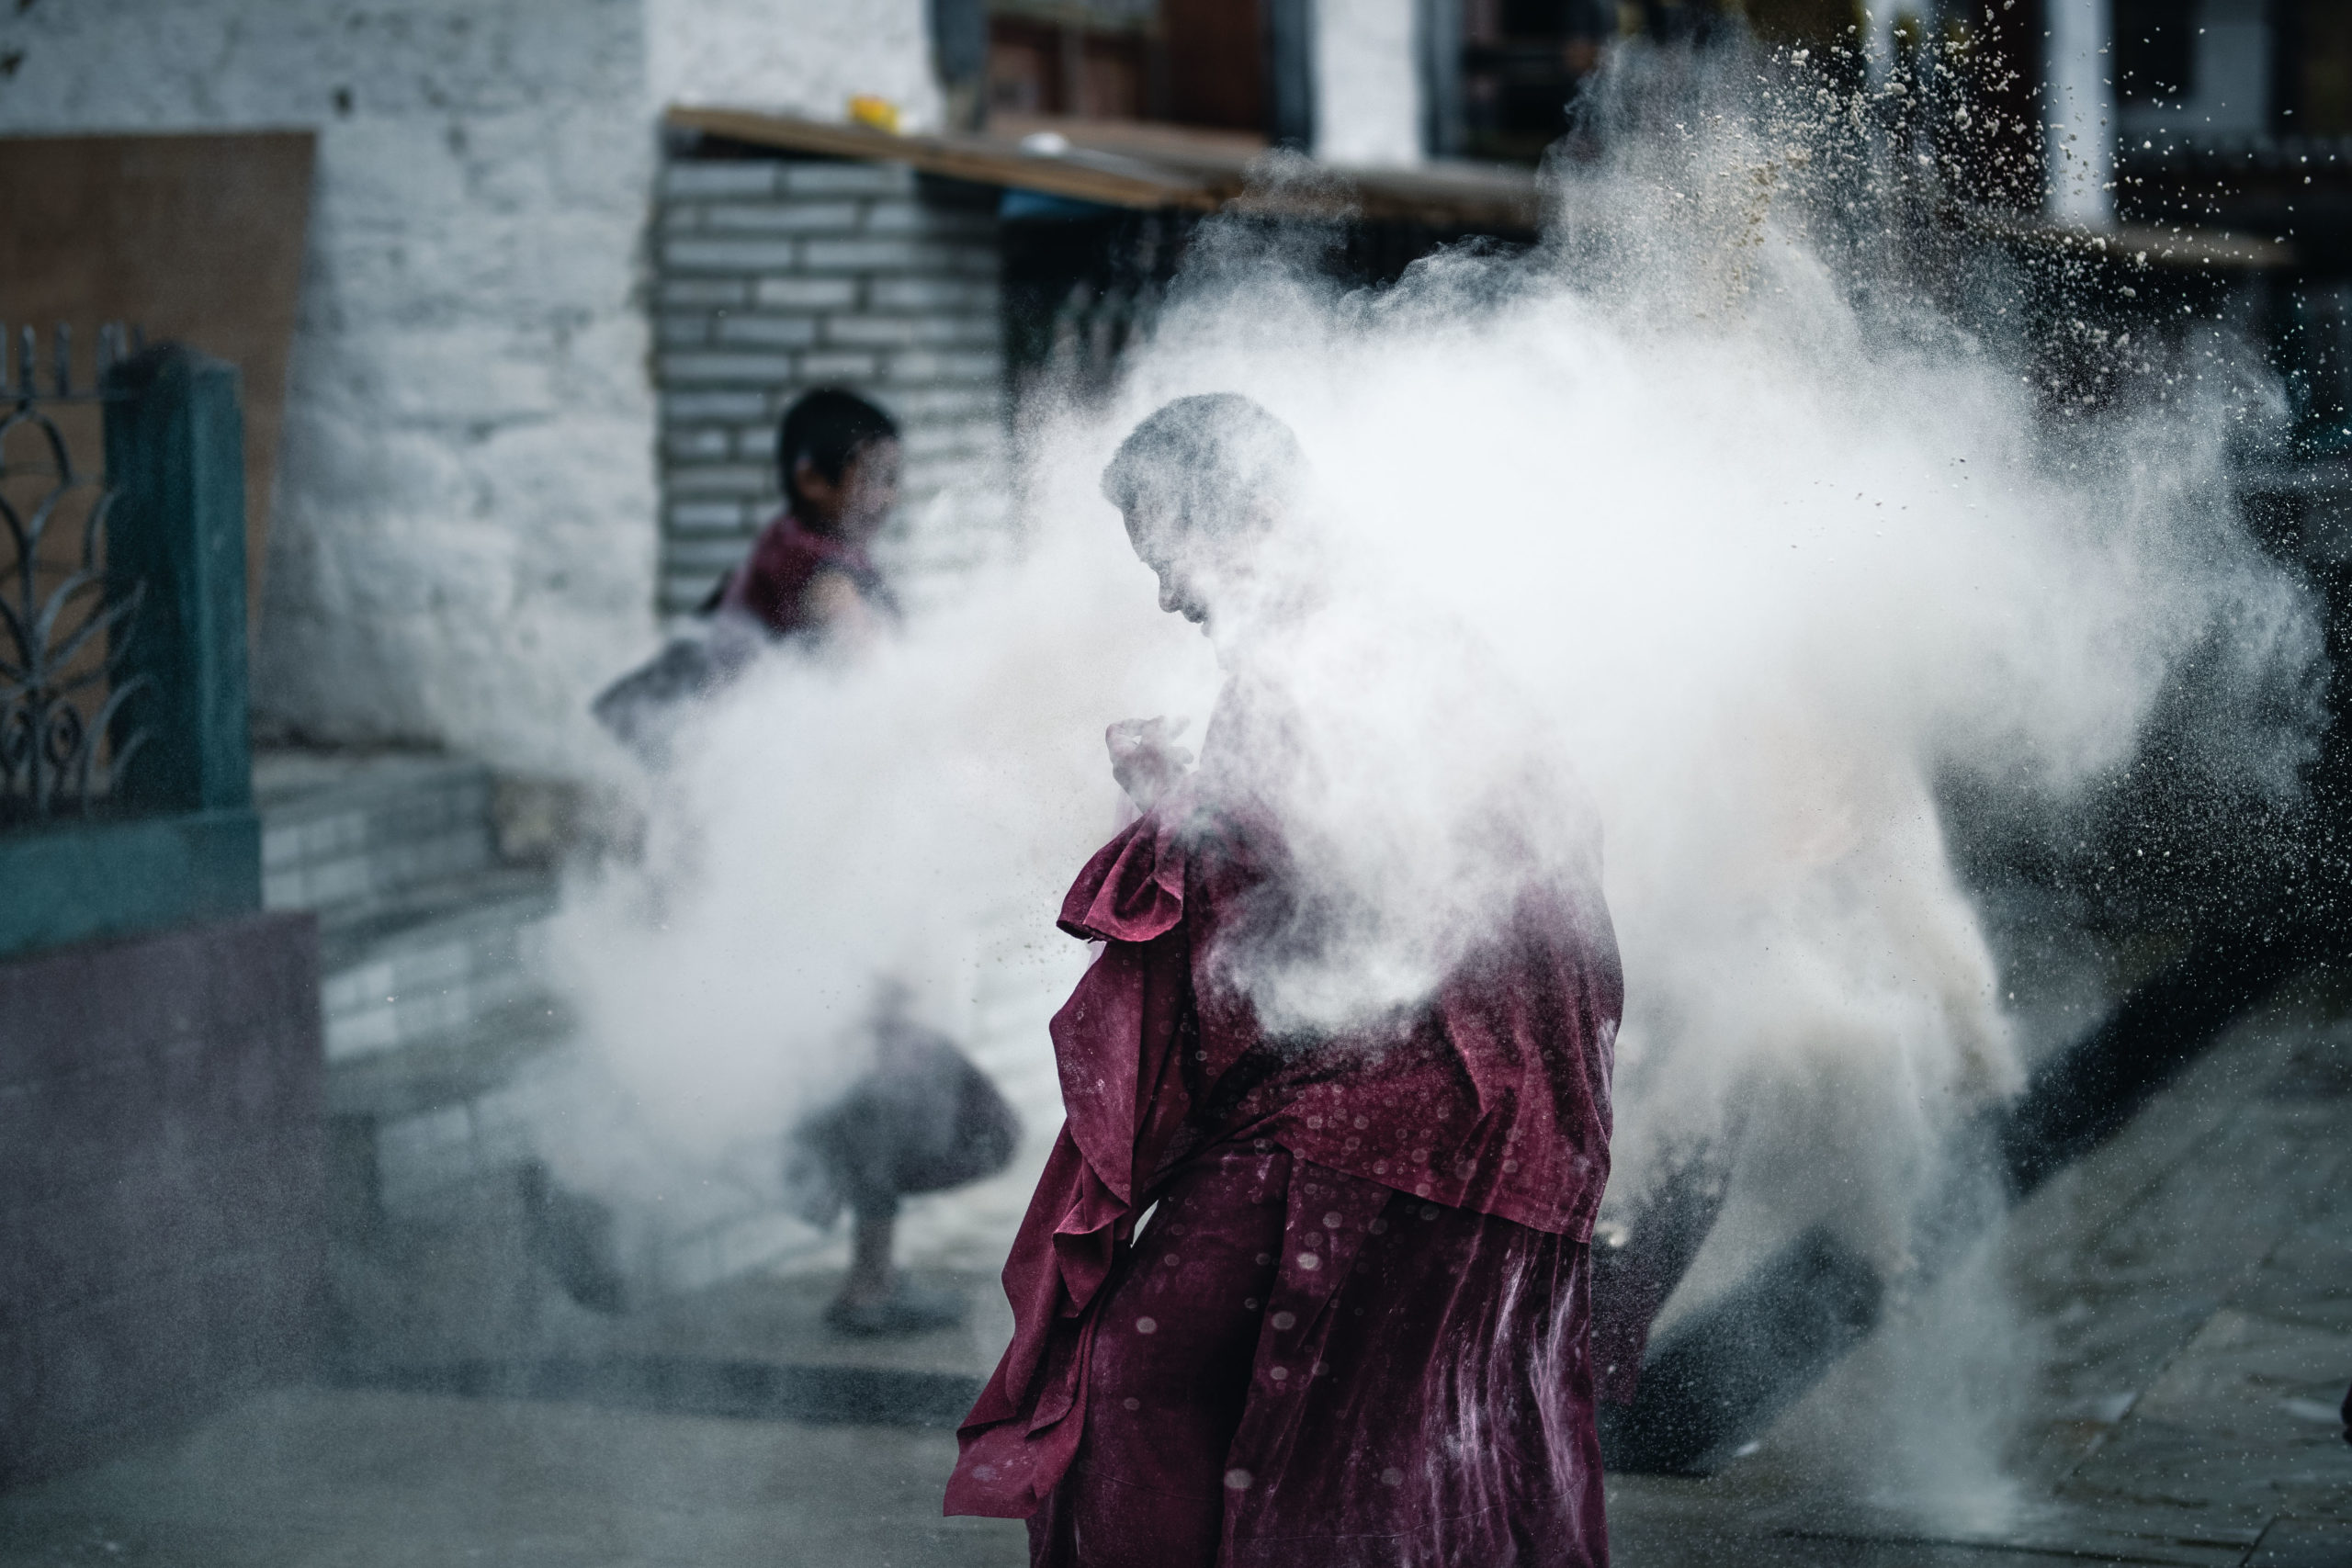
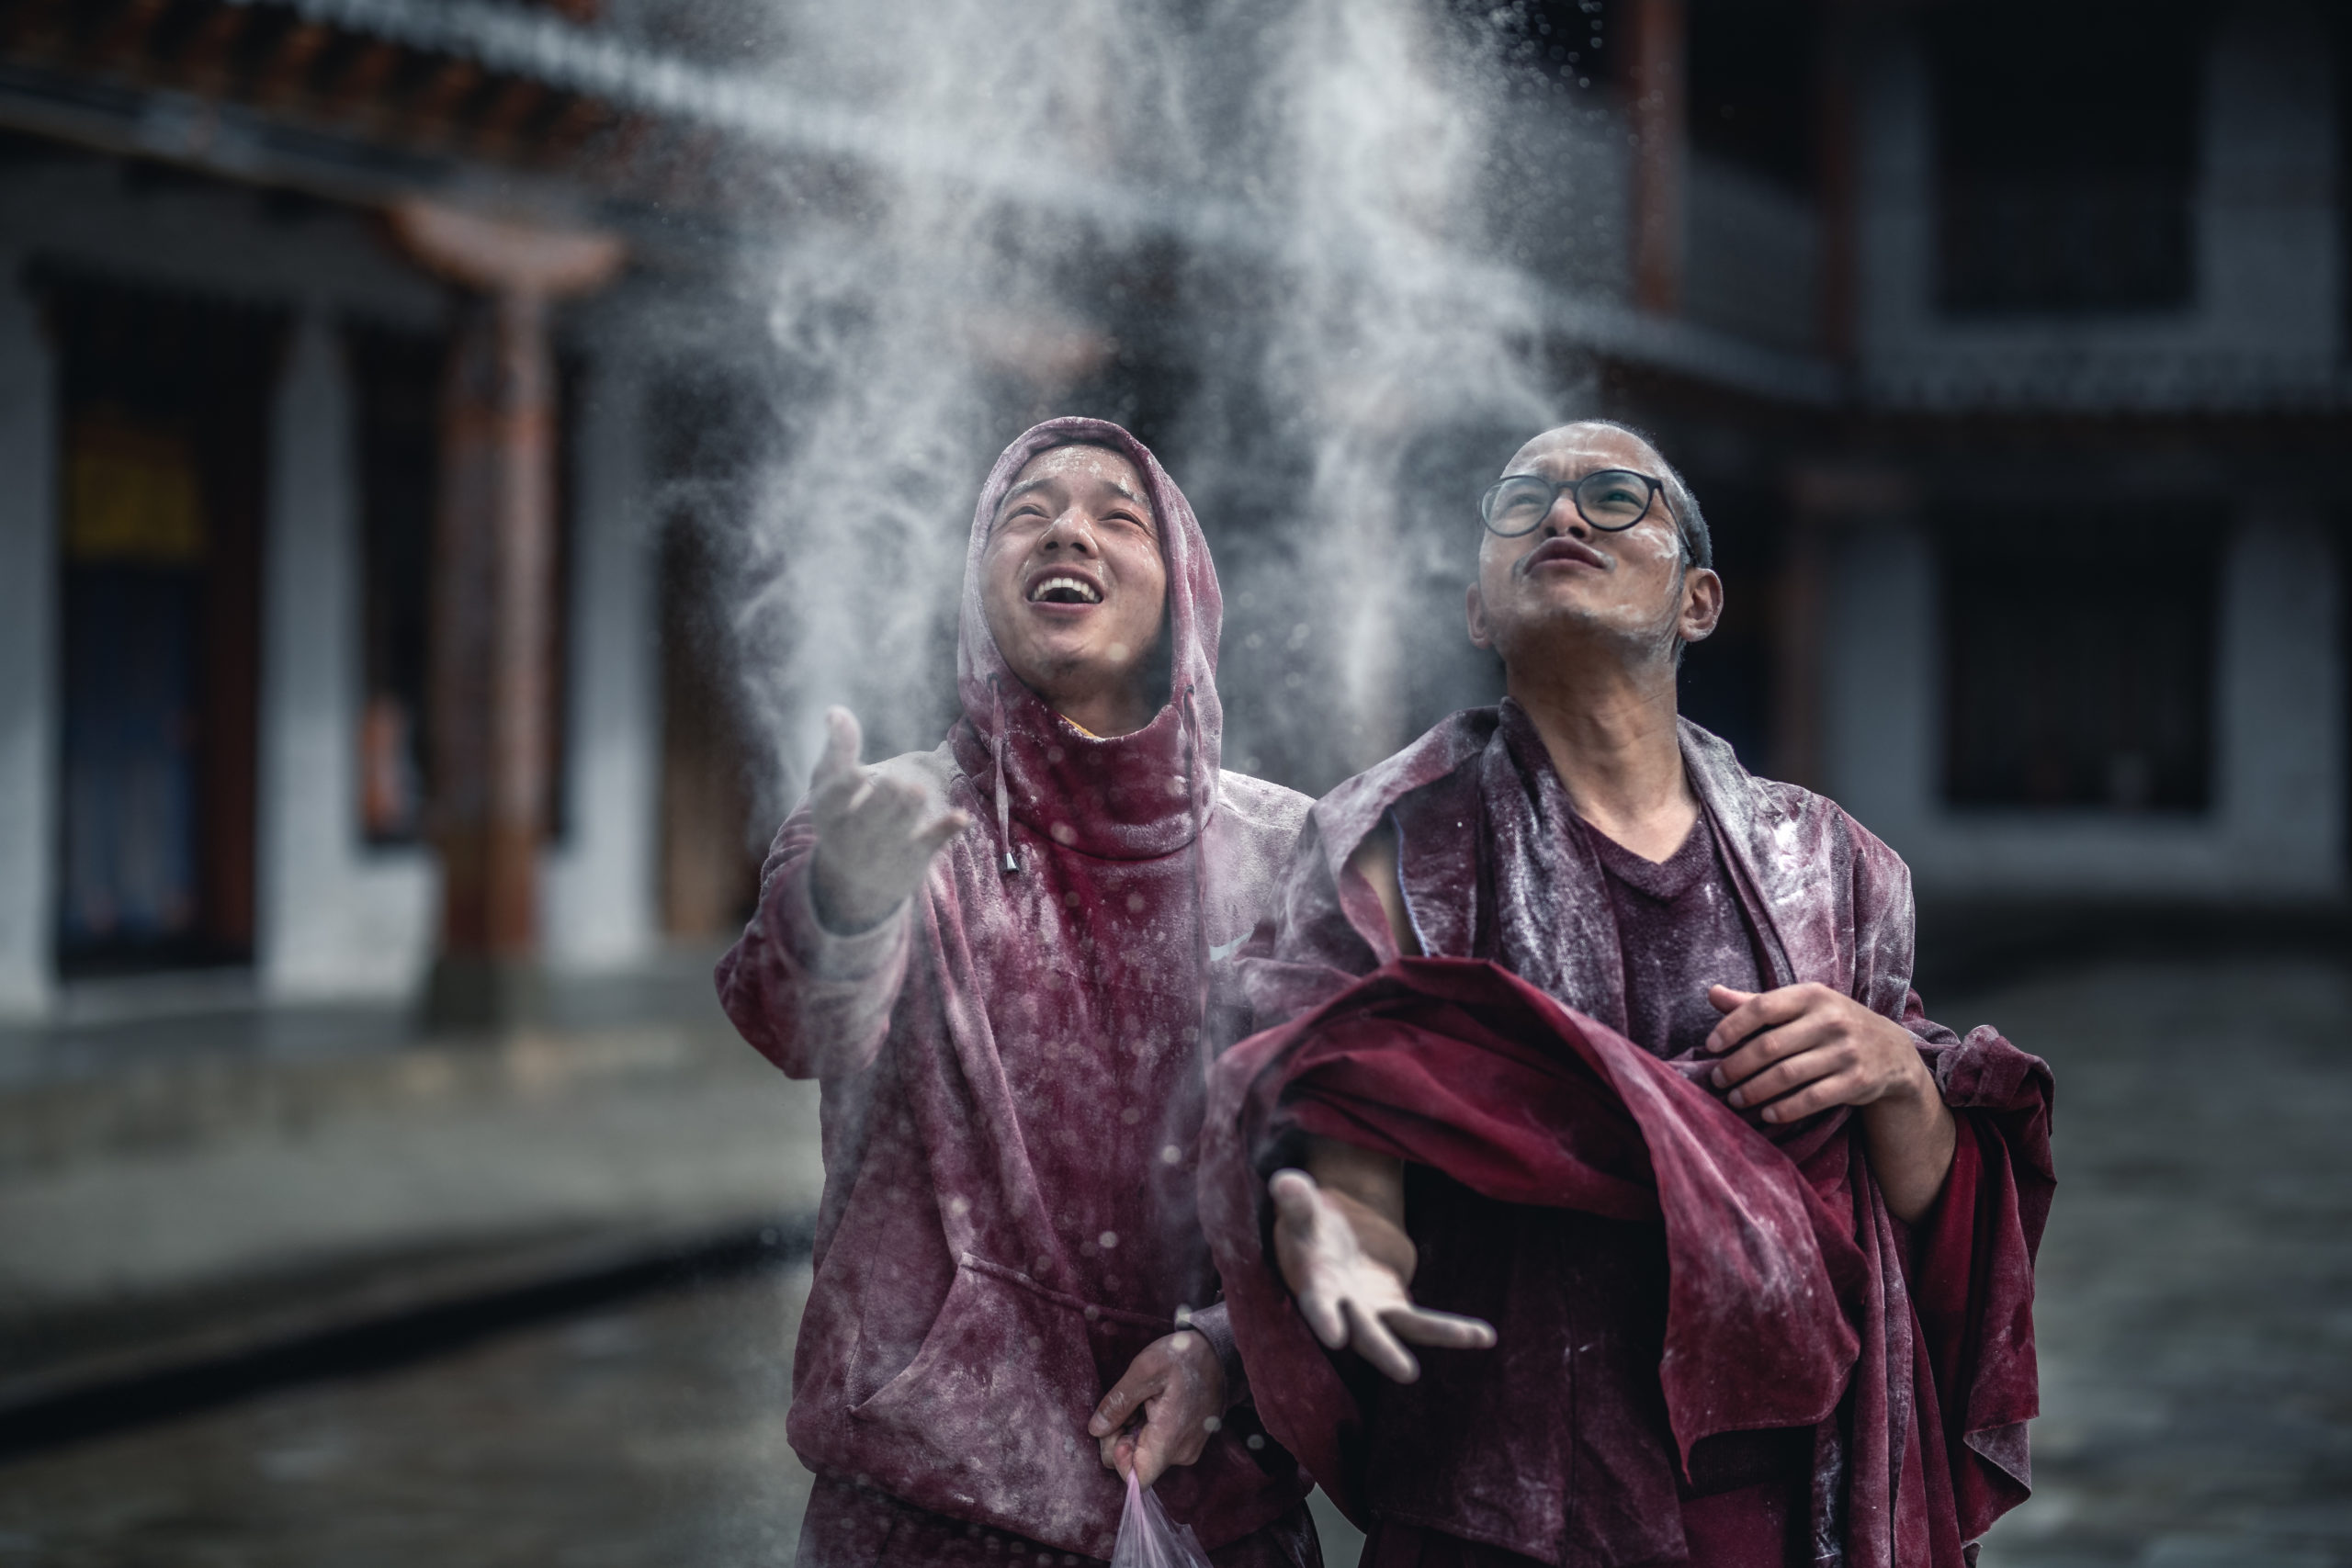
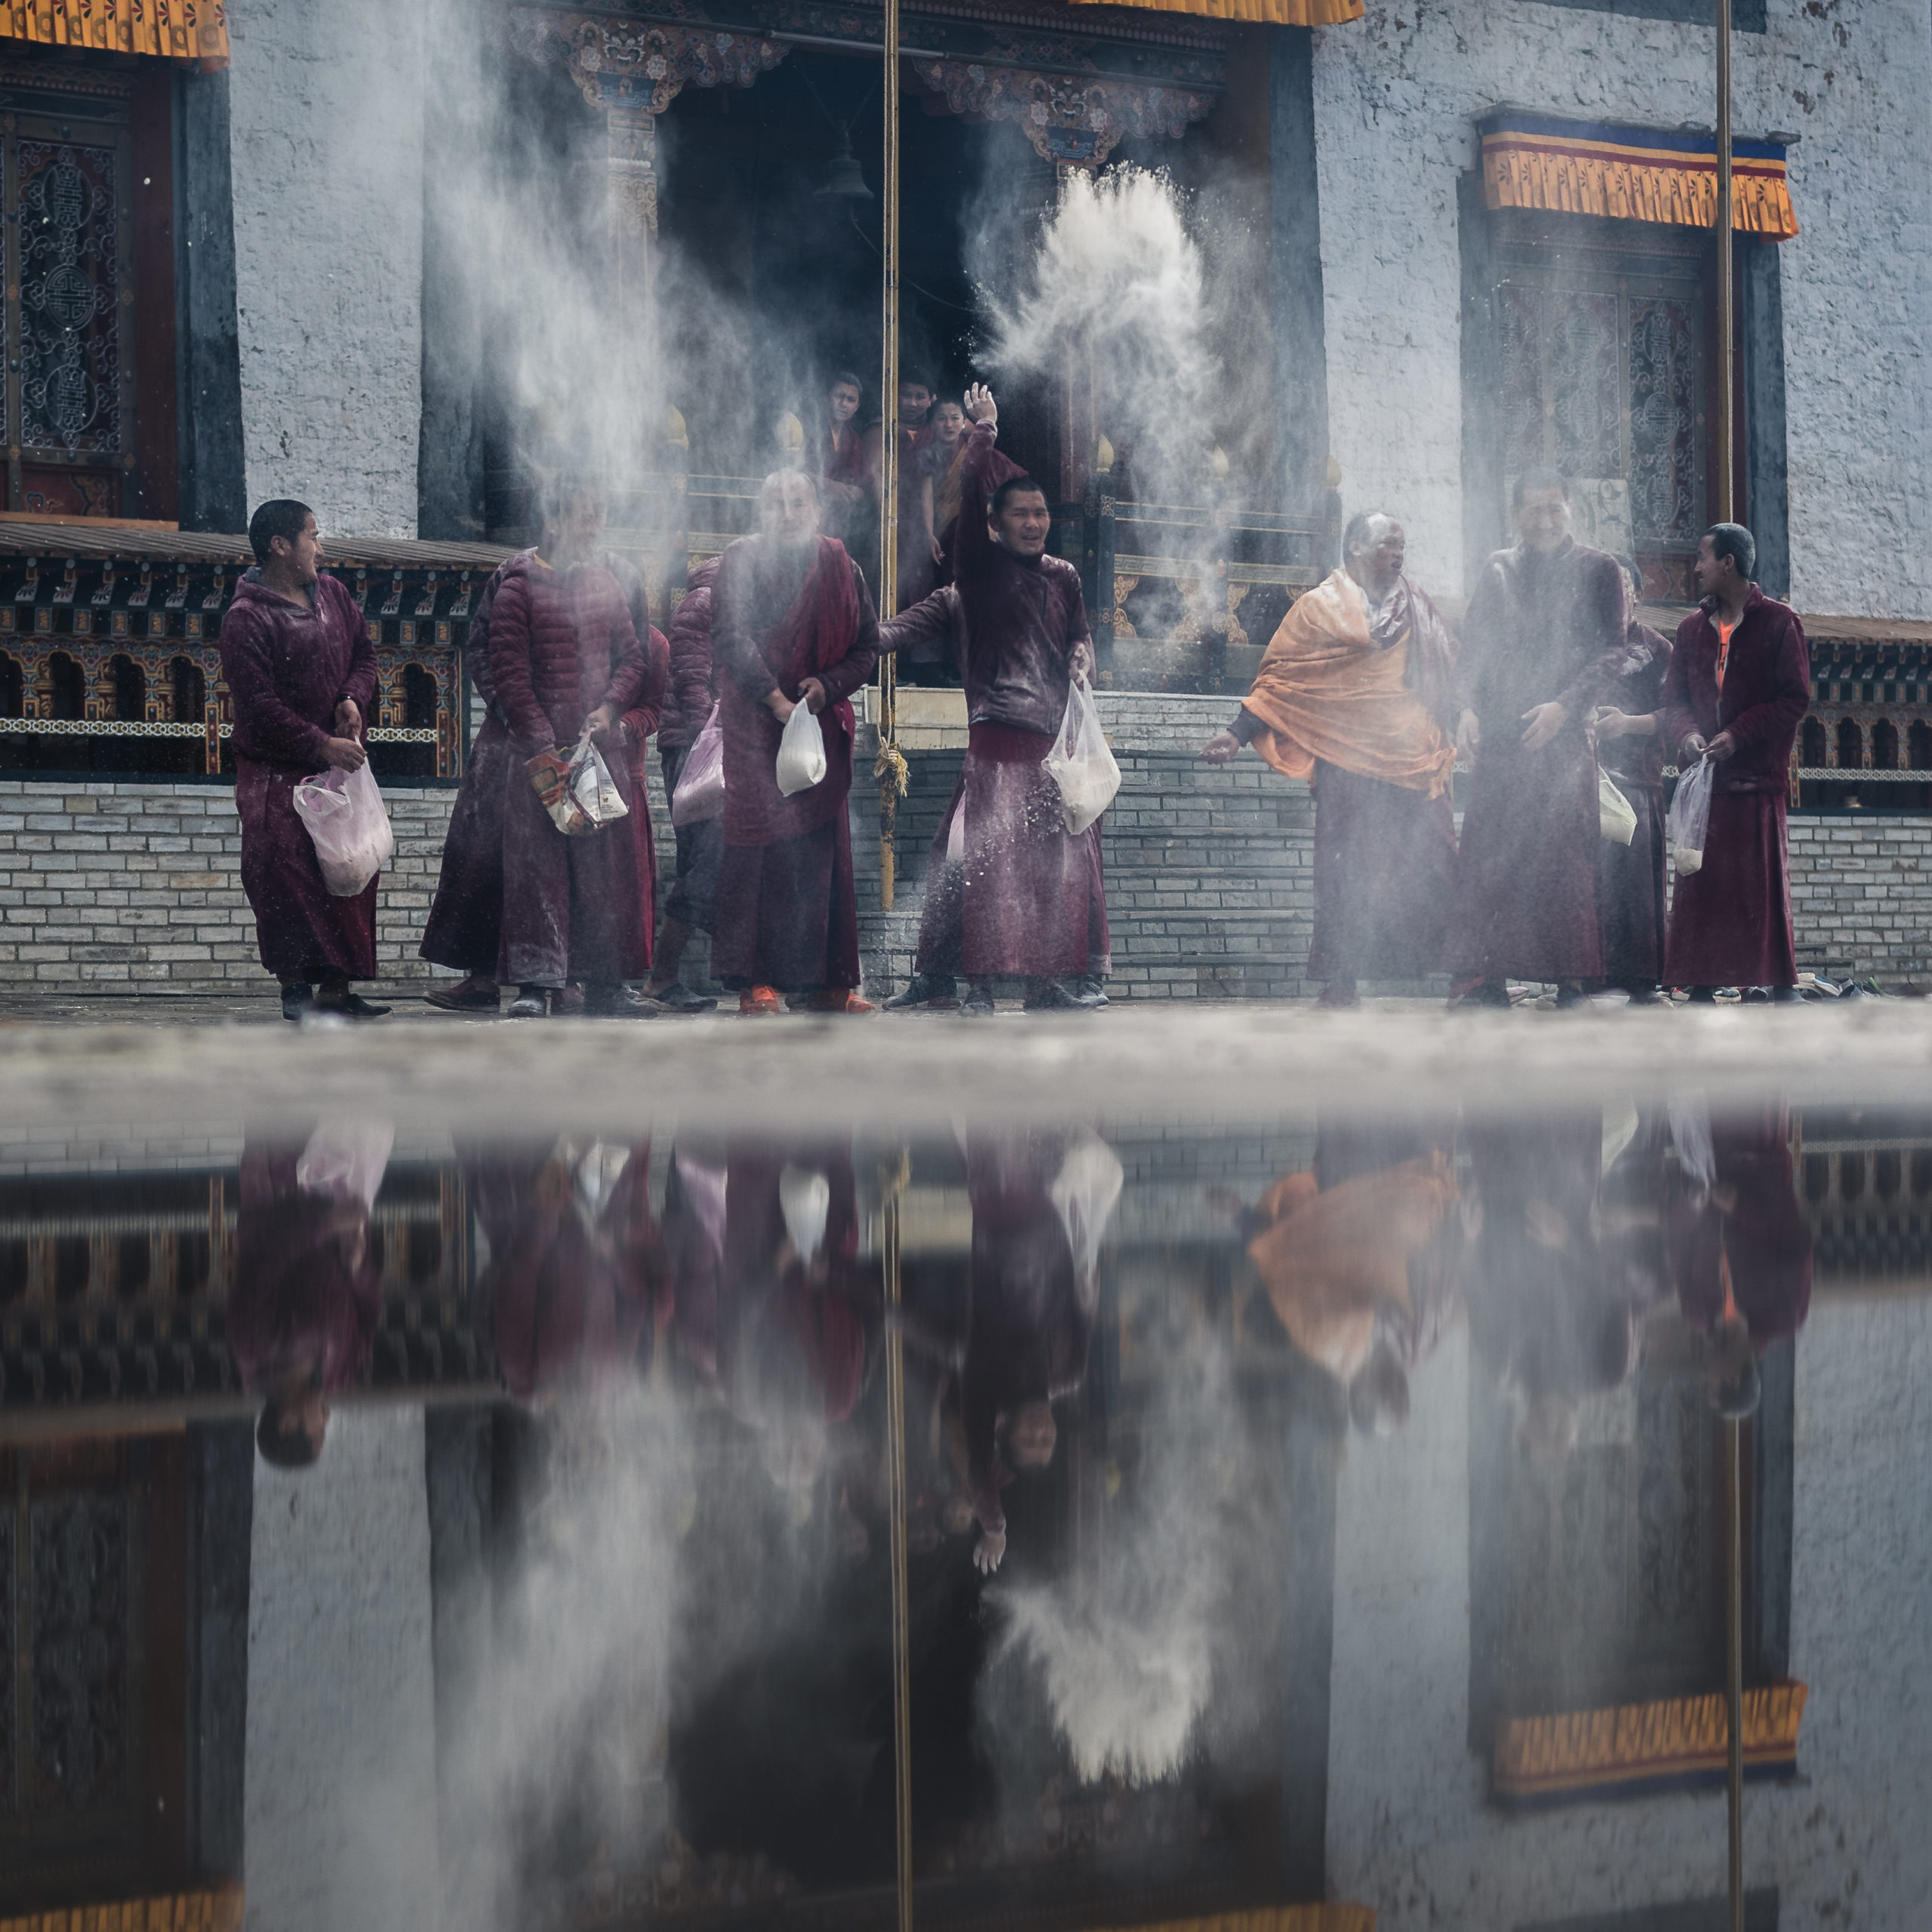
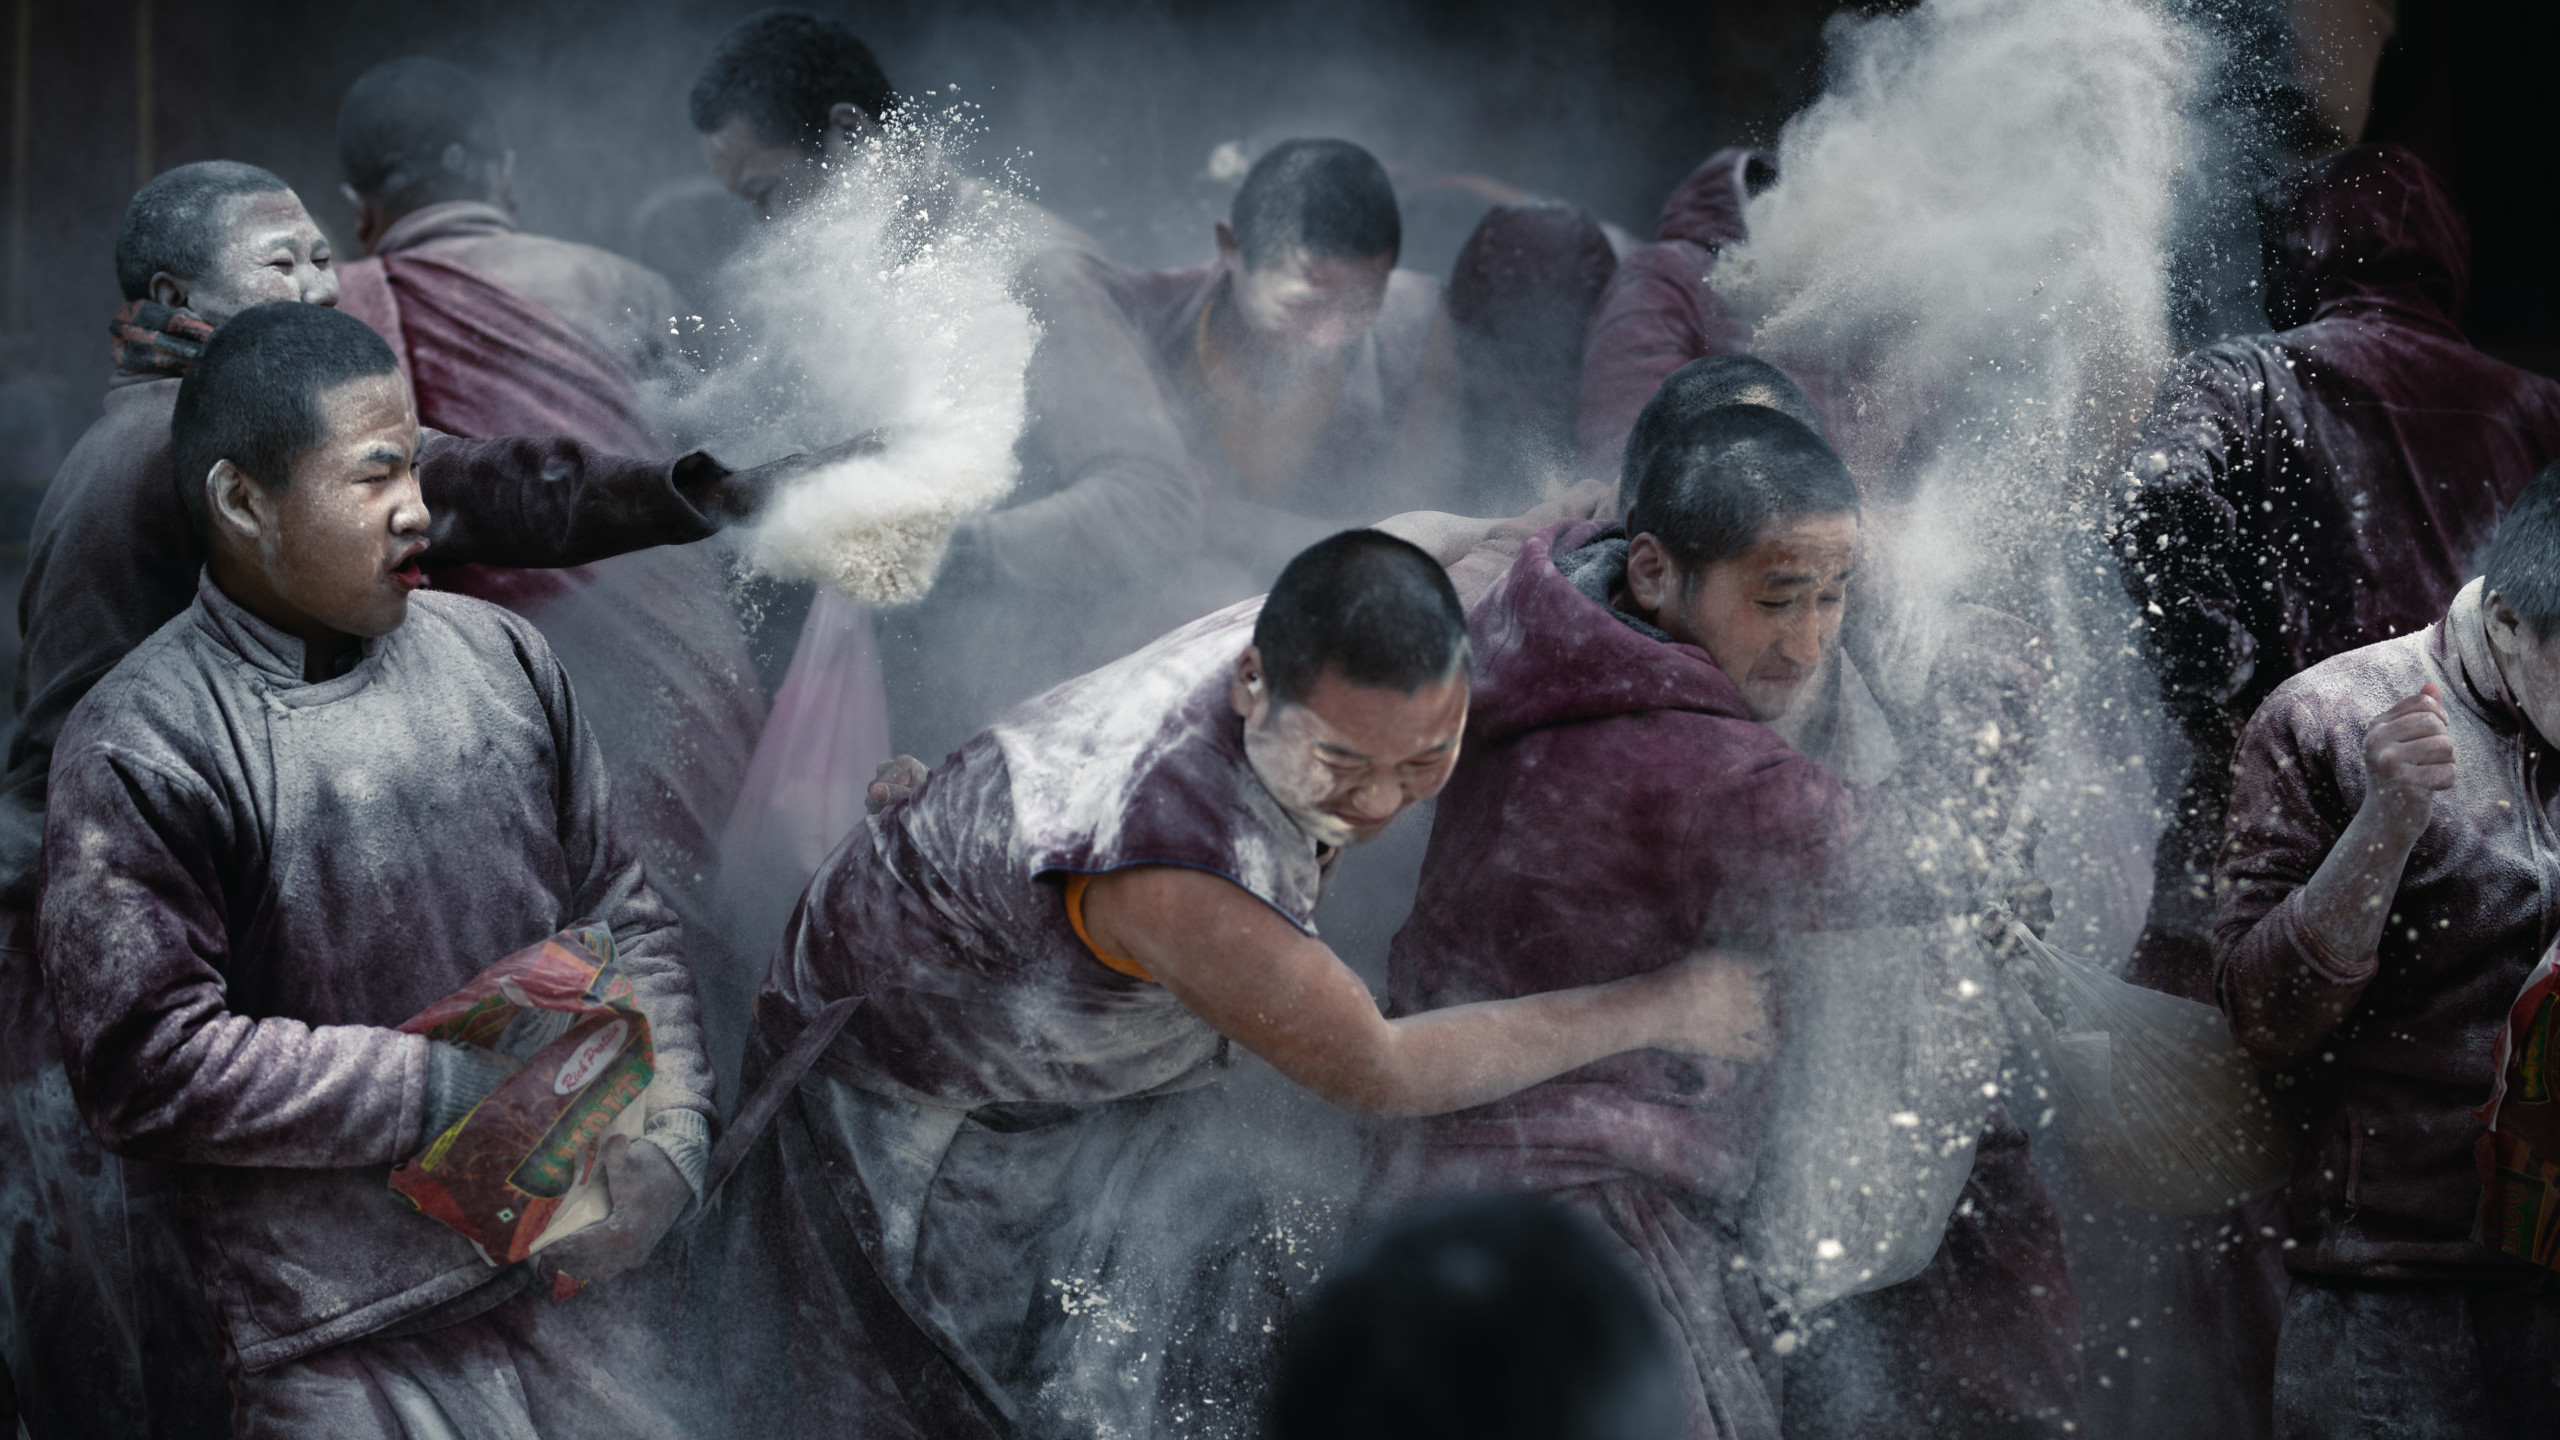
While out one morning during Losar, I ended up at a small monastery full of young monks. Shortly after I arrived, I saw them run and throw hand fulls of flour at each other. At first, I thought it was part of a prank but then learned that they were preparing to take part in a much larger traditional flour battle in celebration of Losar. With the majority of monks worshipping inside the temple, a small group of other monks gathered outside to ambush them as they exited.
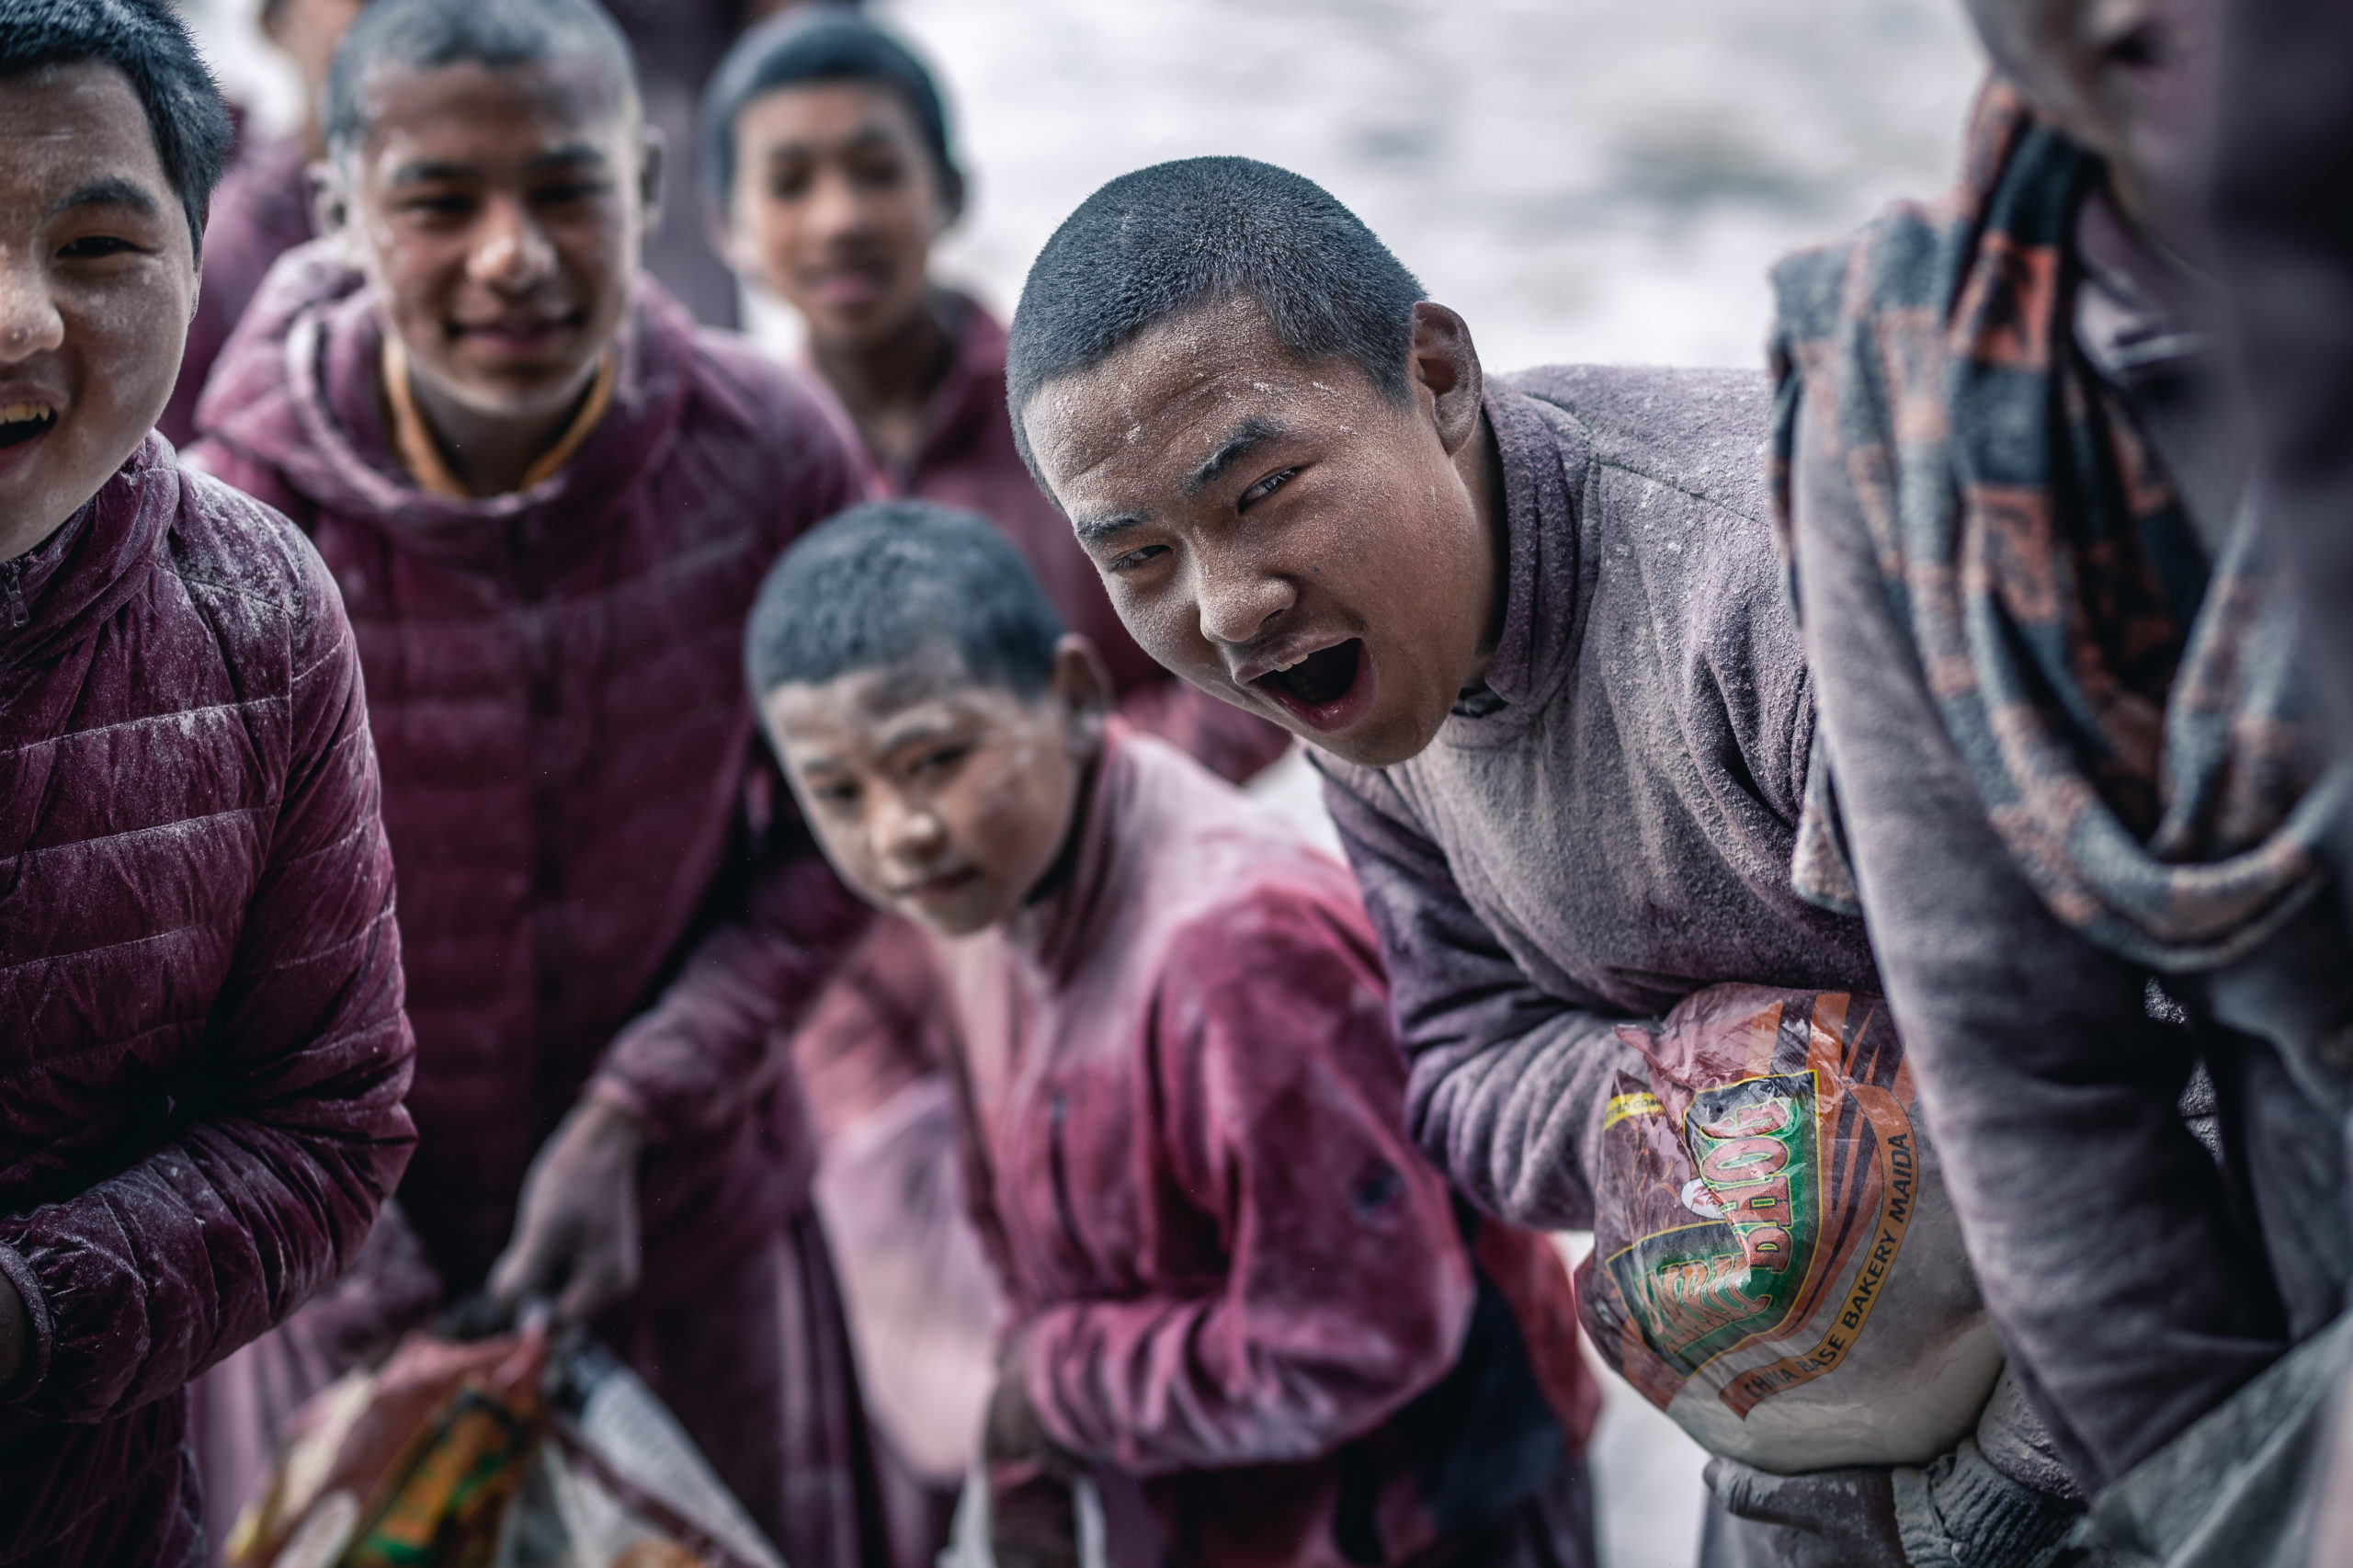
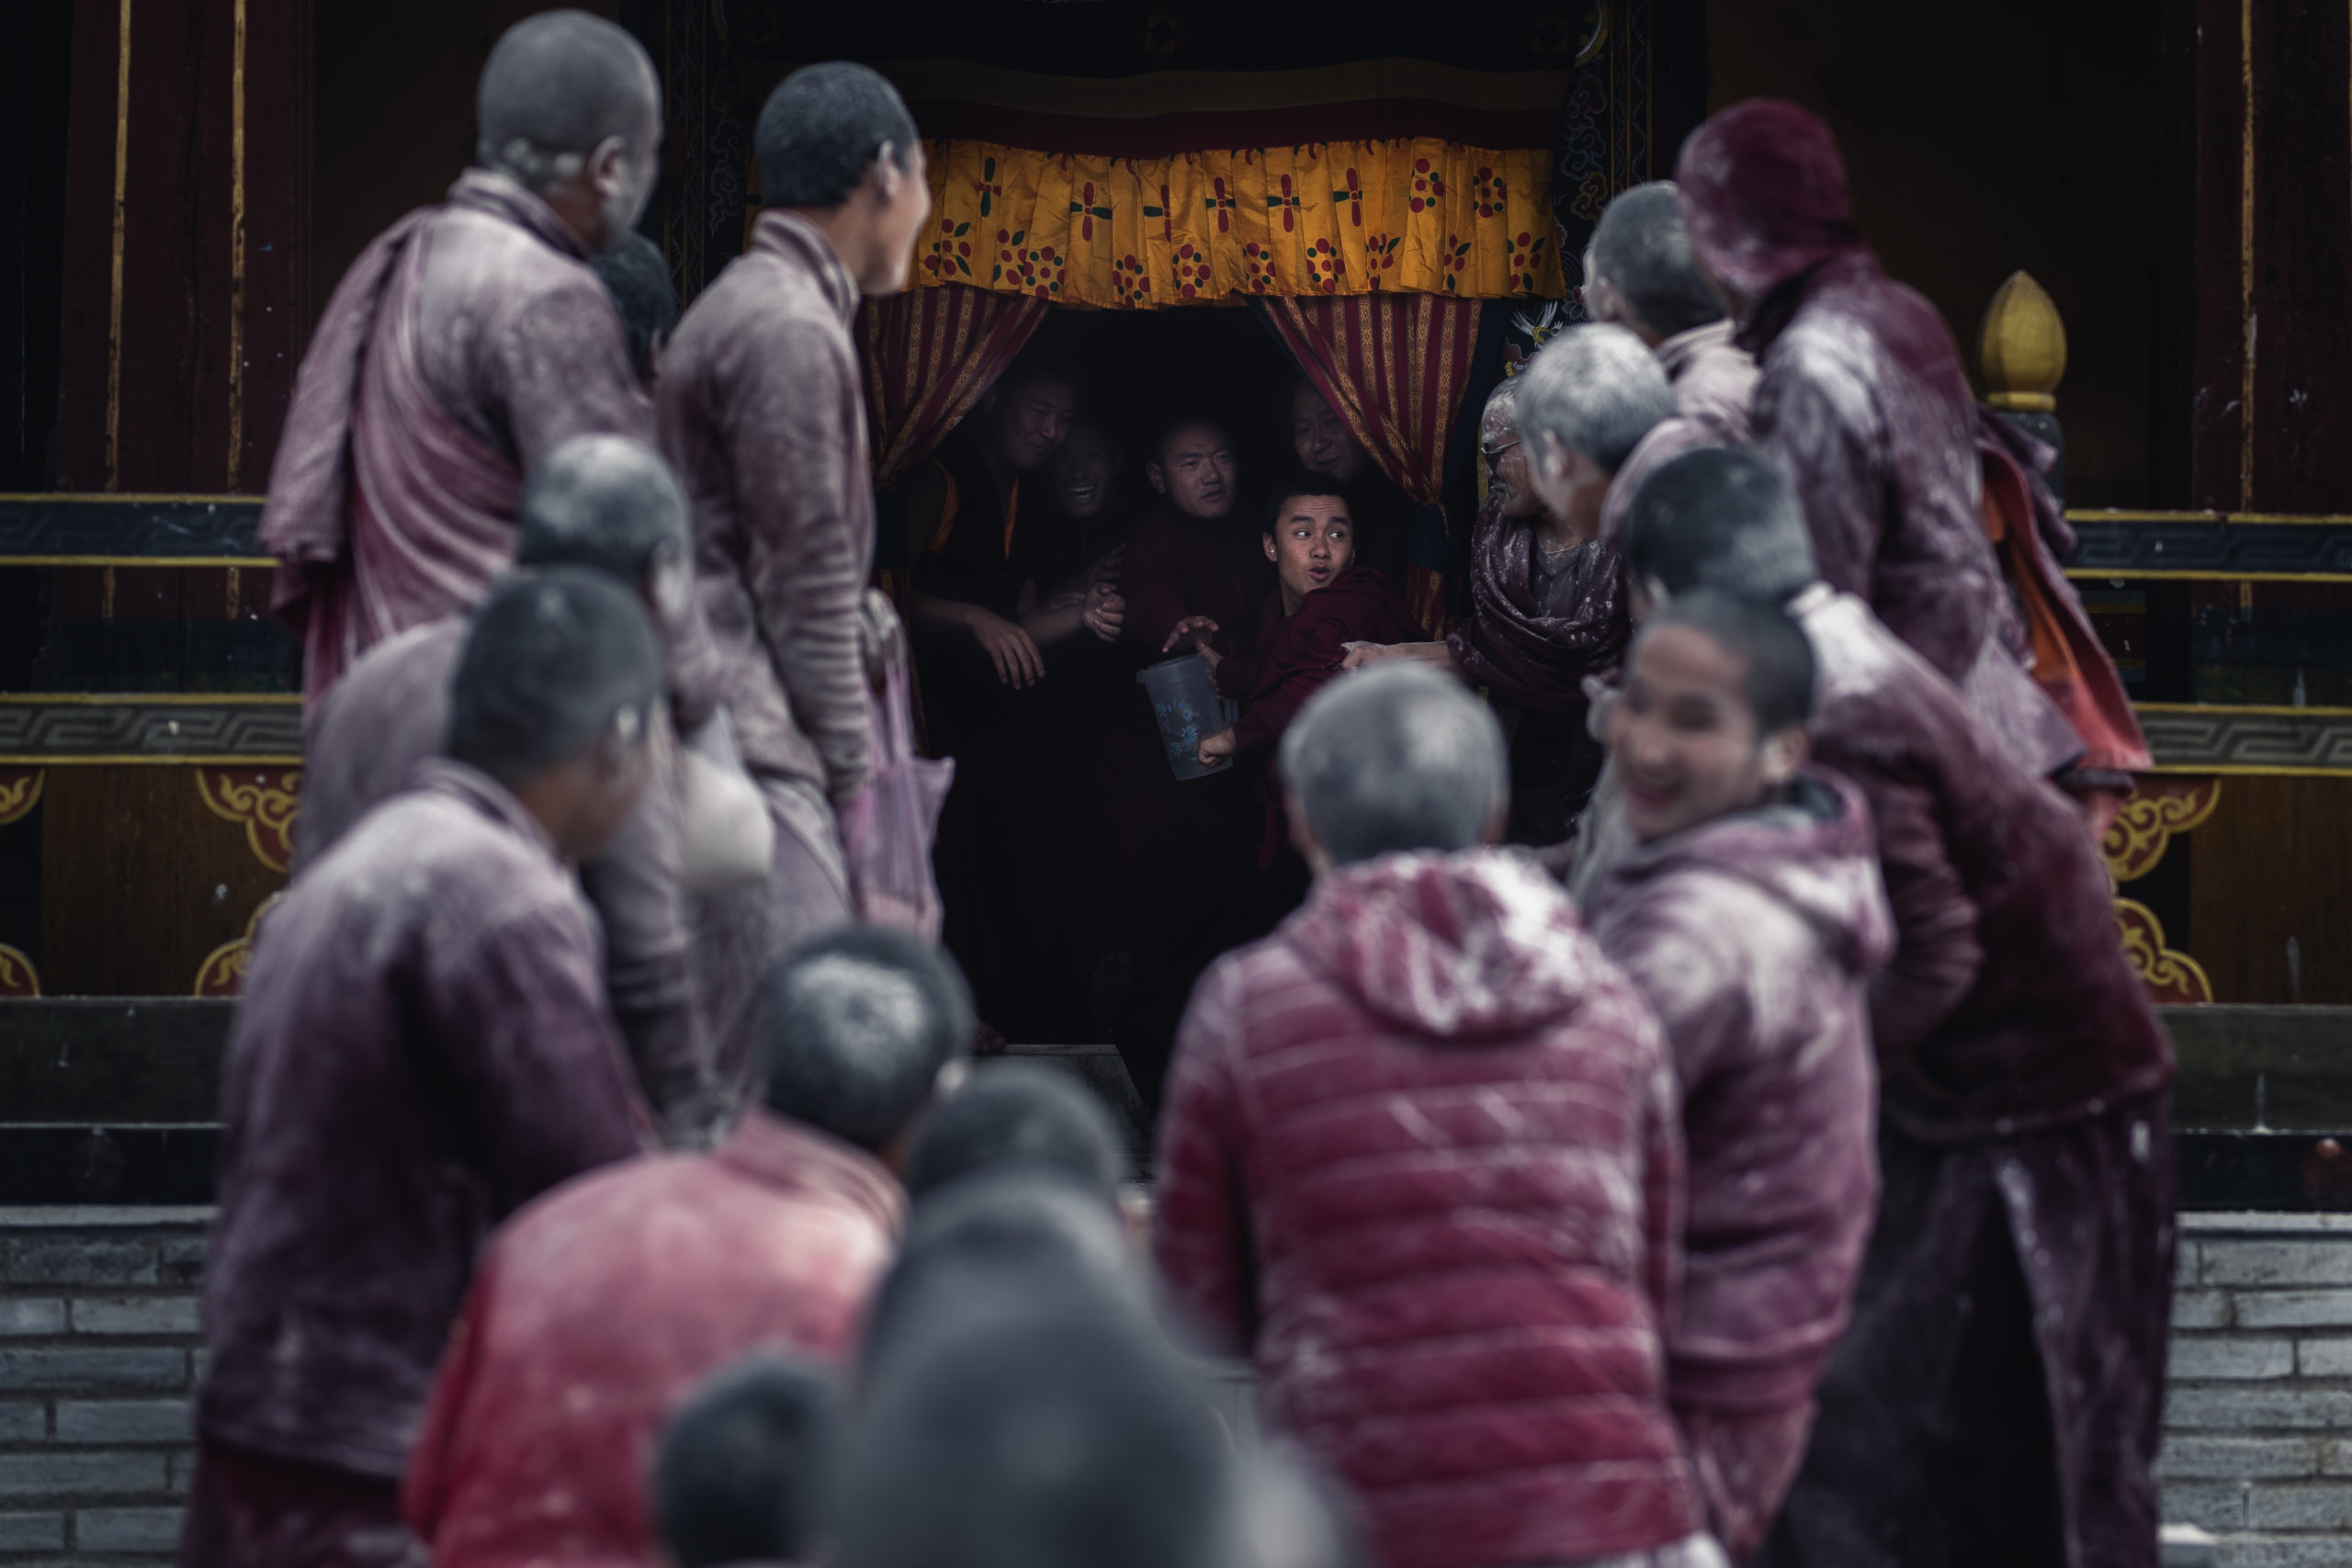
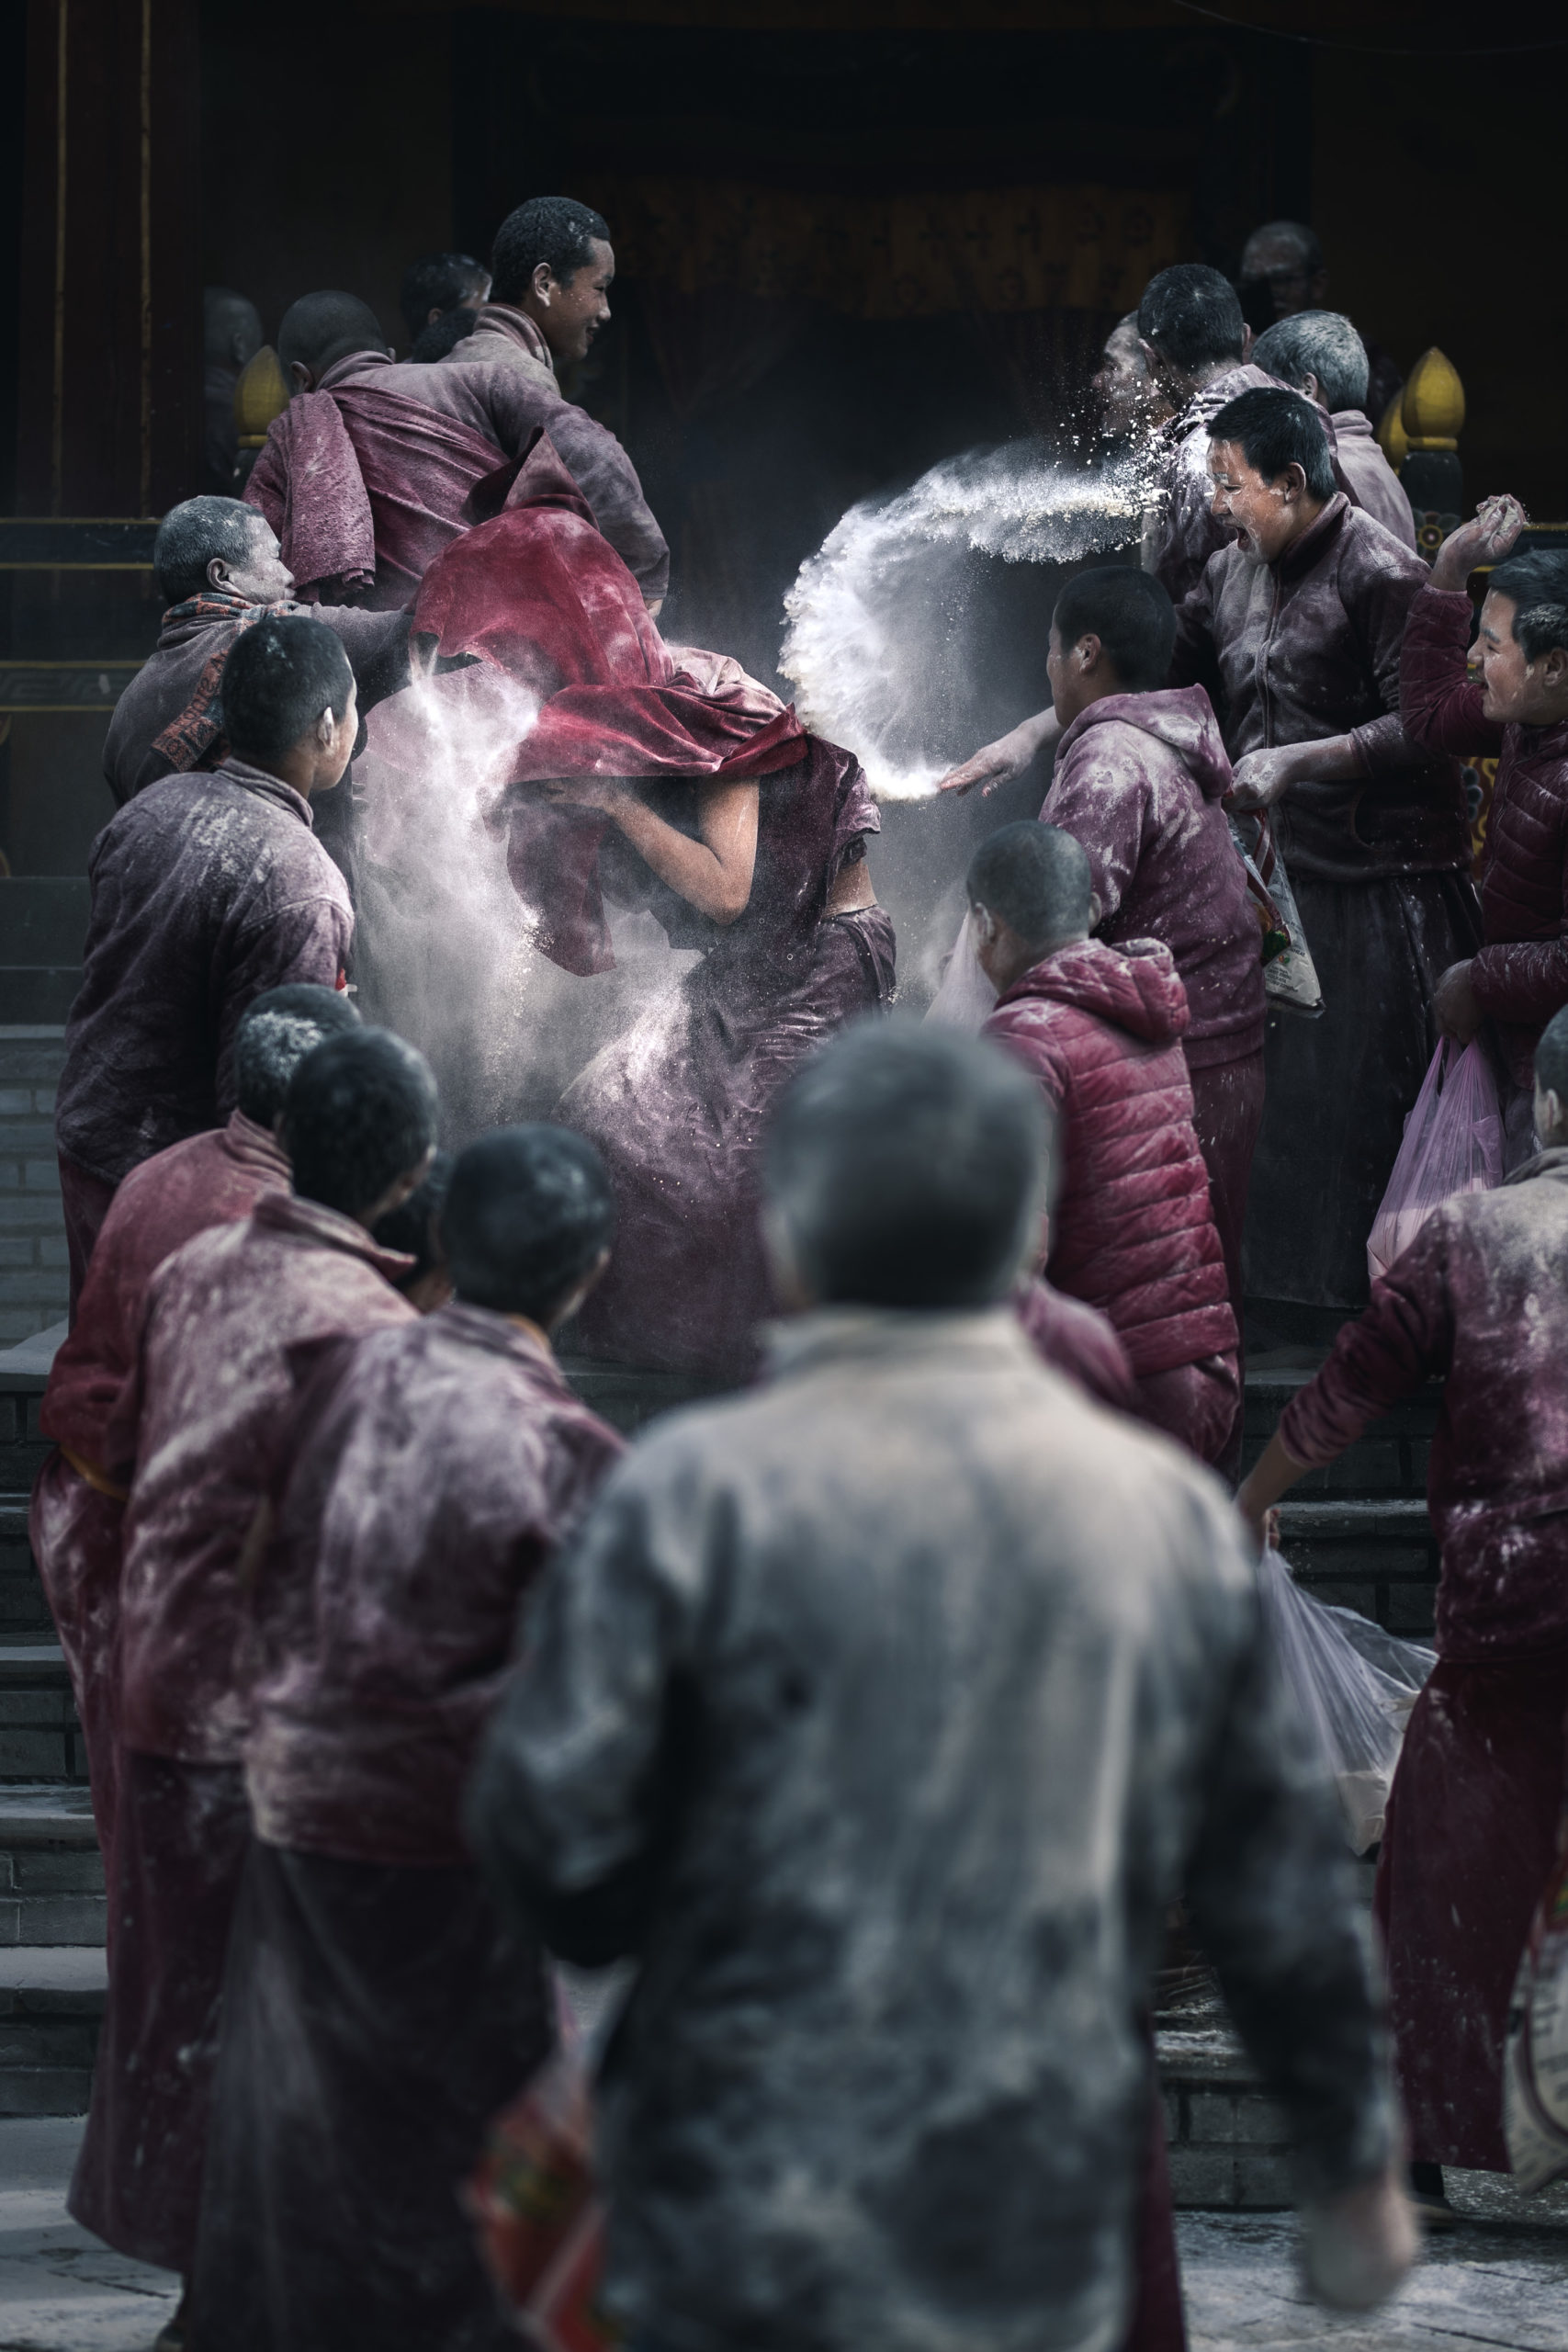
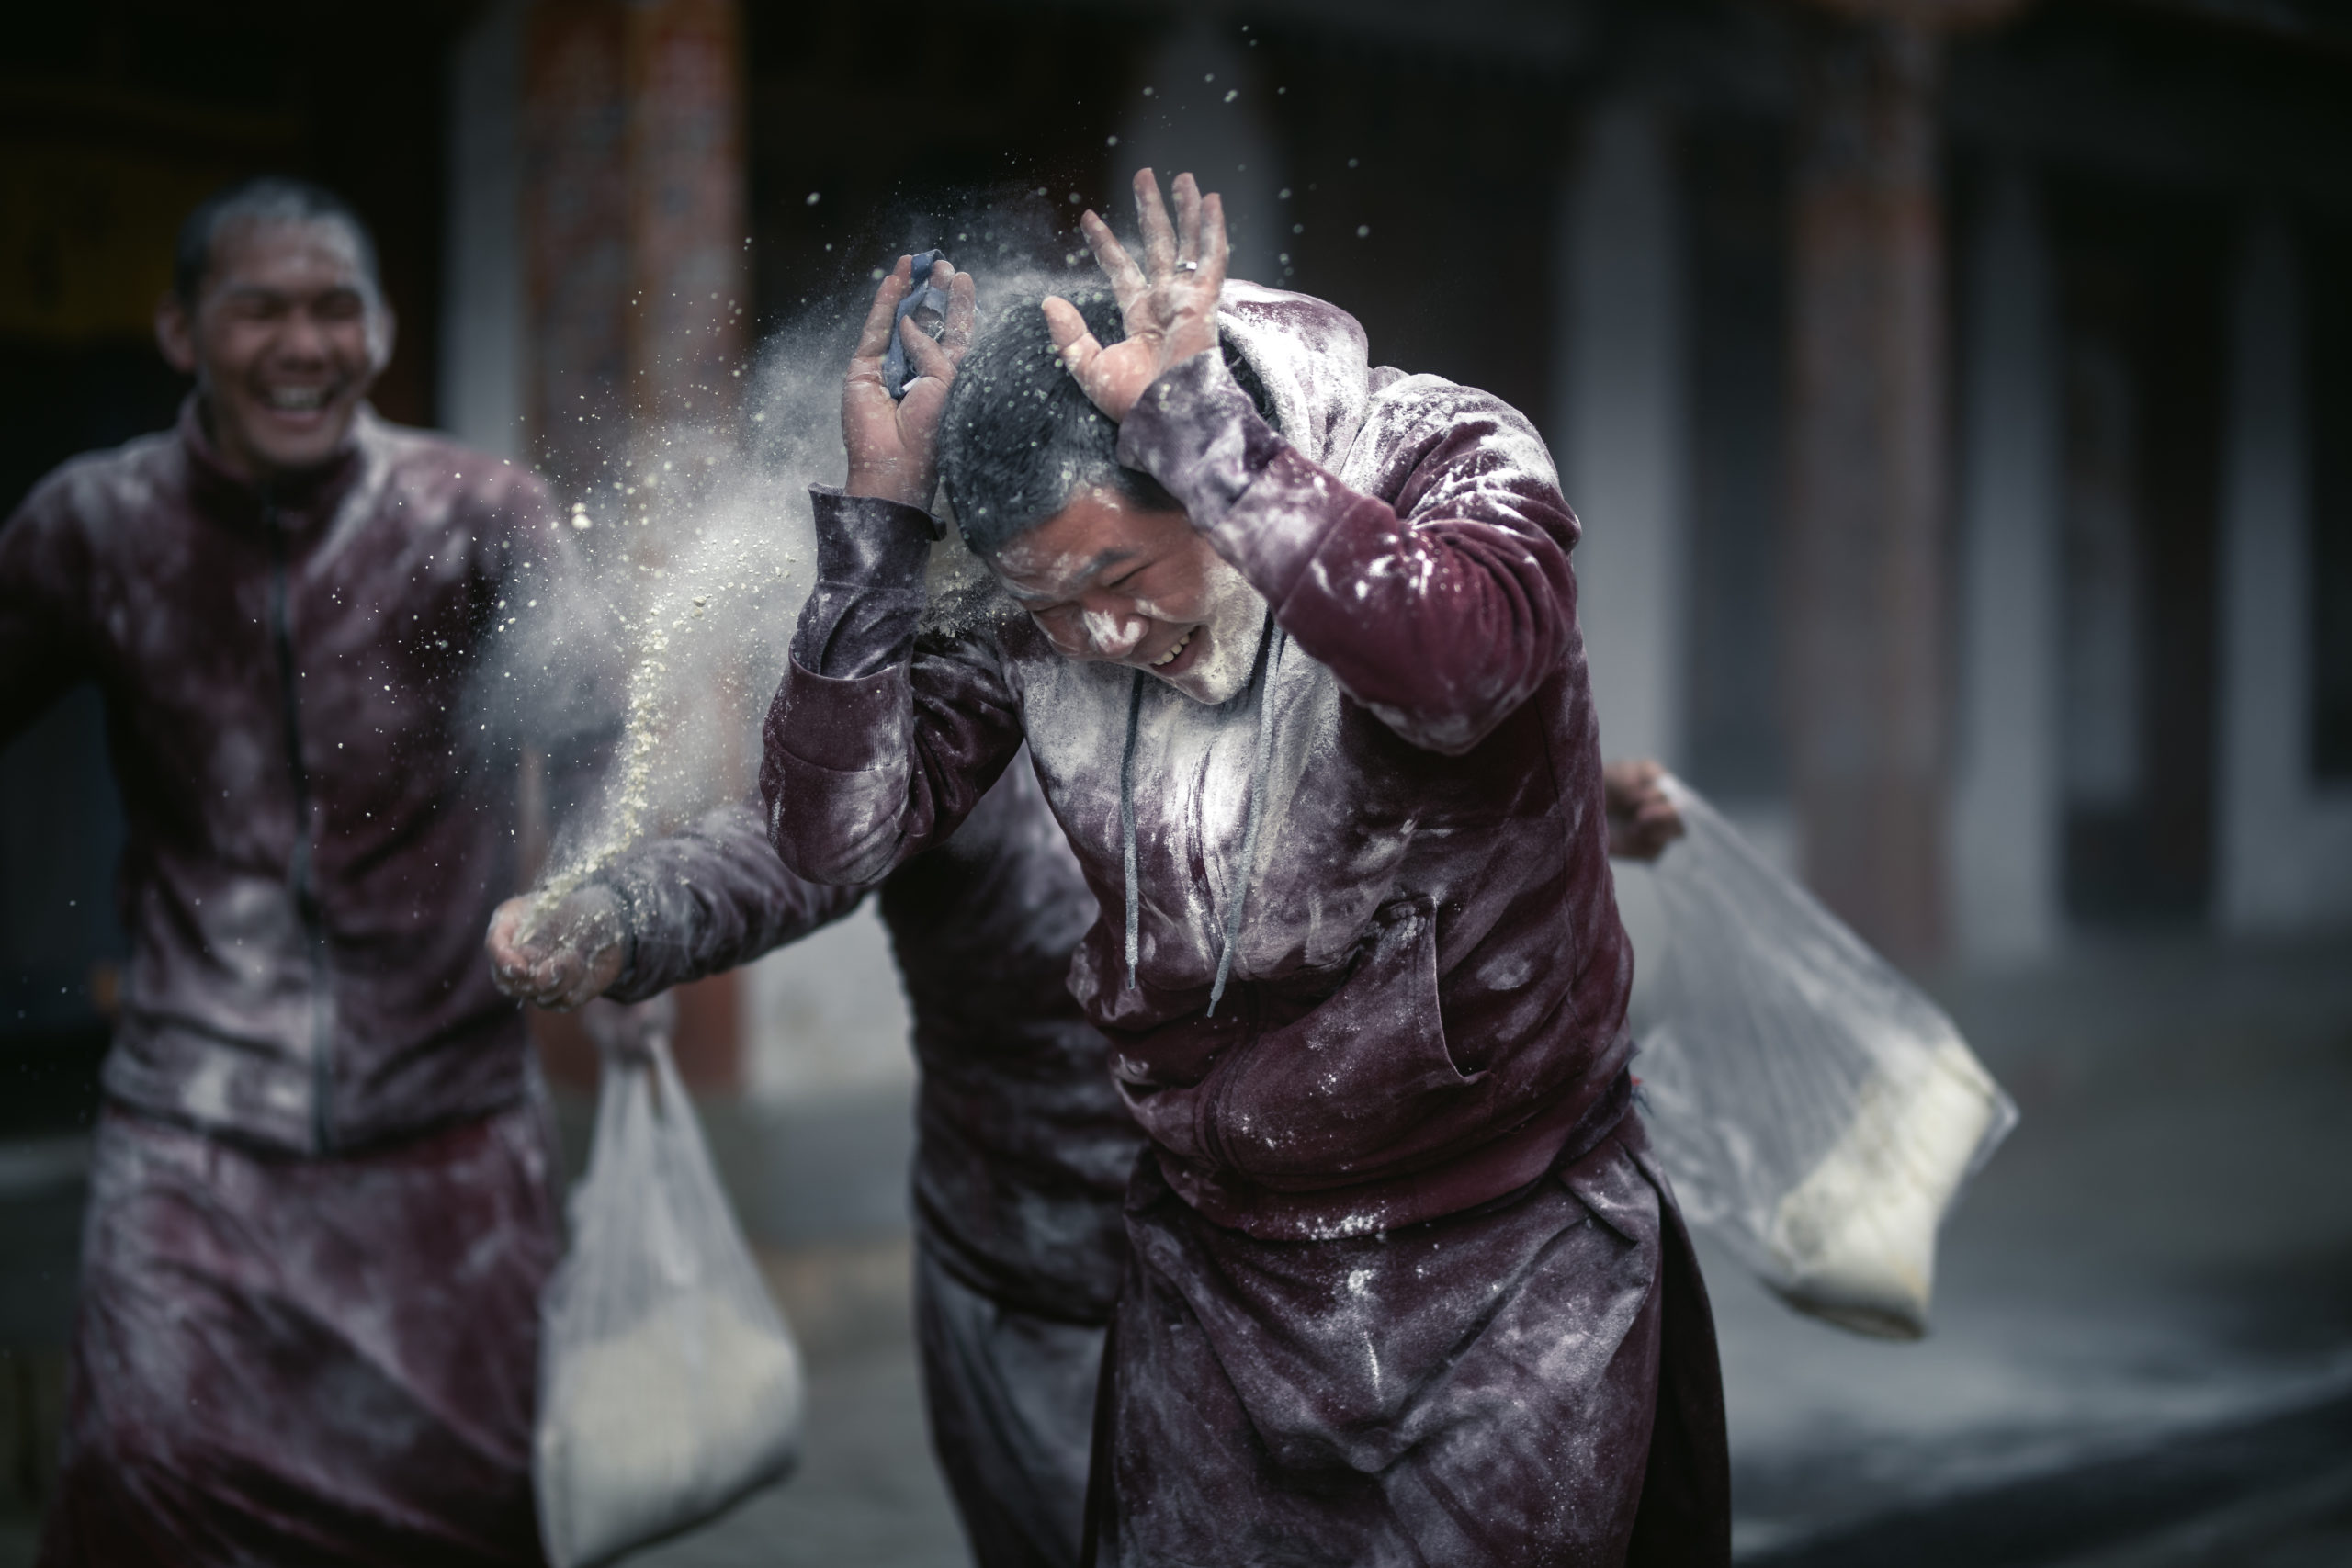
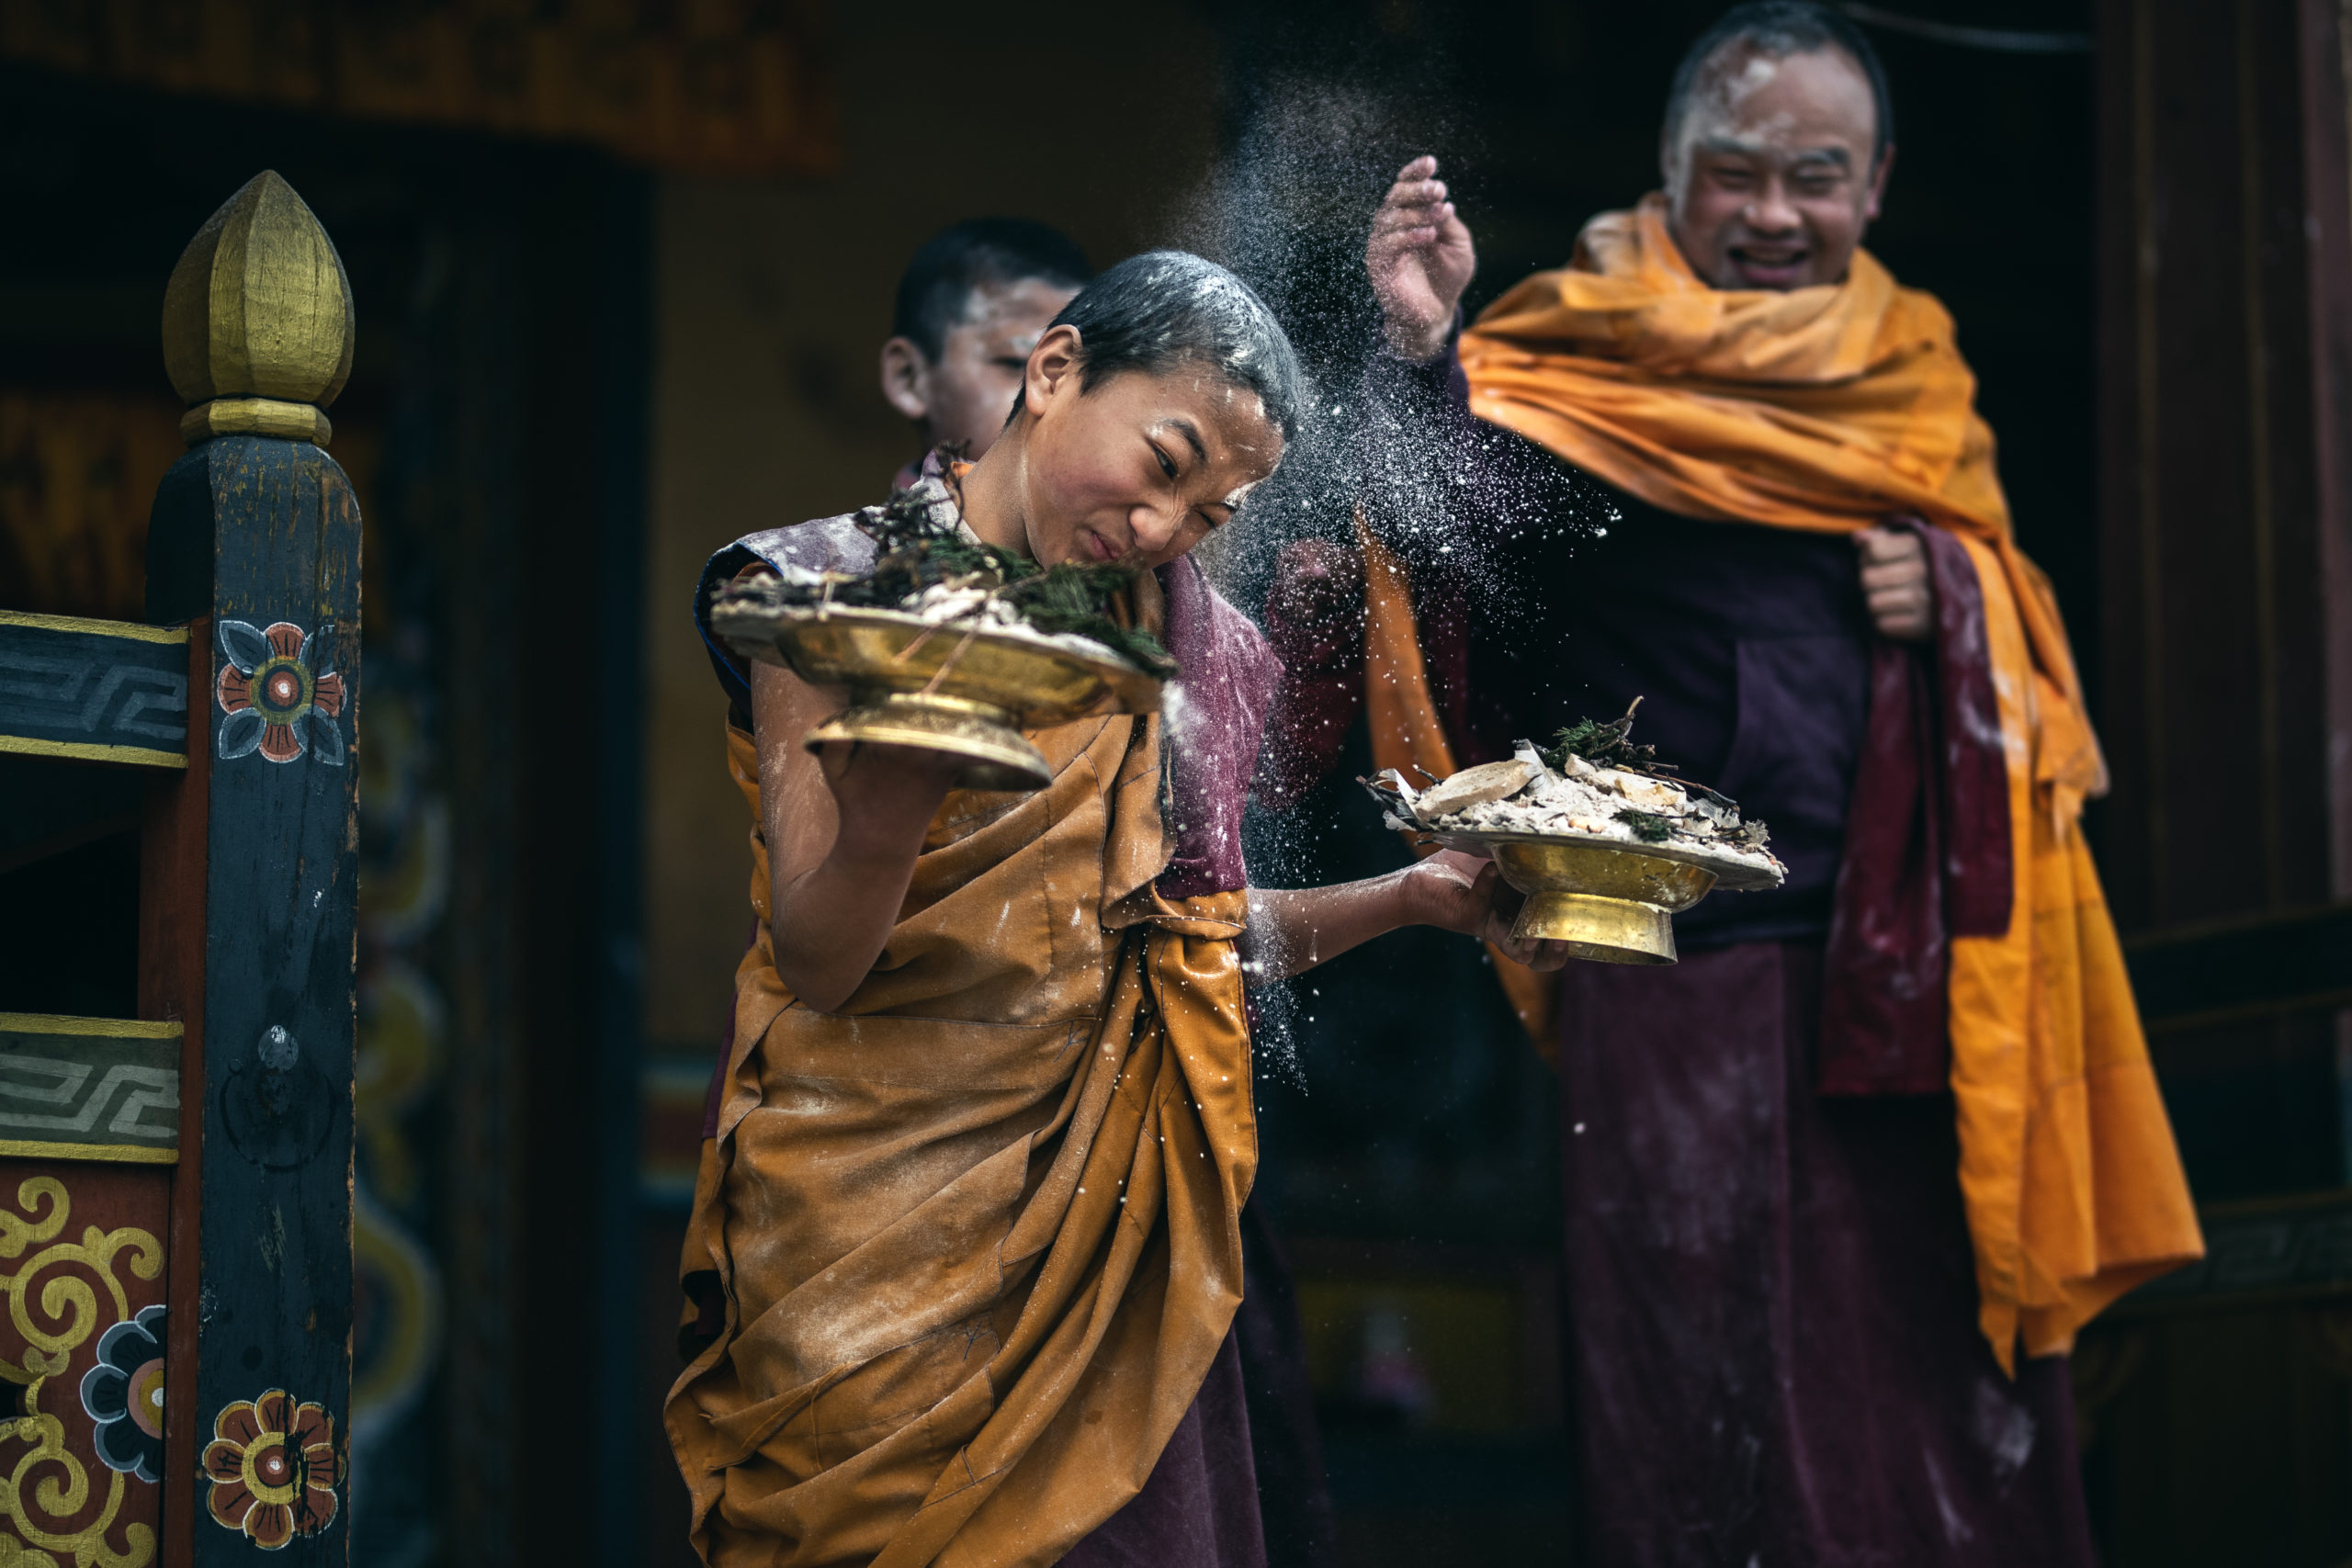
As the monks finished their worship ceremonies and exited the temple, they were quickly bombarded with friendly hand fulls of flour. As strange of a festival as it may appear, the throwing of roasted barley flour on each other is a symbolic gesture, observed in many monasteries around the country, to usher in Losar.
Photographing the flour battle was some of the most fun I’ve ever had while shooting.
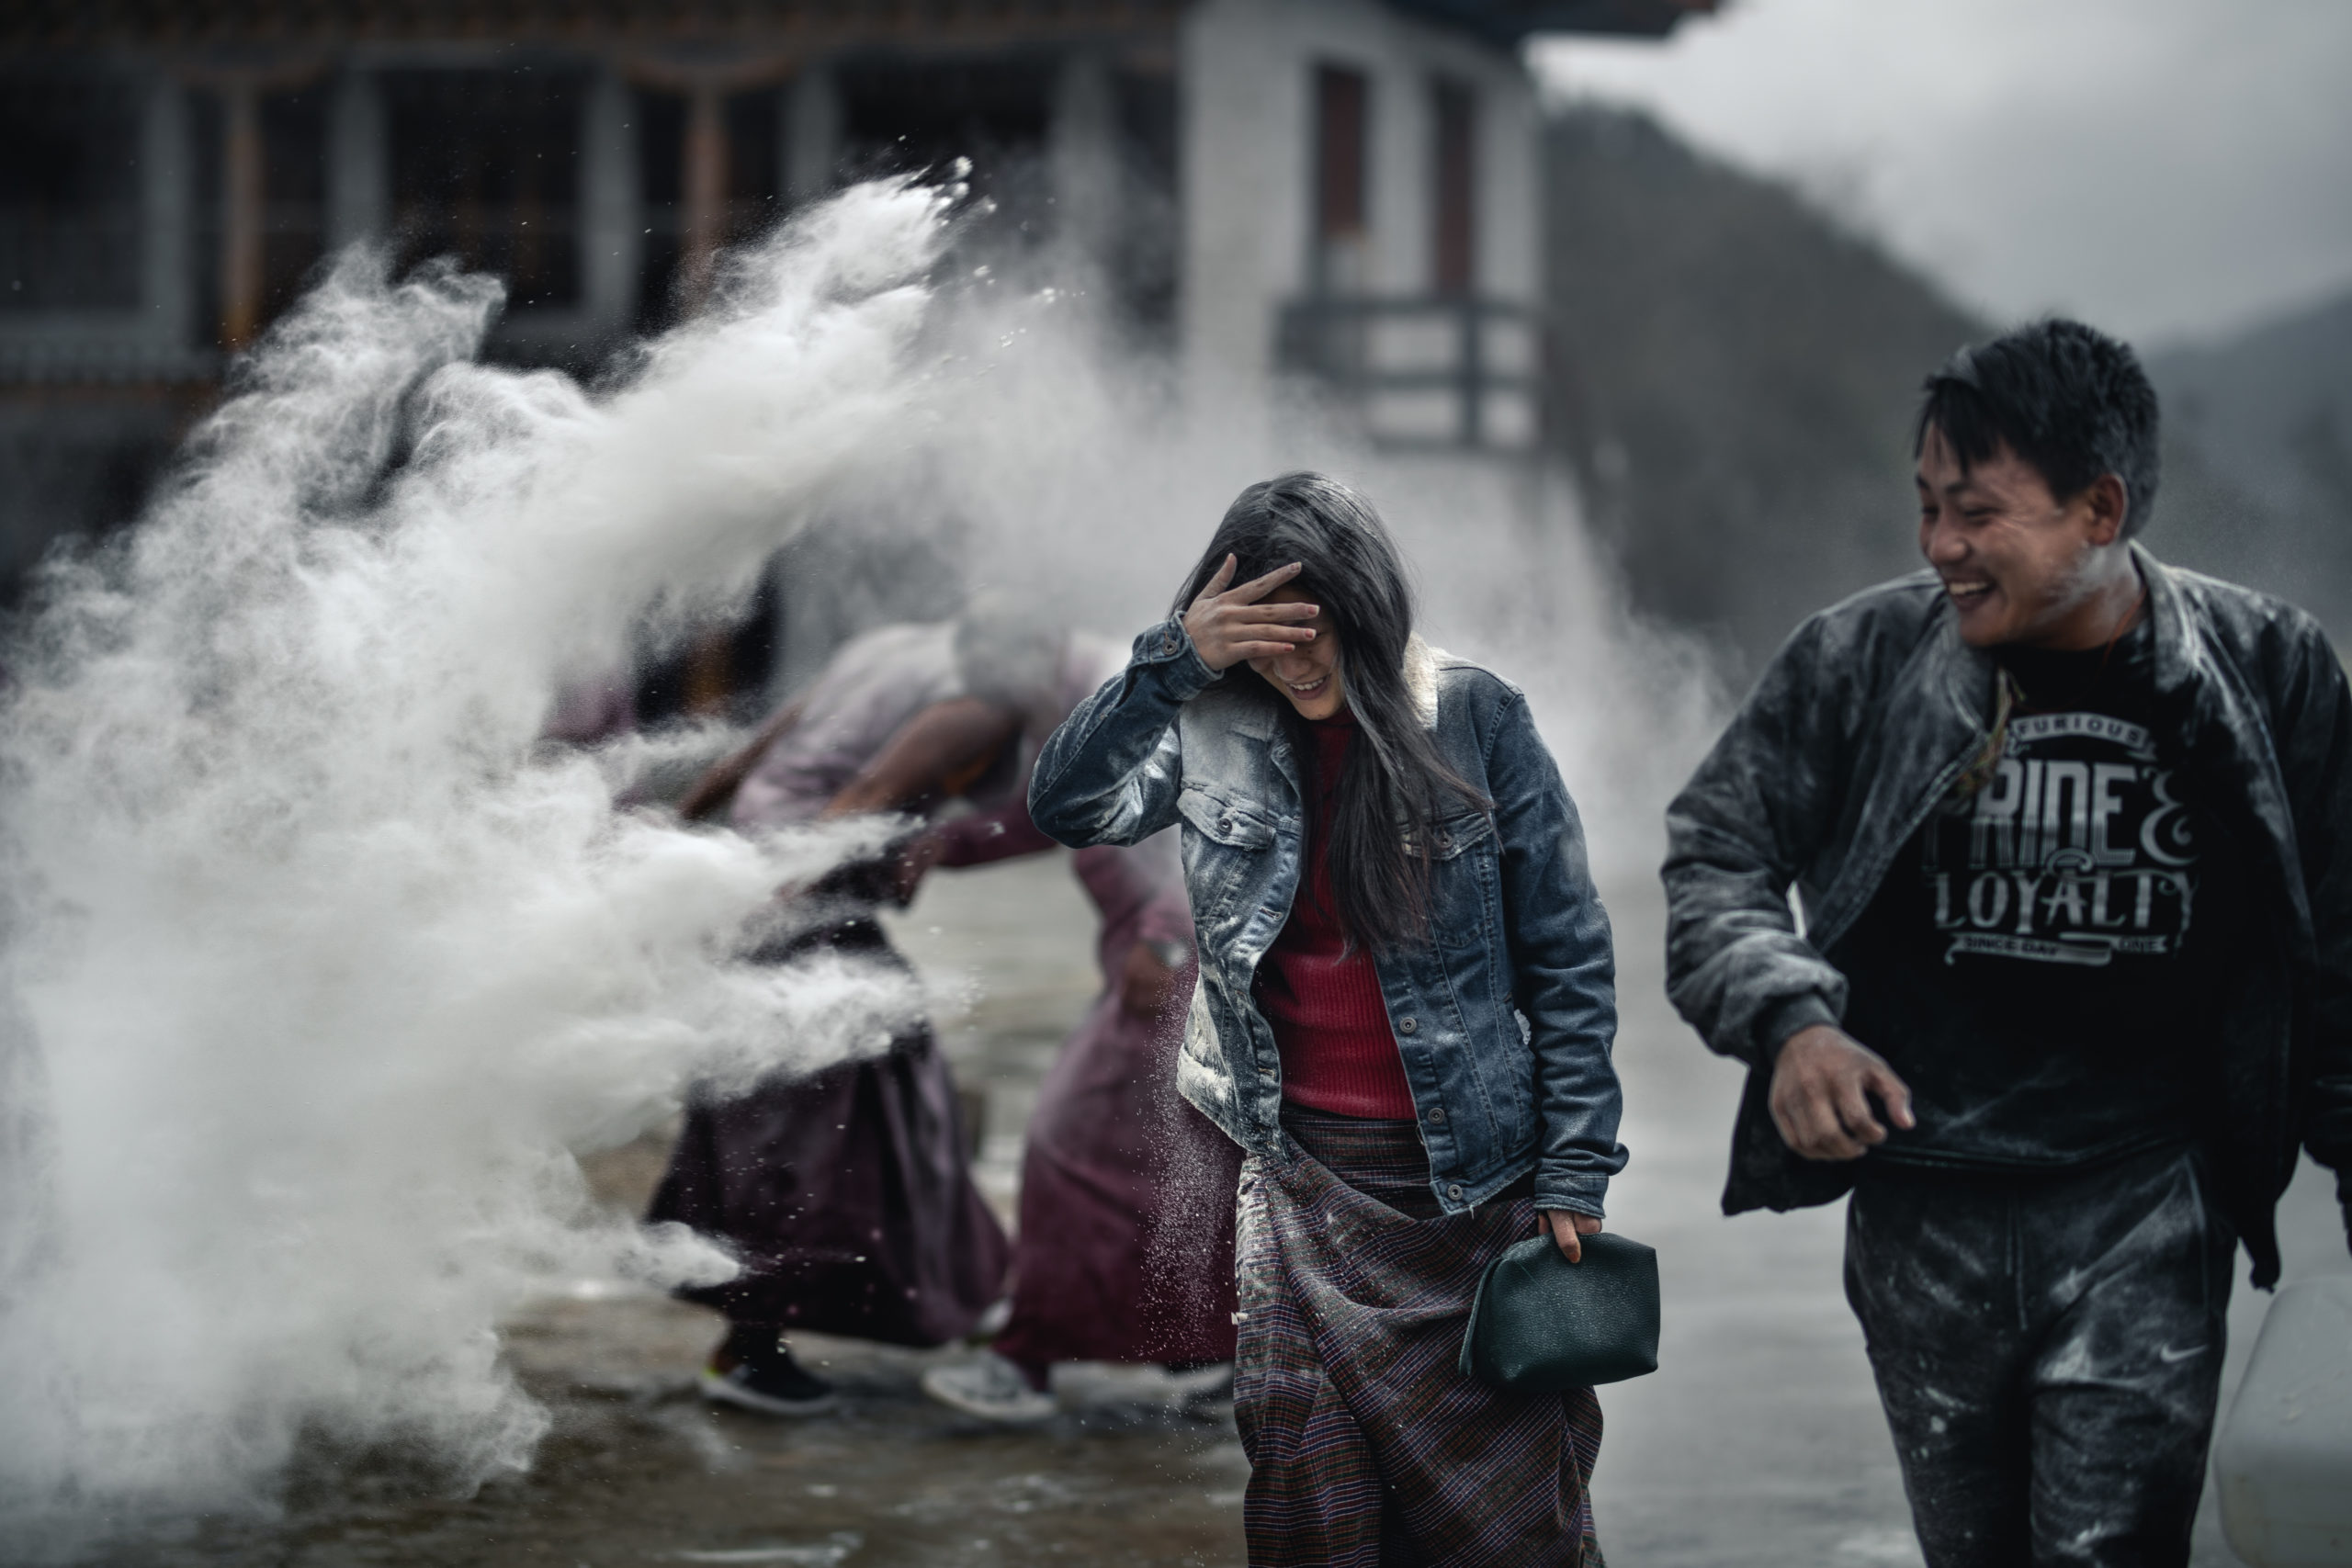
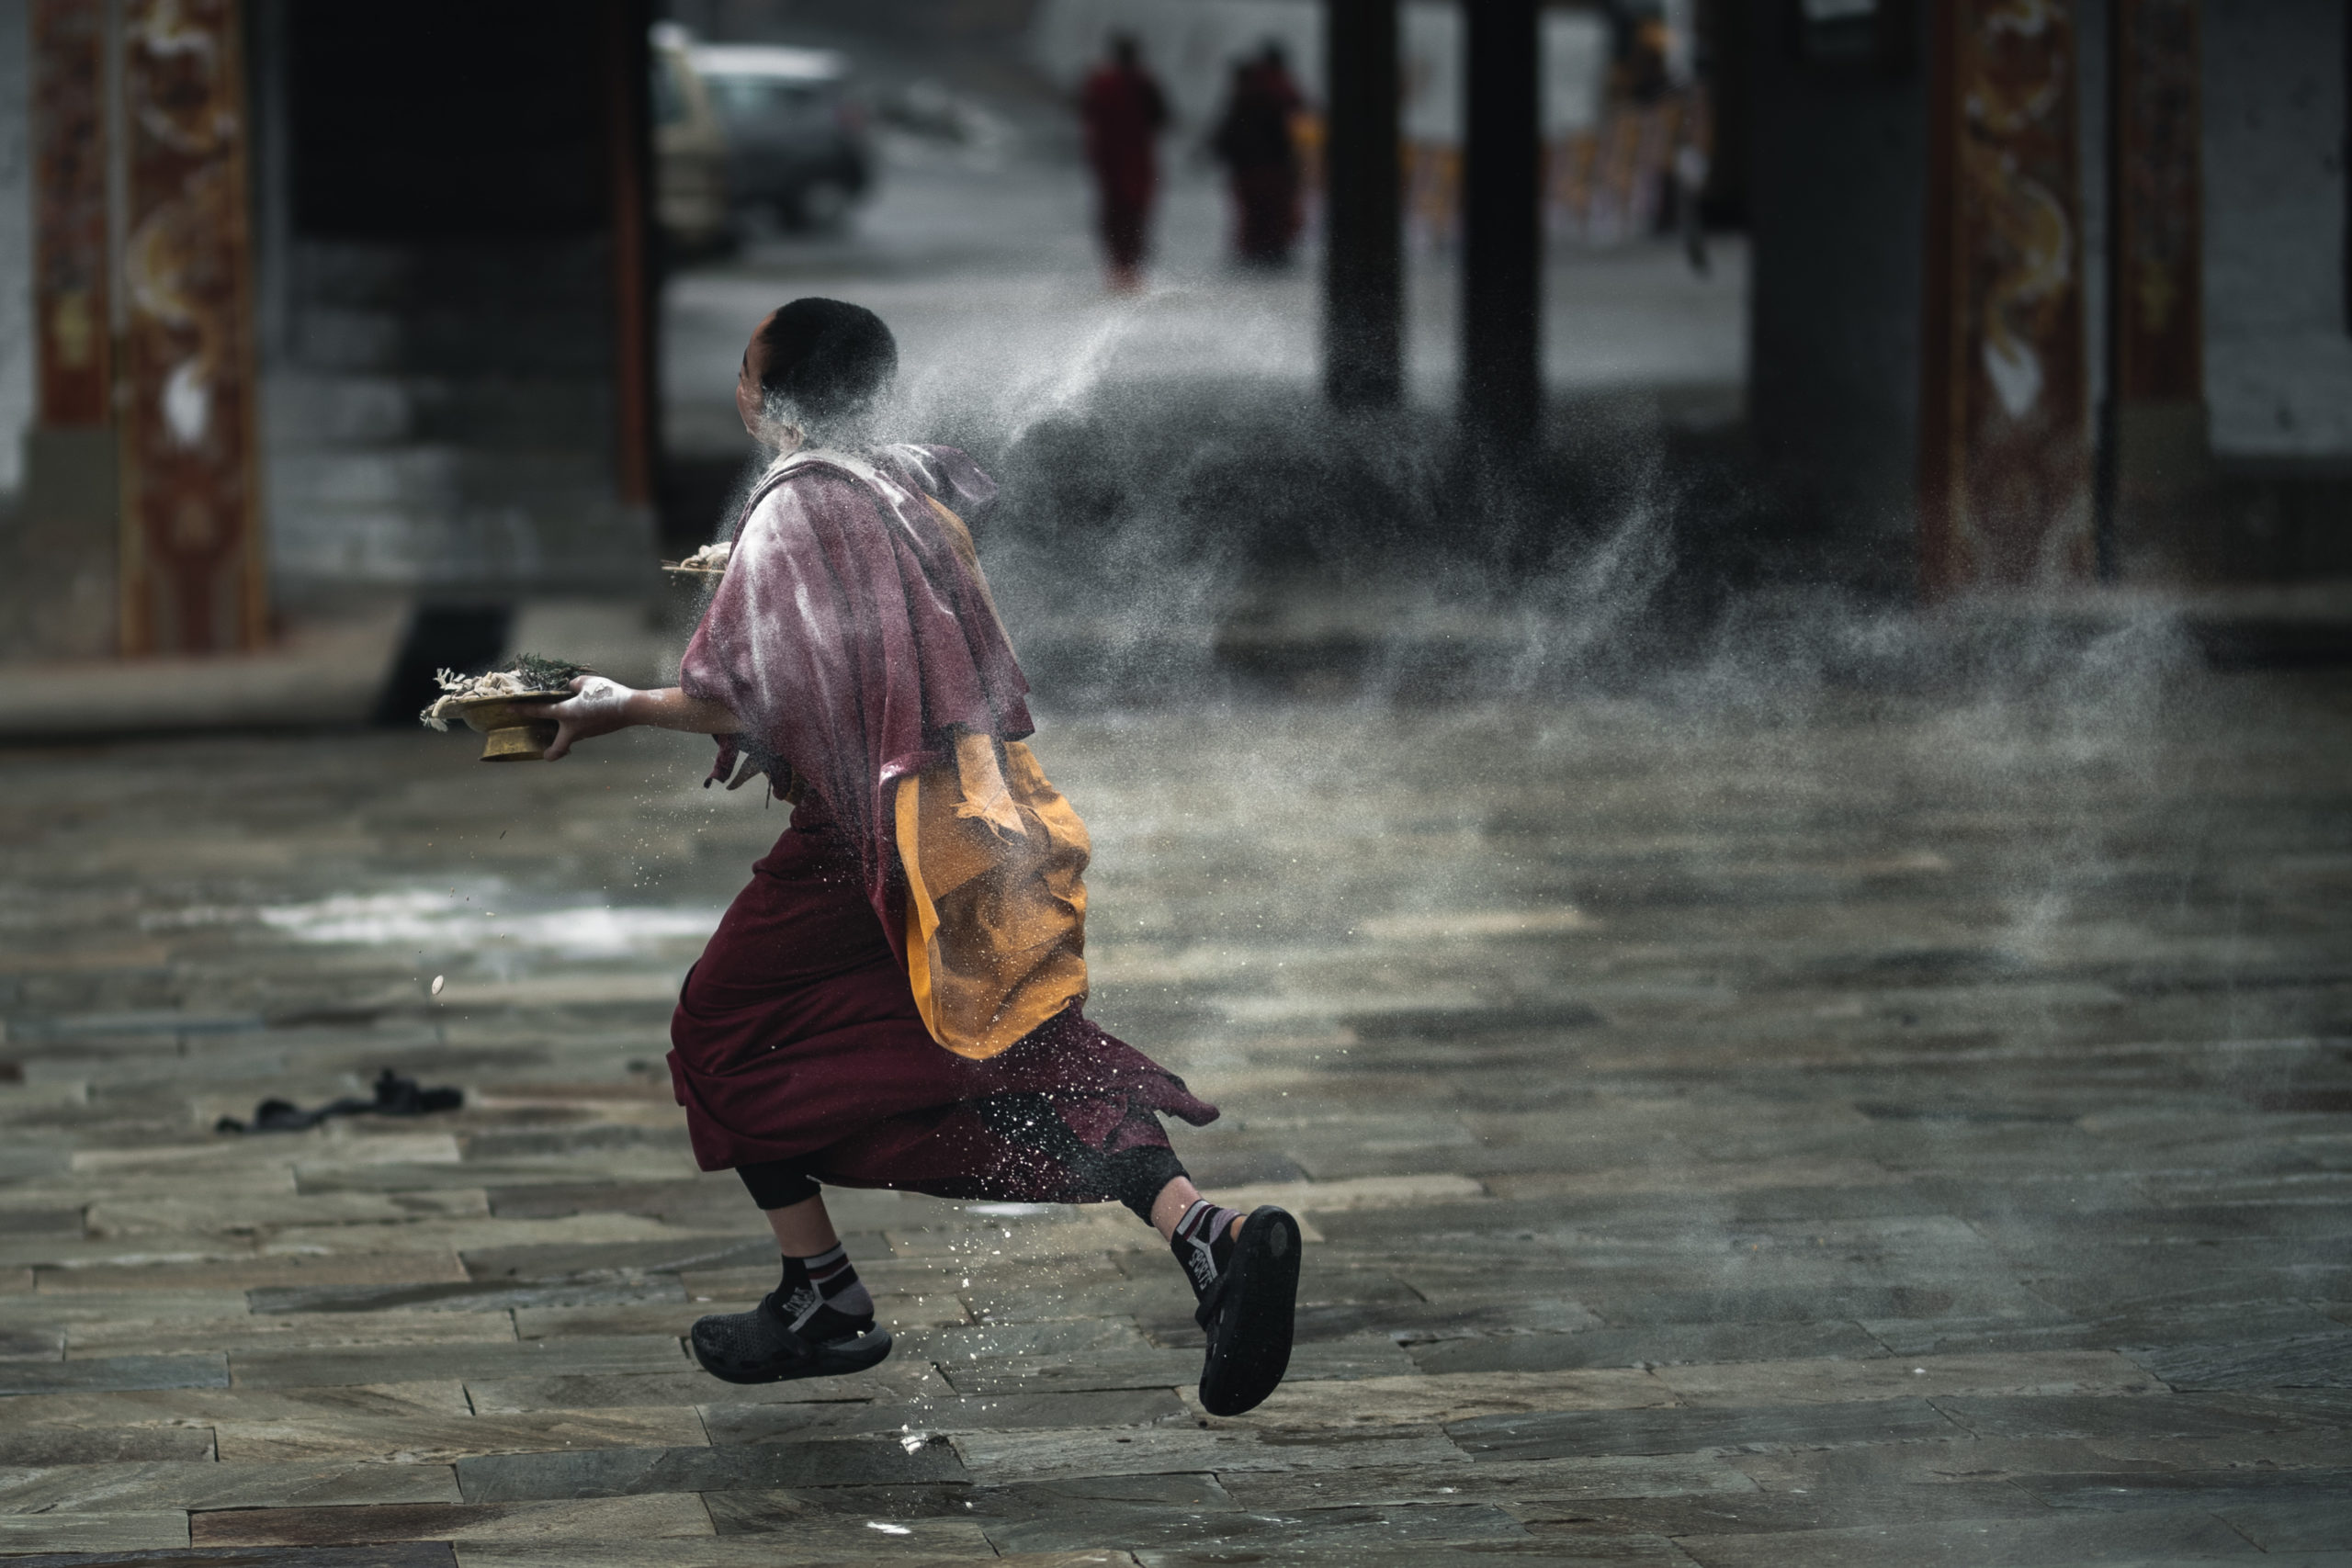
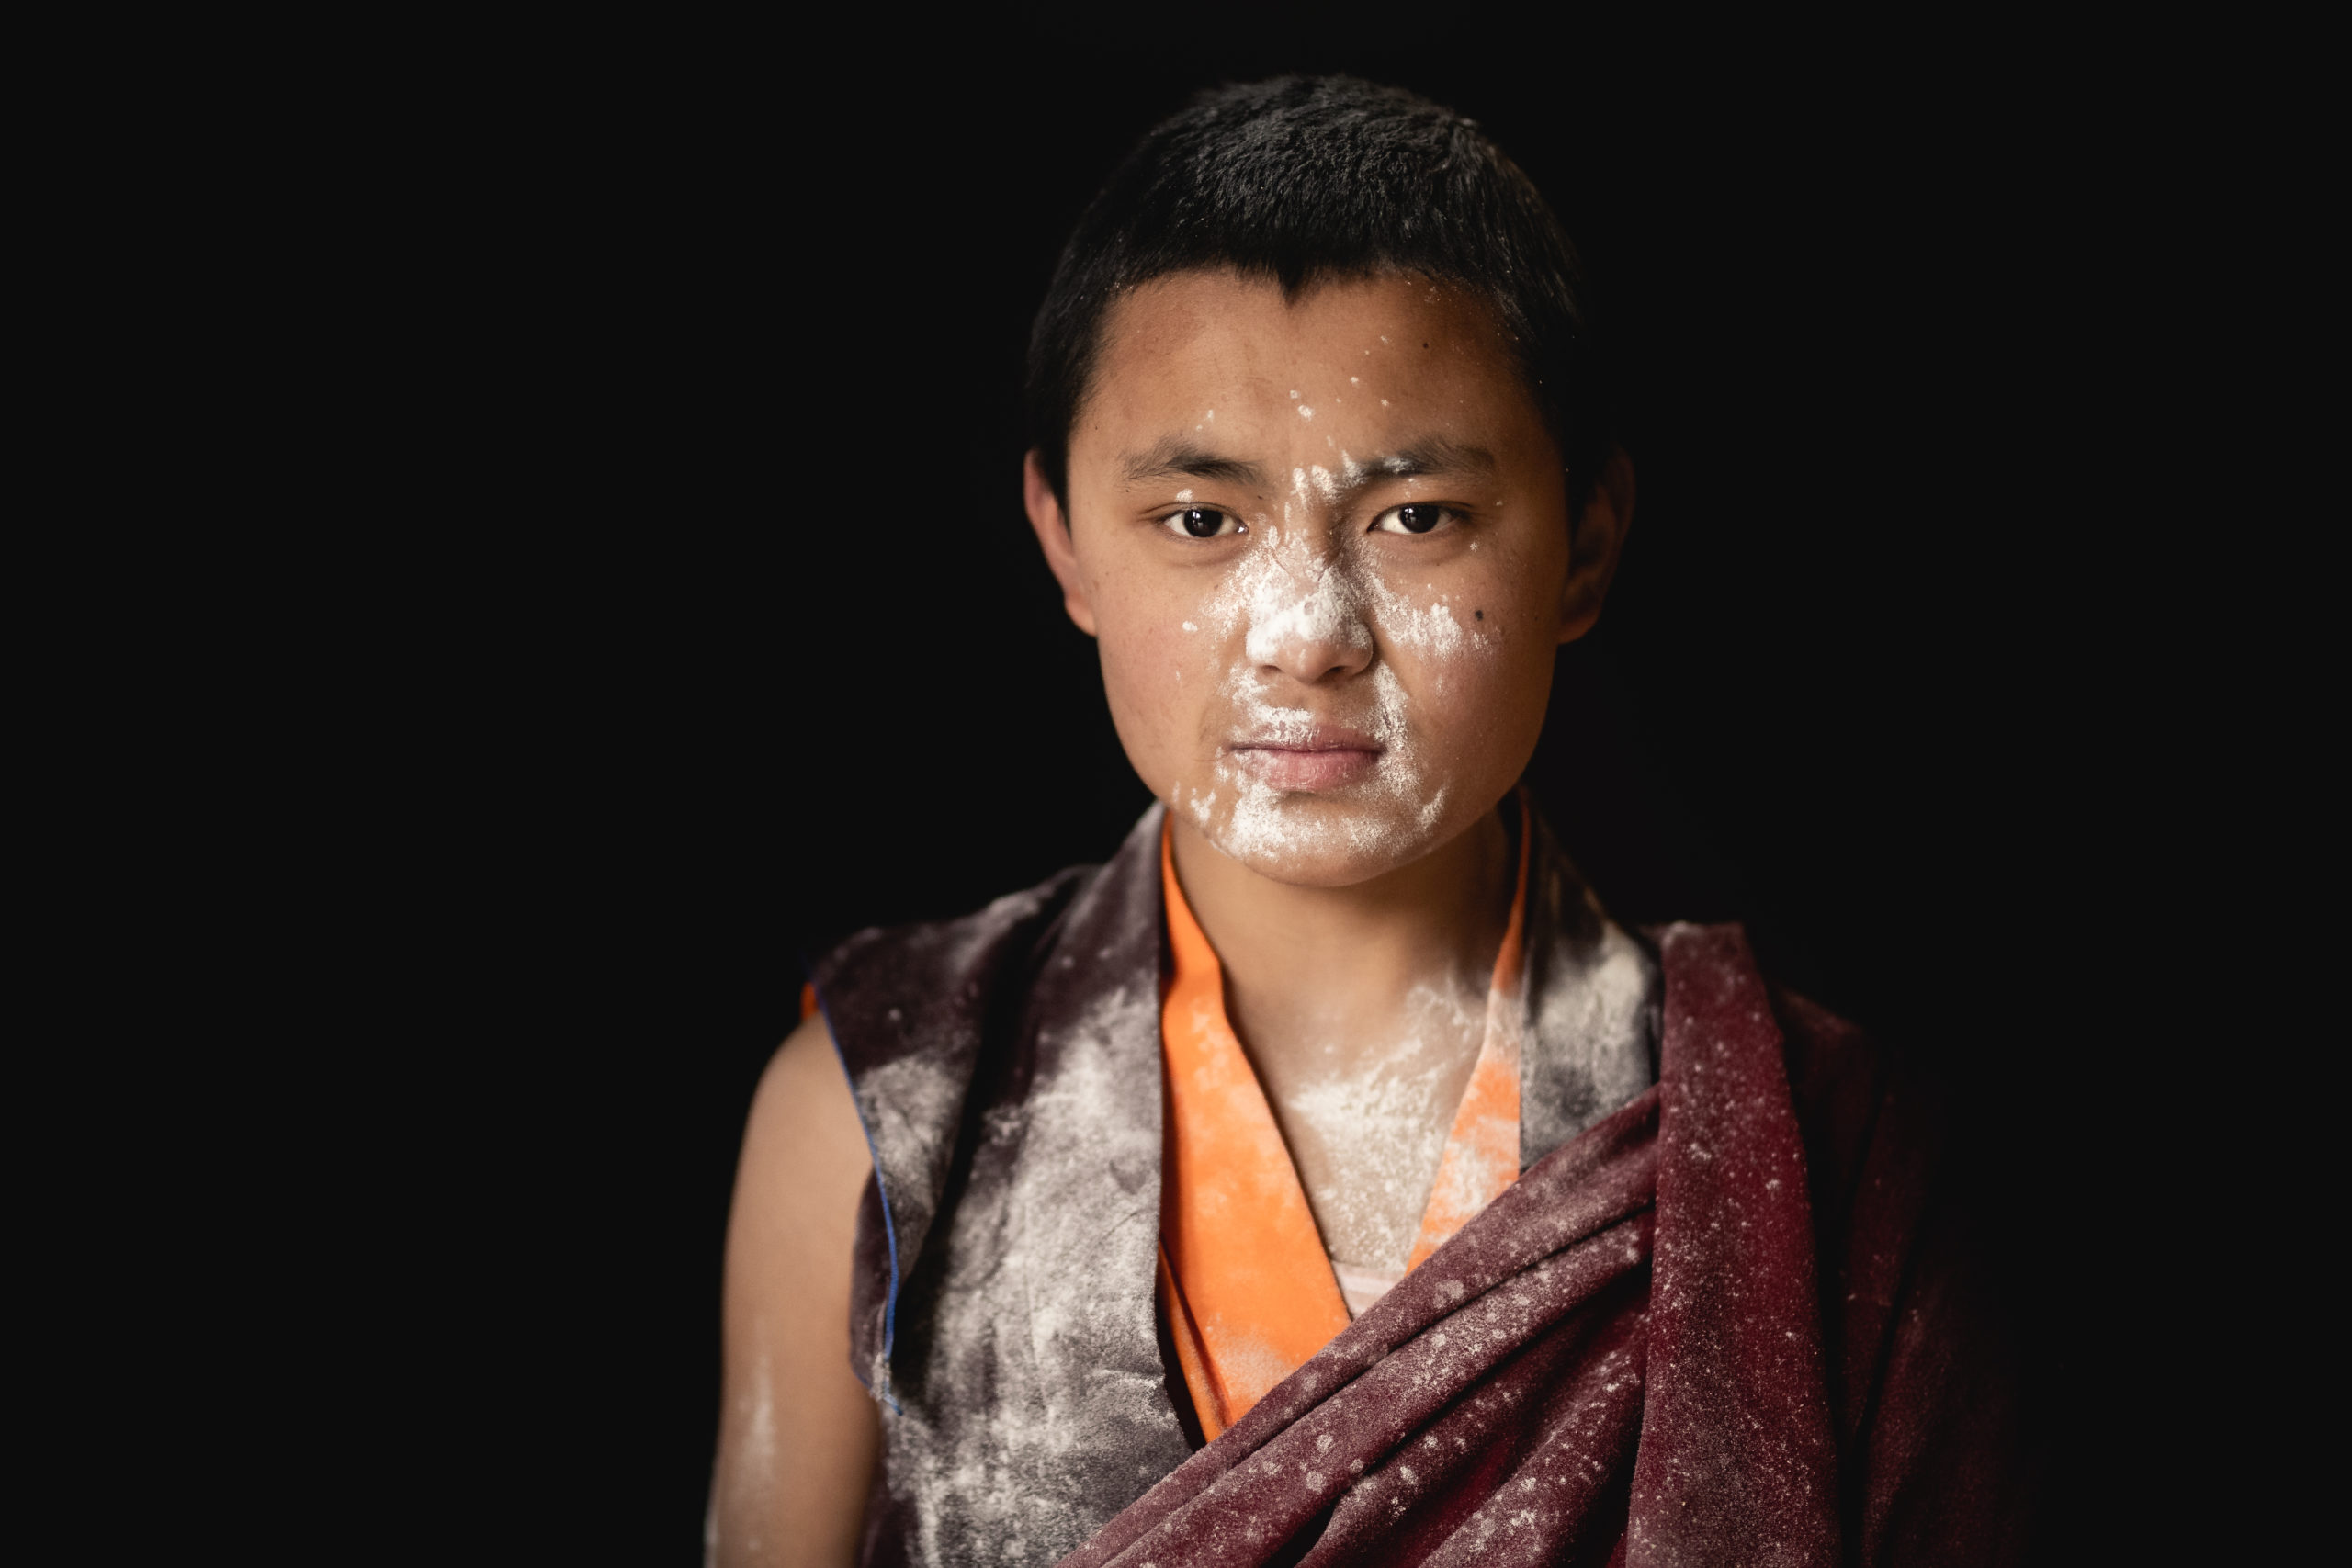
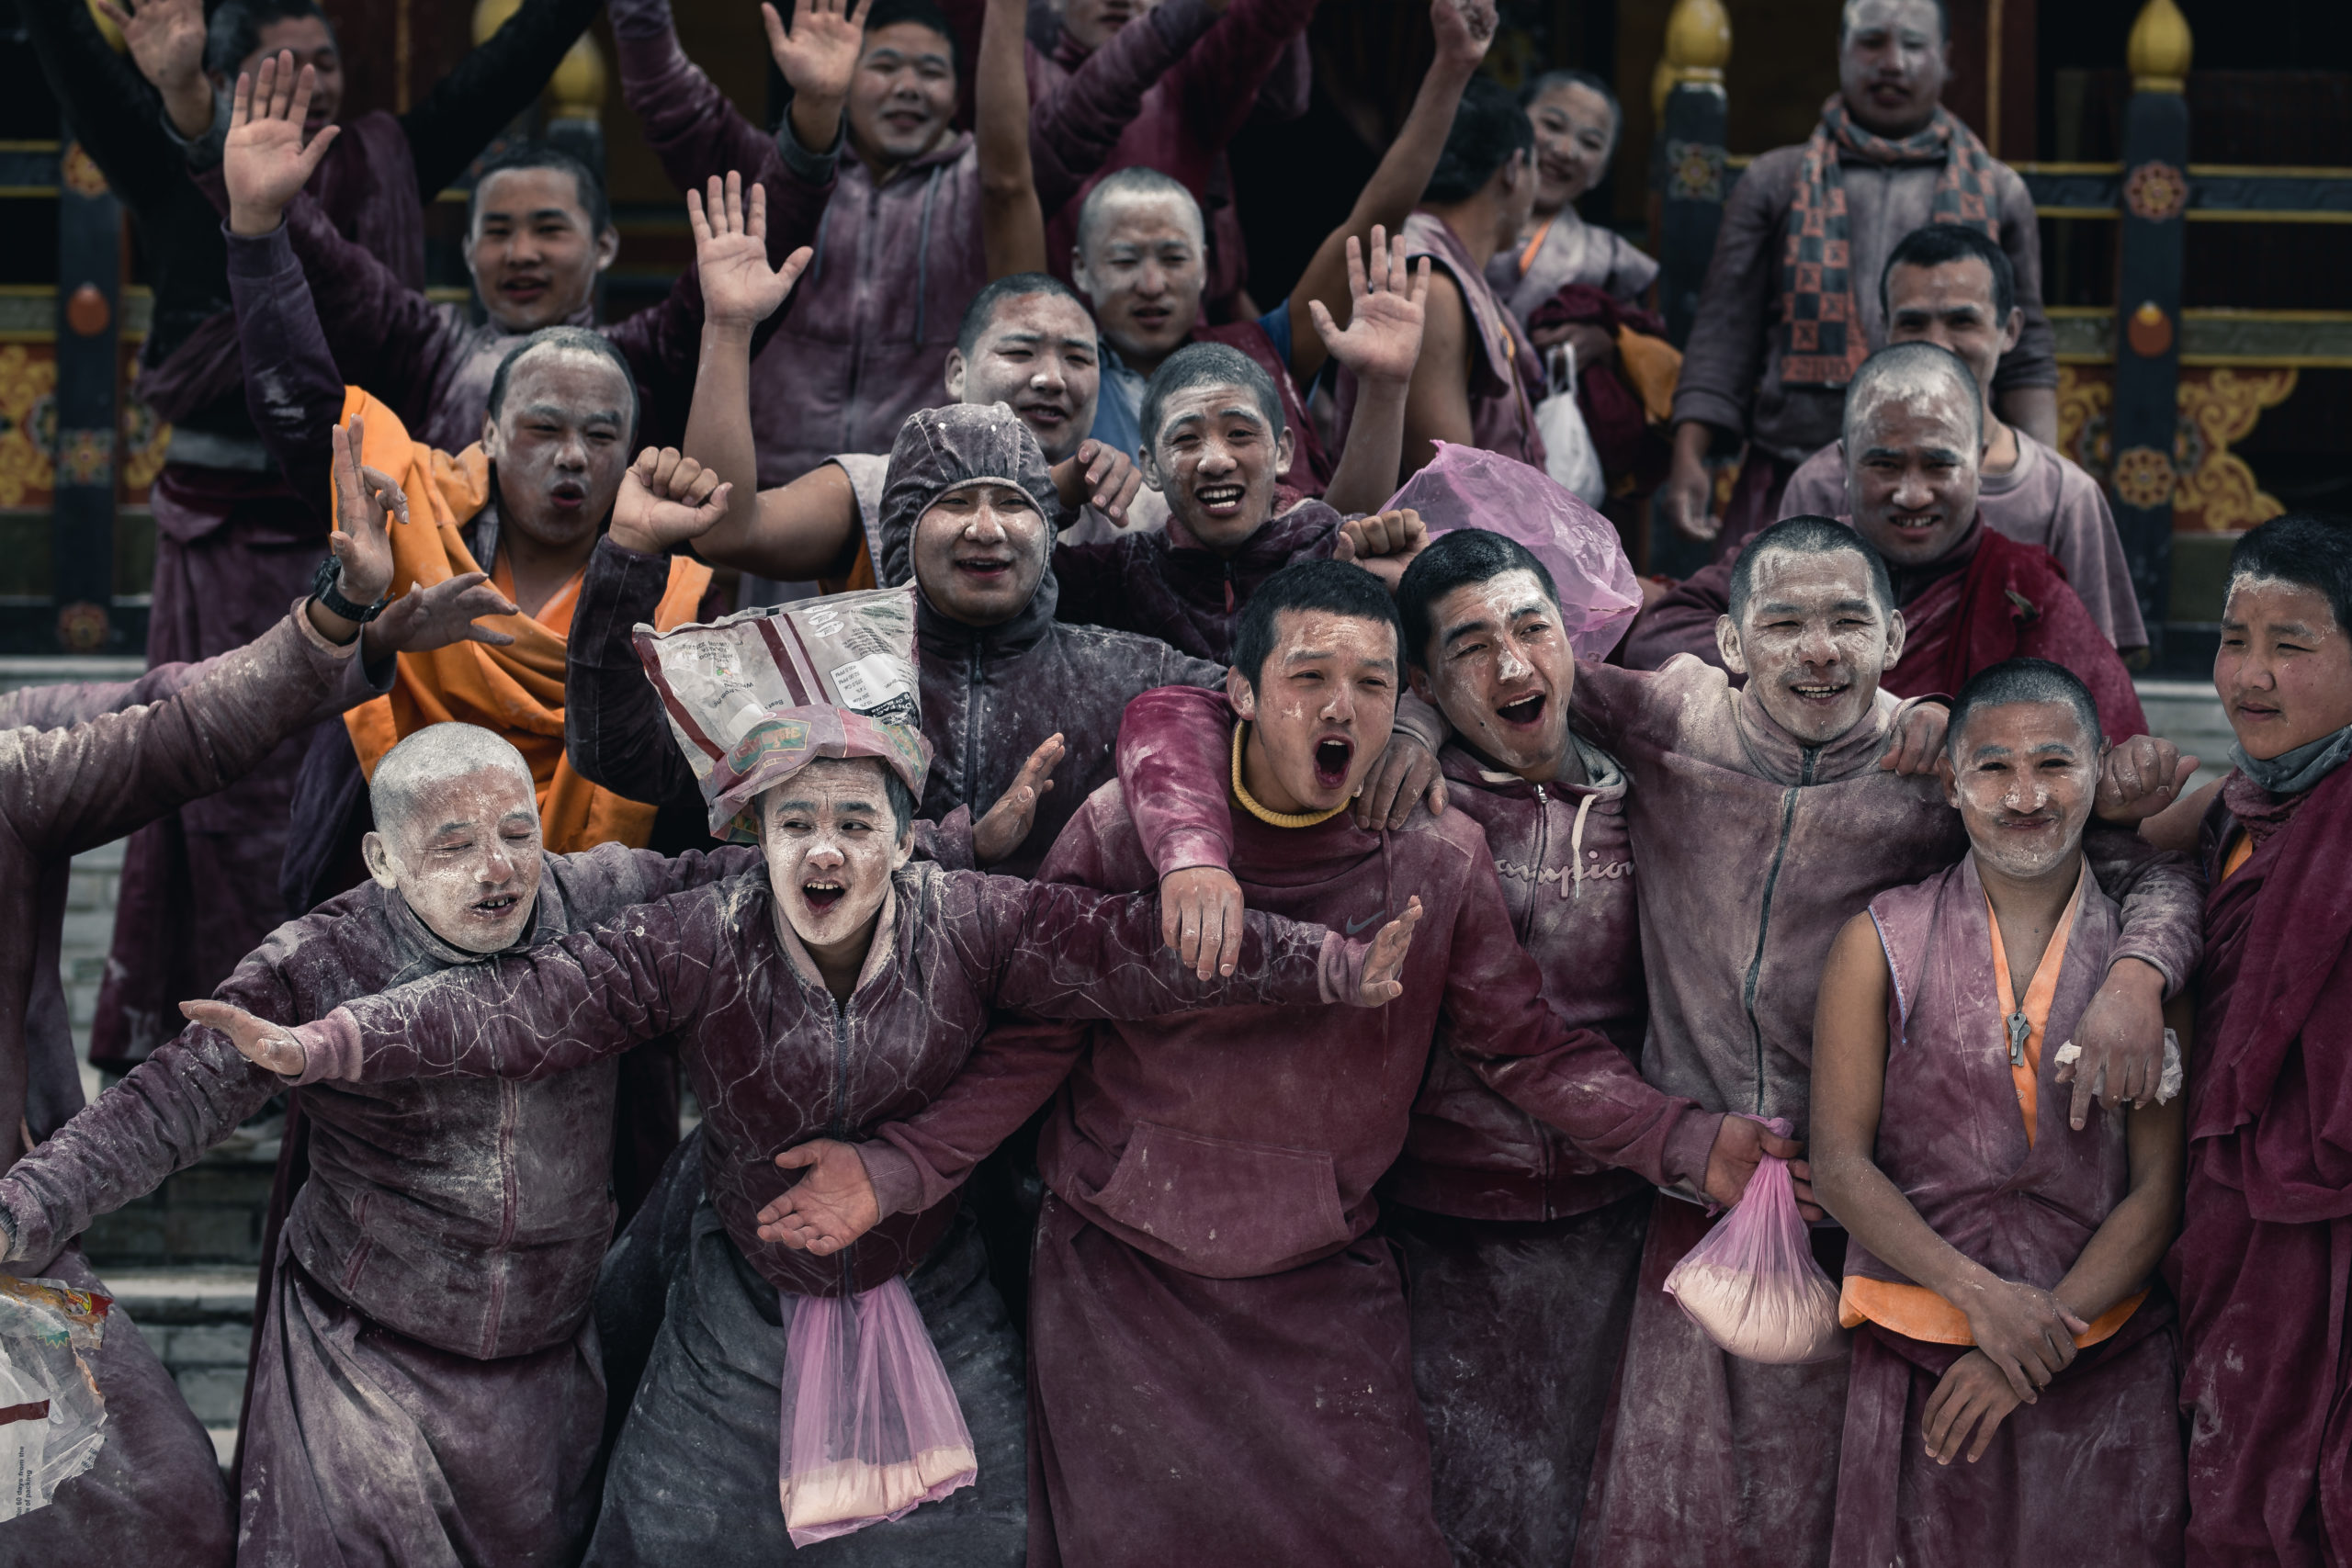
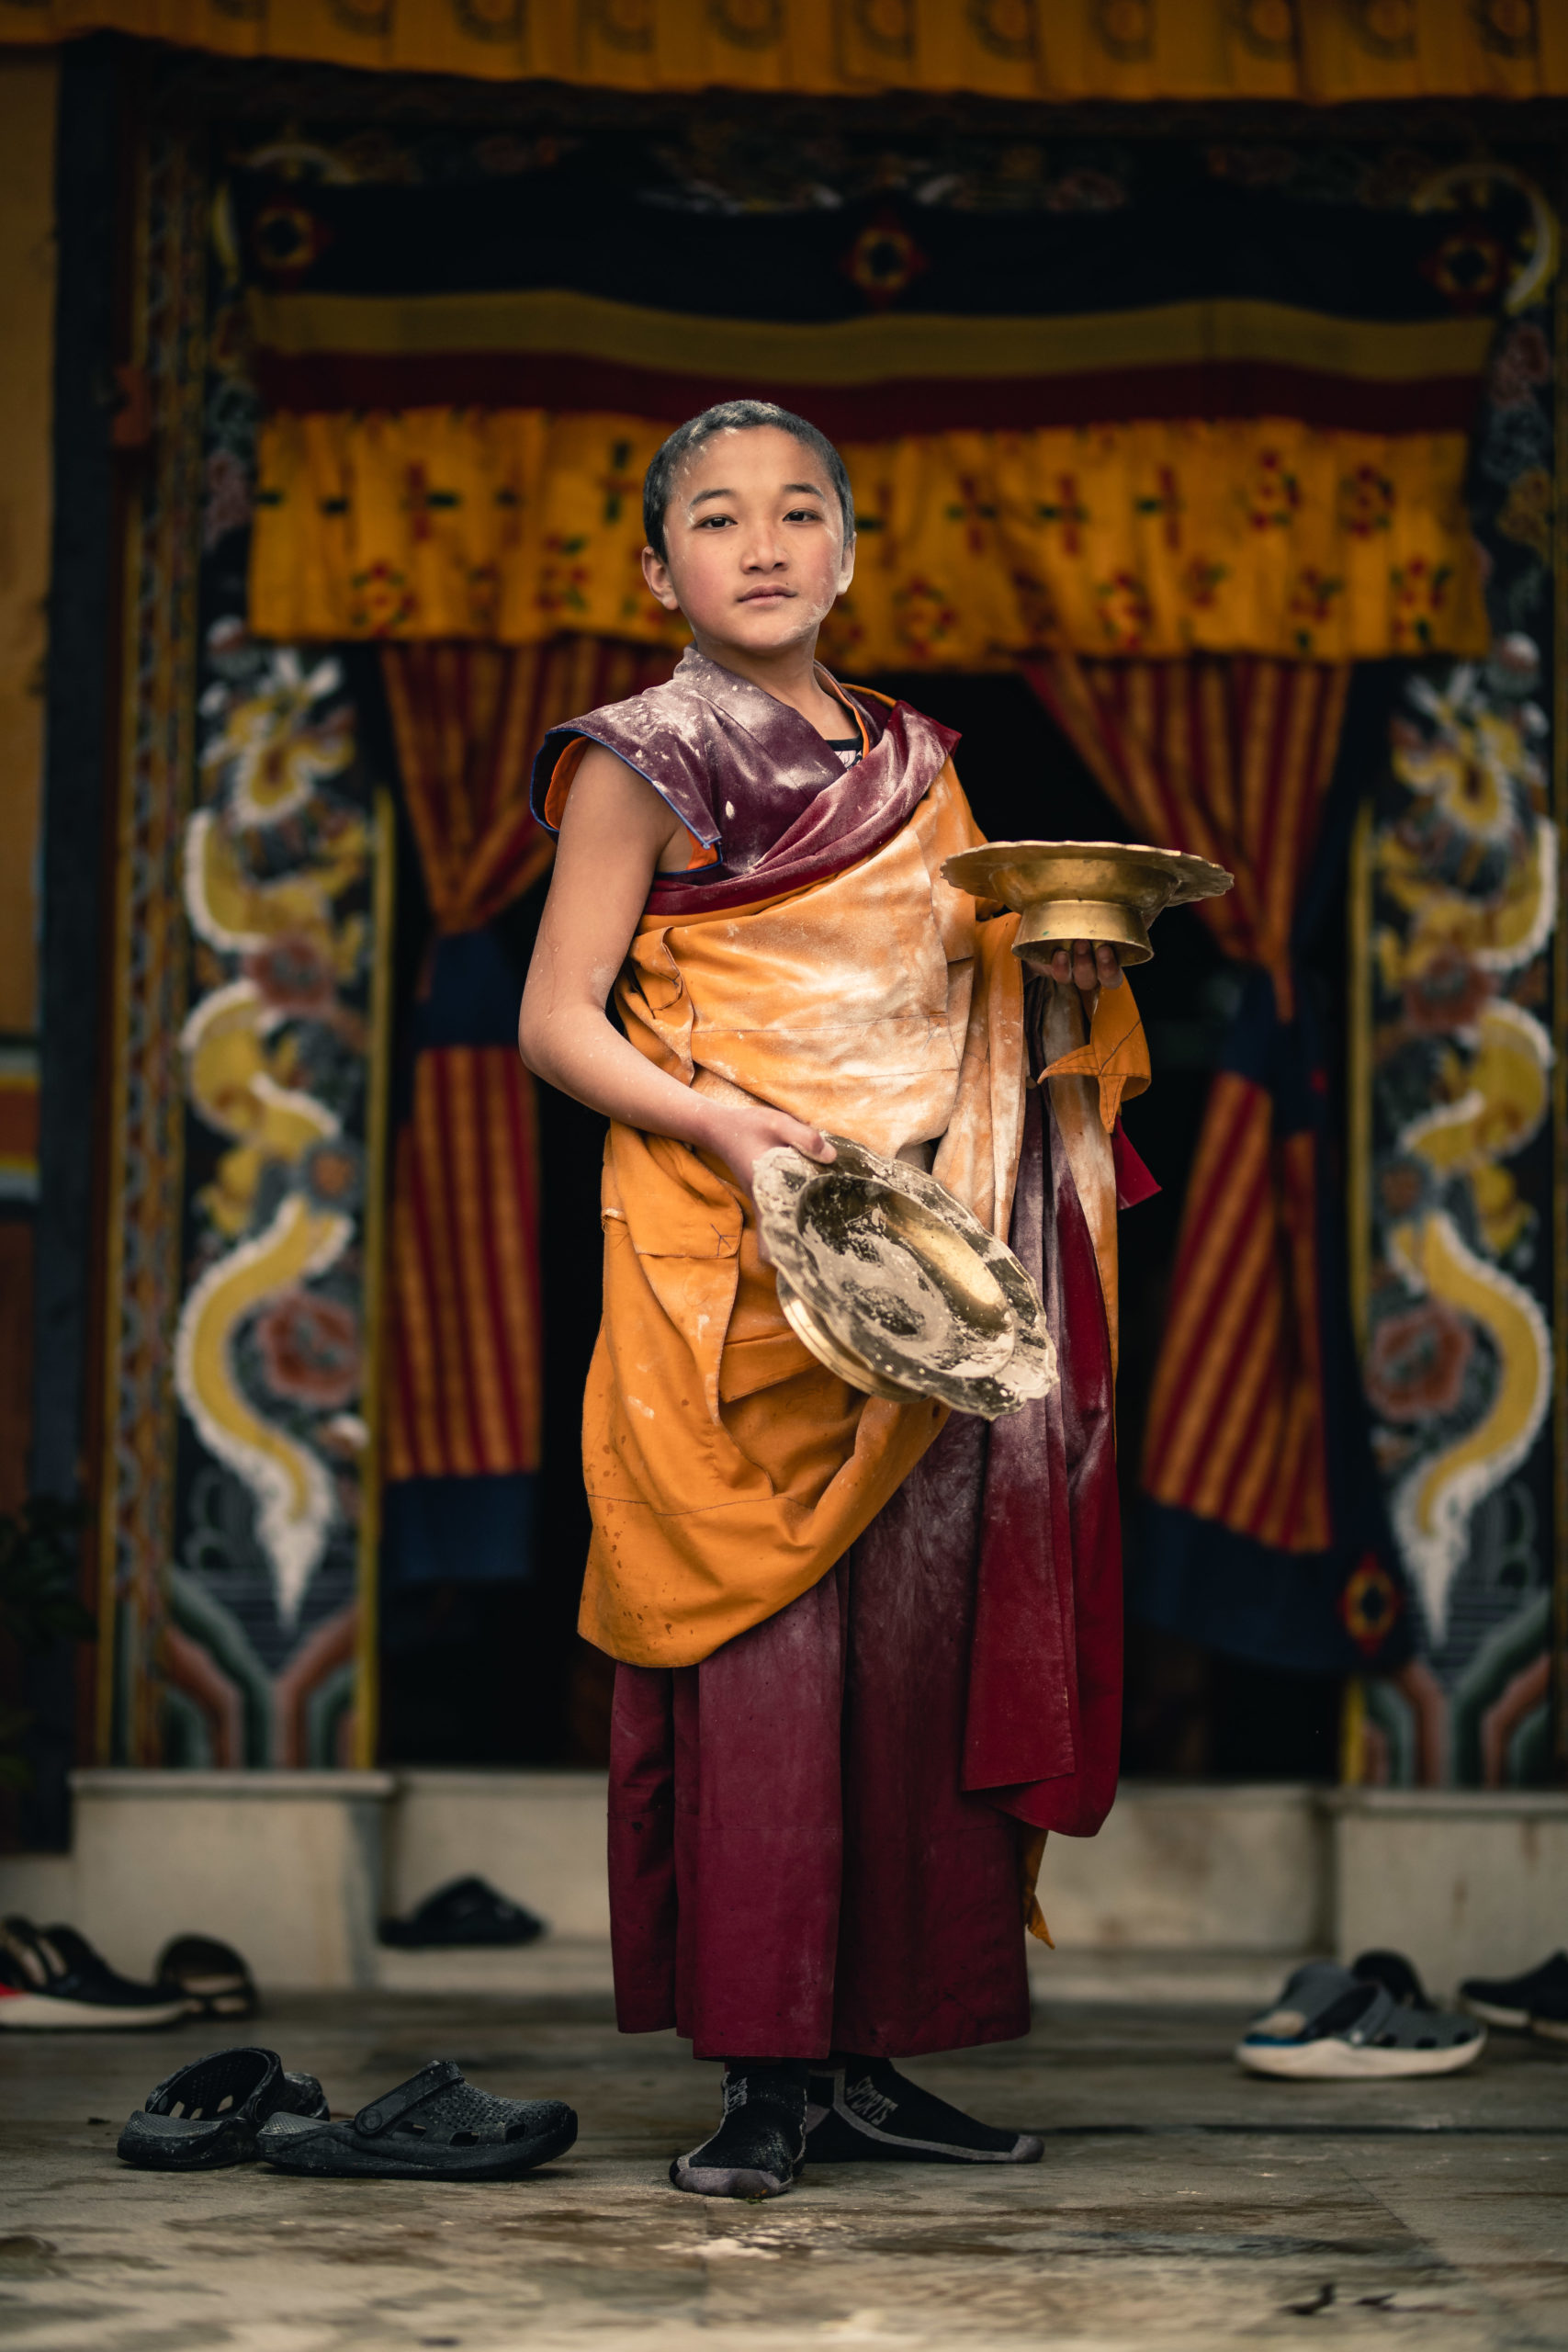
Throughout the entire morning, the monks made me feel completely welcome and made it such an incredible experience. They even invited me into the battle and spent so much time kindly teaching me their traditional dances and songs before inviting me inside for lunch.
One monk was kind enough to record the video of me going through the lineup. I never got his name but I’m beyond thankful he was able to capture this memory for me. I can’t express how welcoming all the monks were to me. I felt so fortunate to spend Losar with them and hope to be back again next year.
Thank you for taking the time to read! If you’re interested in visiting Bhutan, I highly recommend getting in touch with MyBhutan to plan your trip!

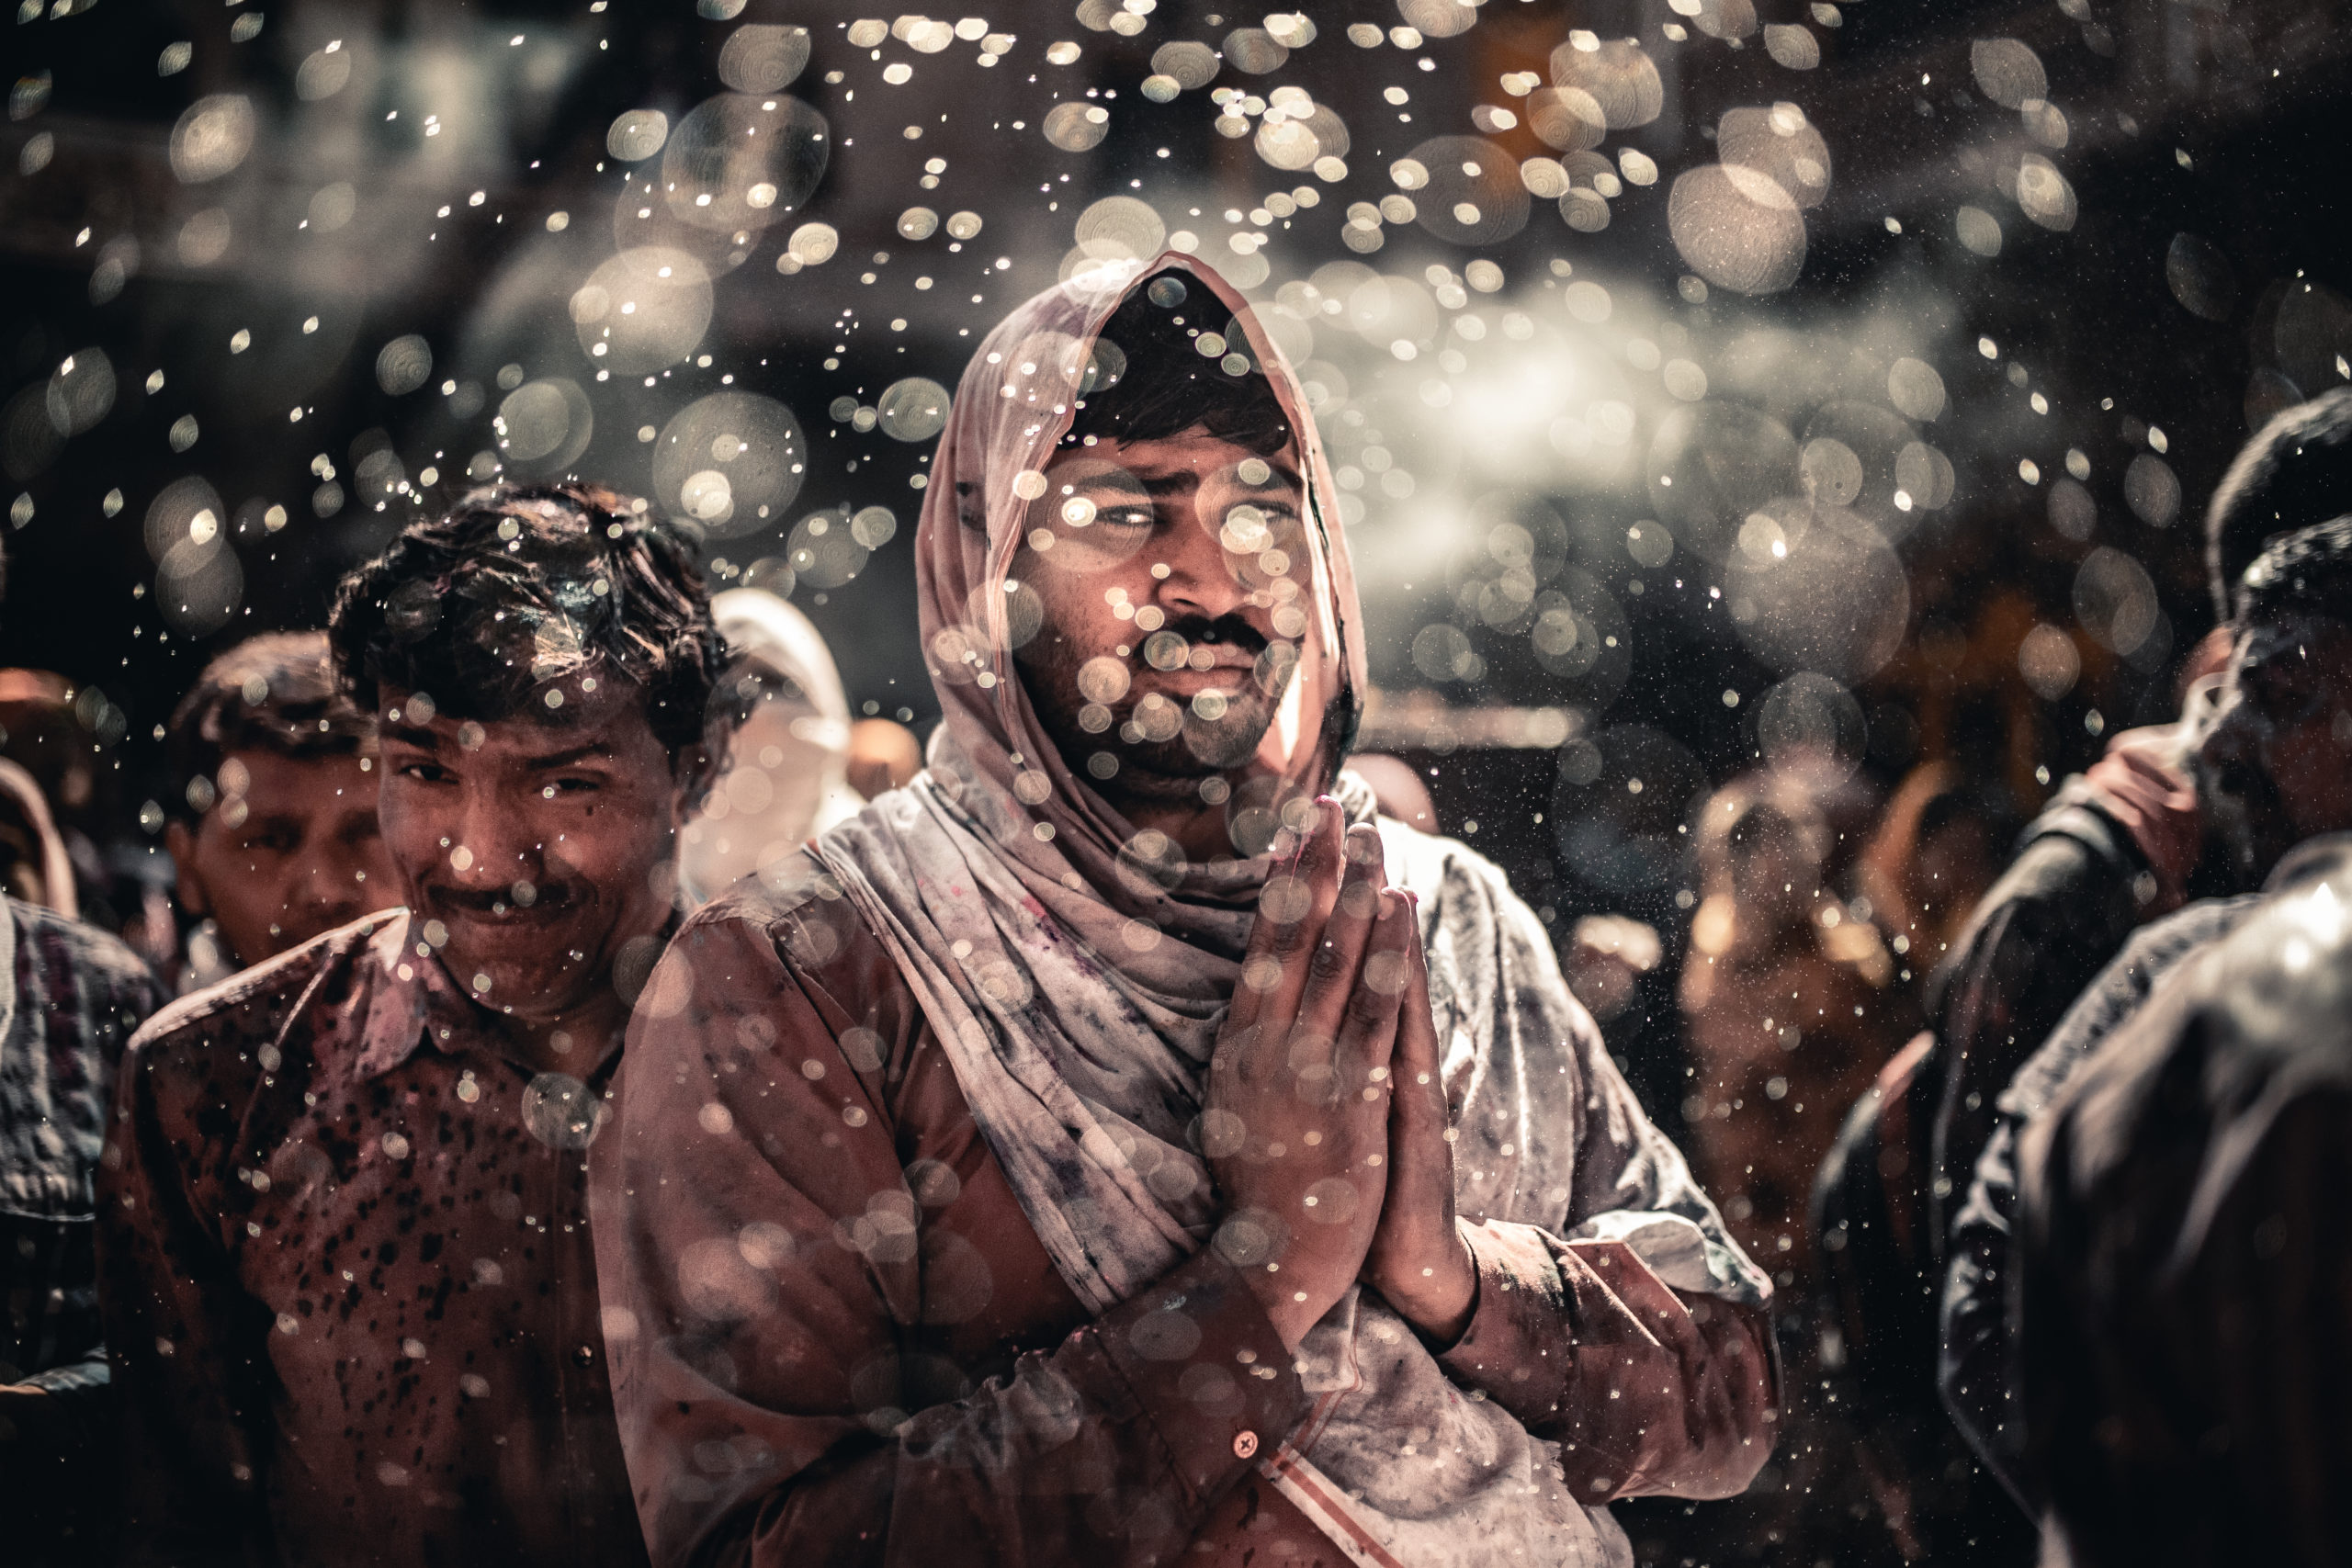
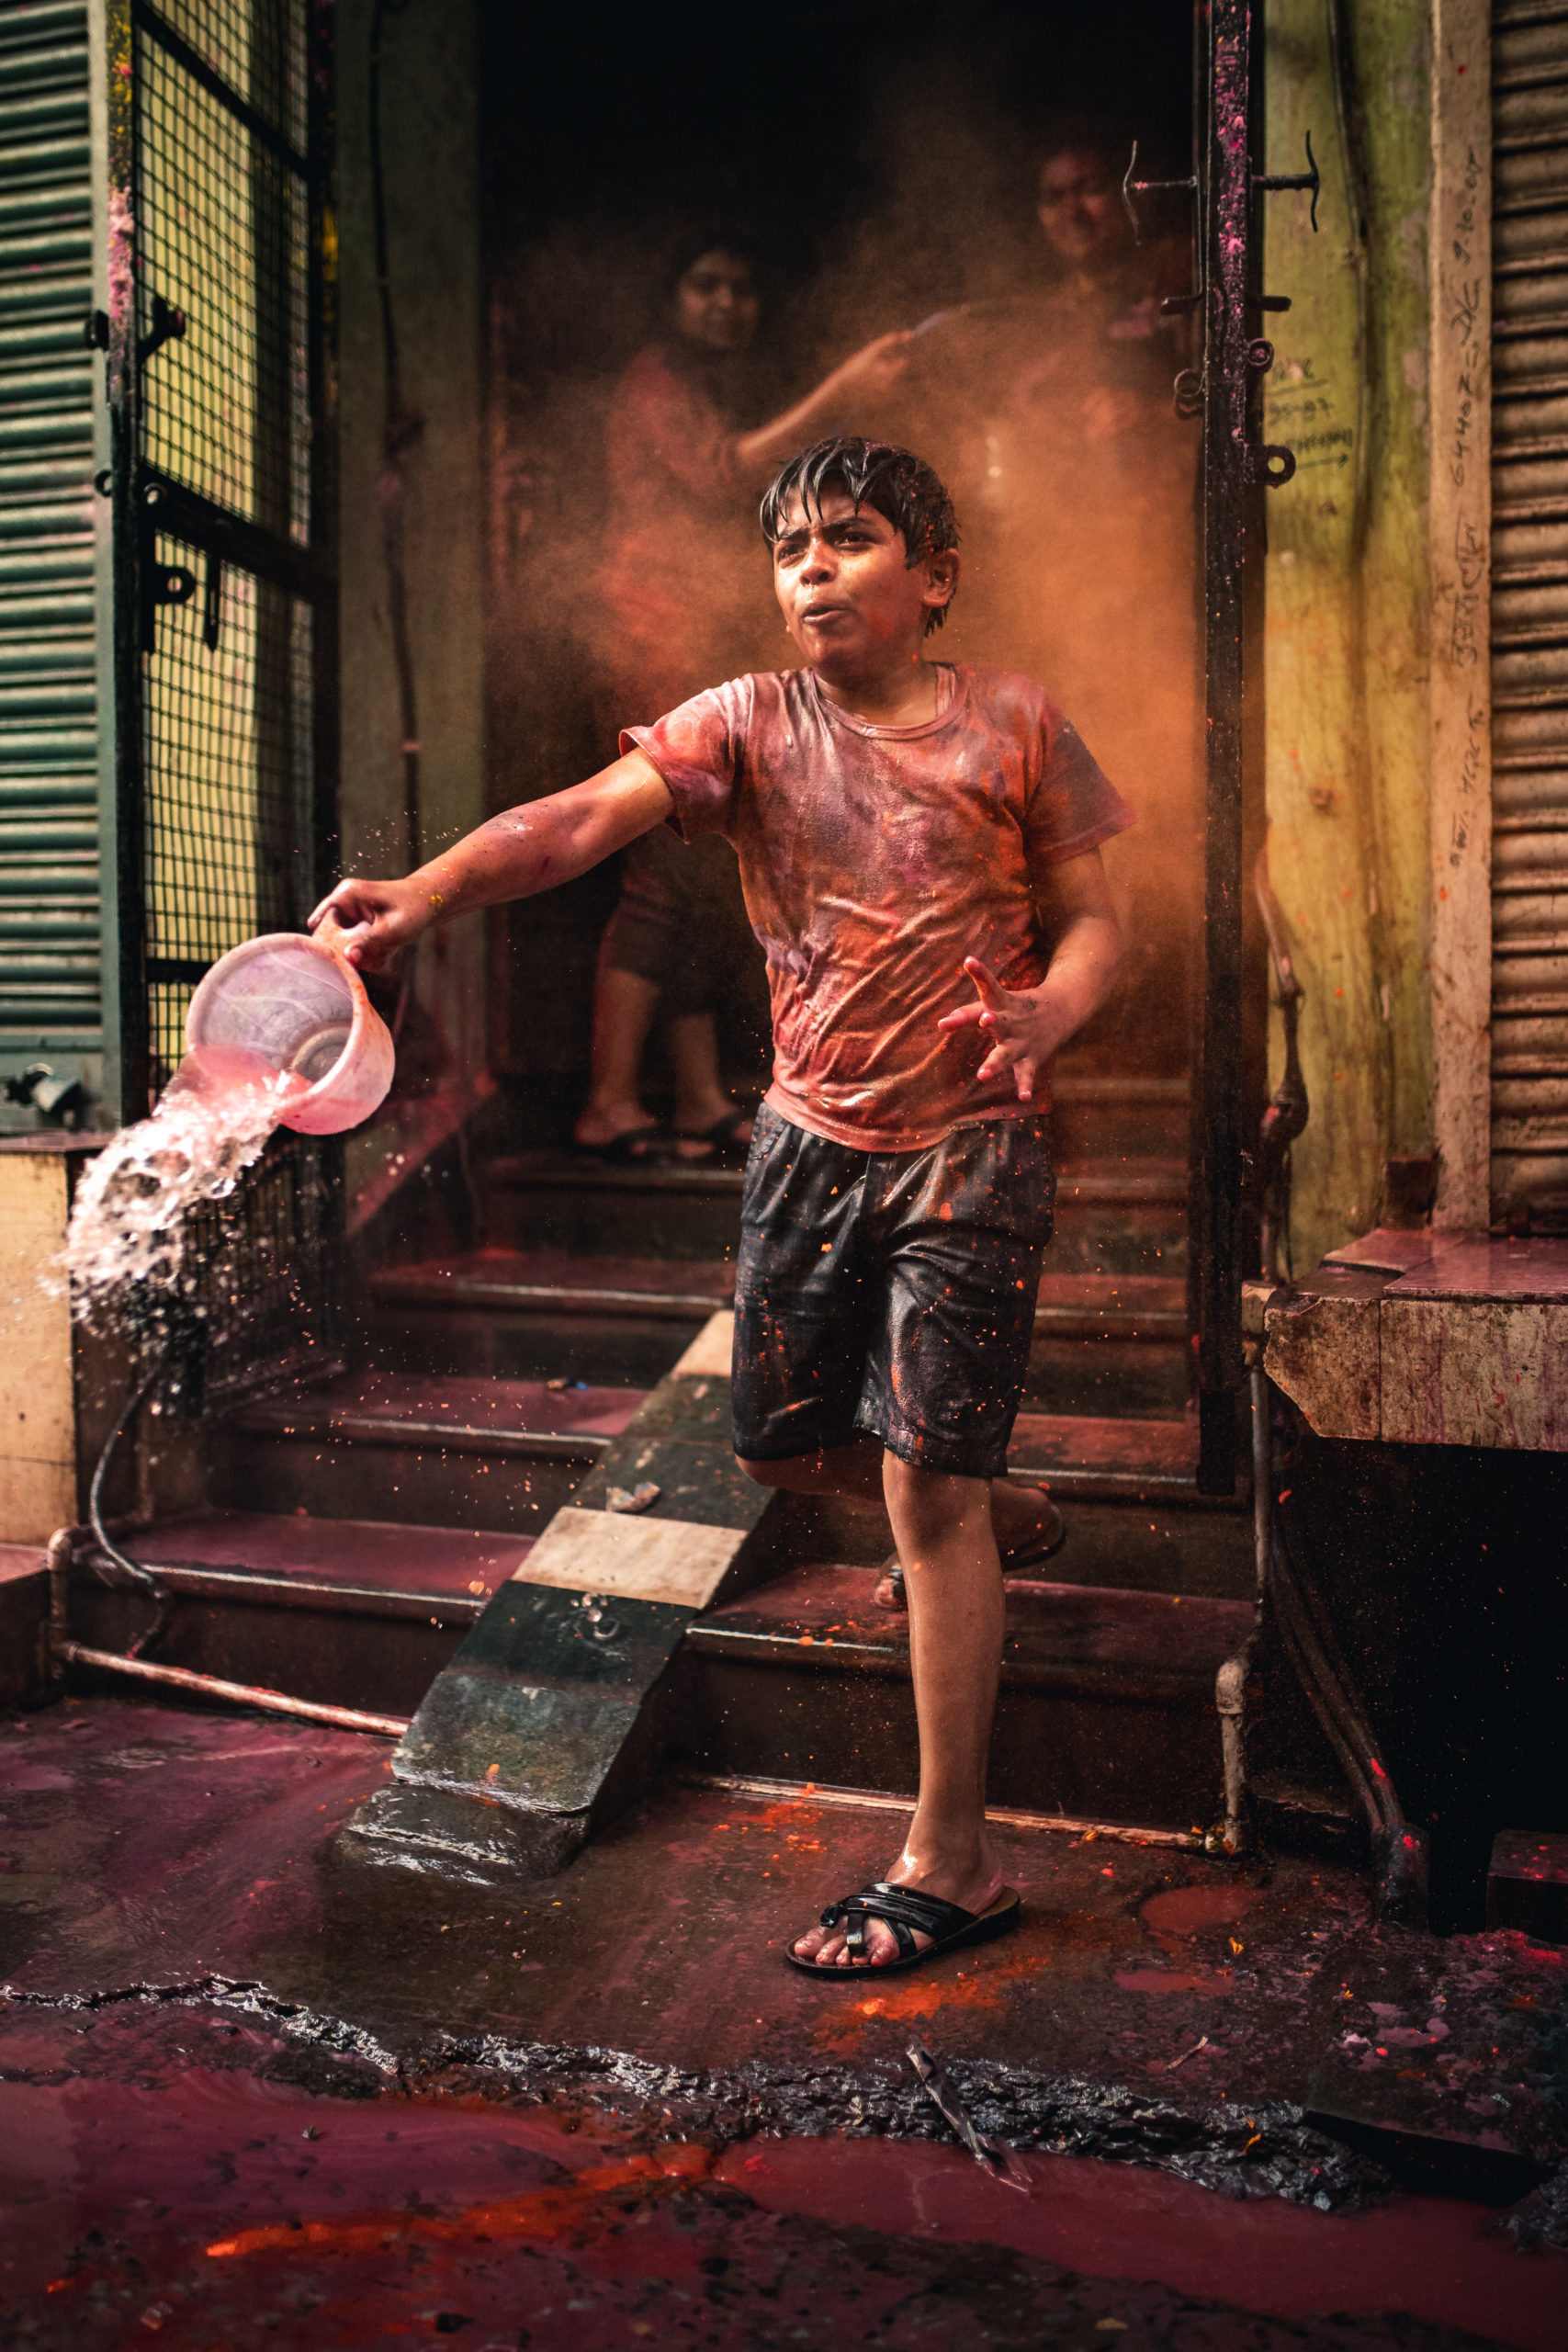
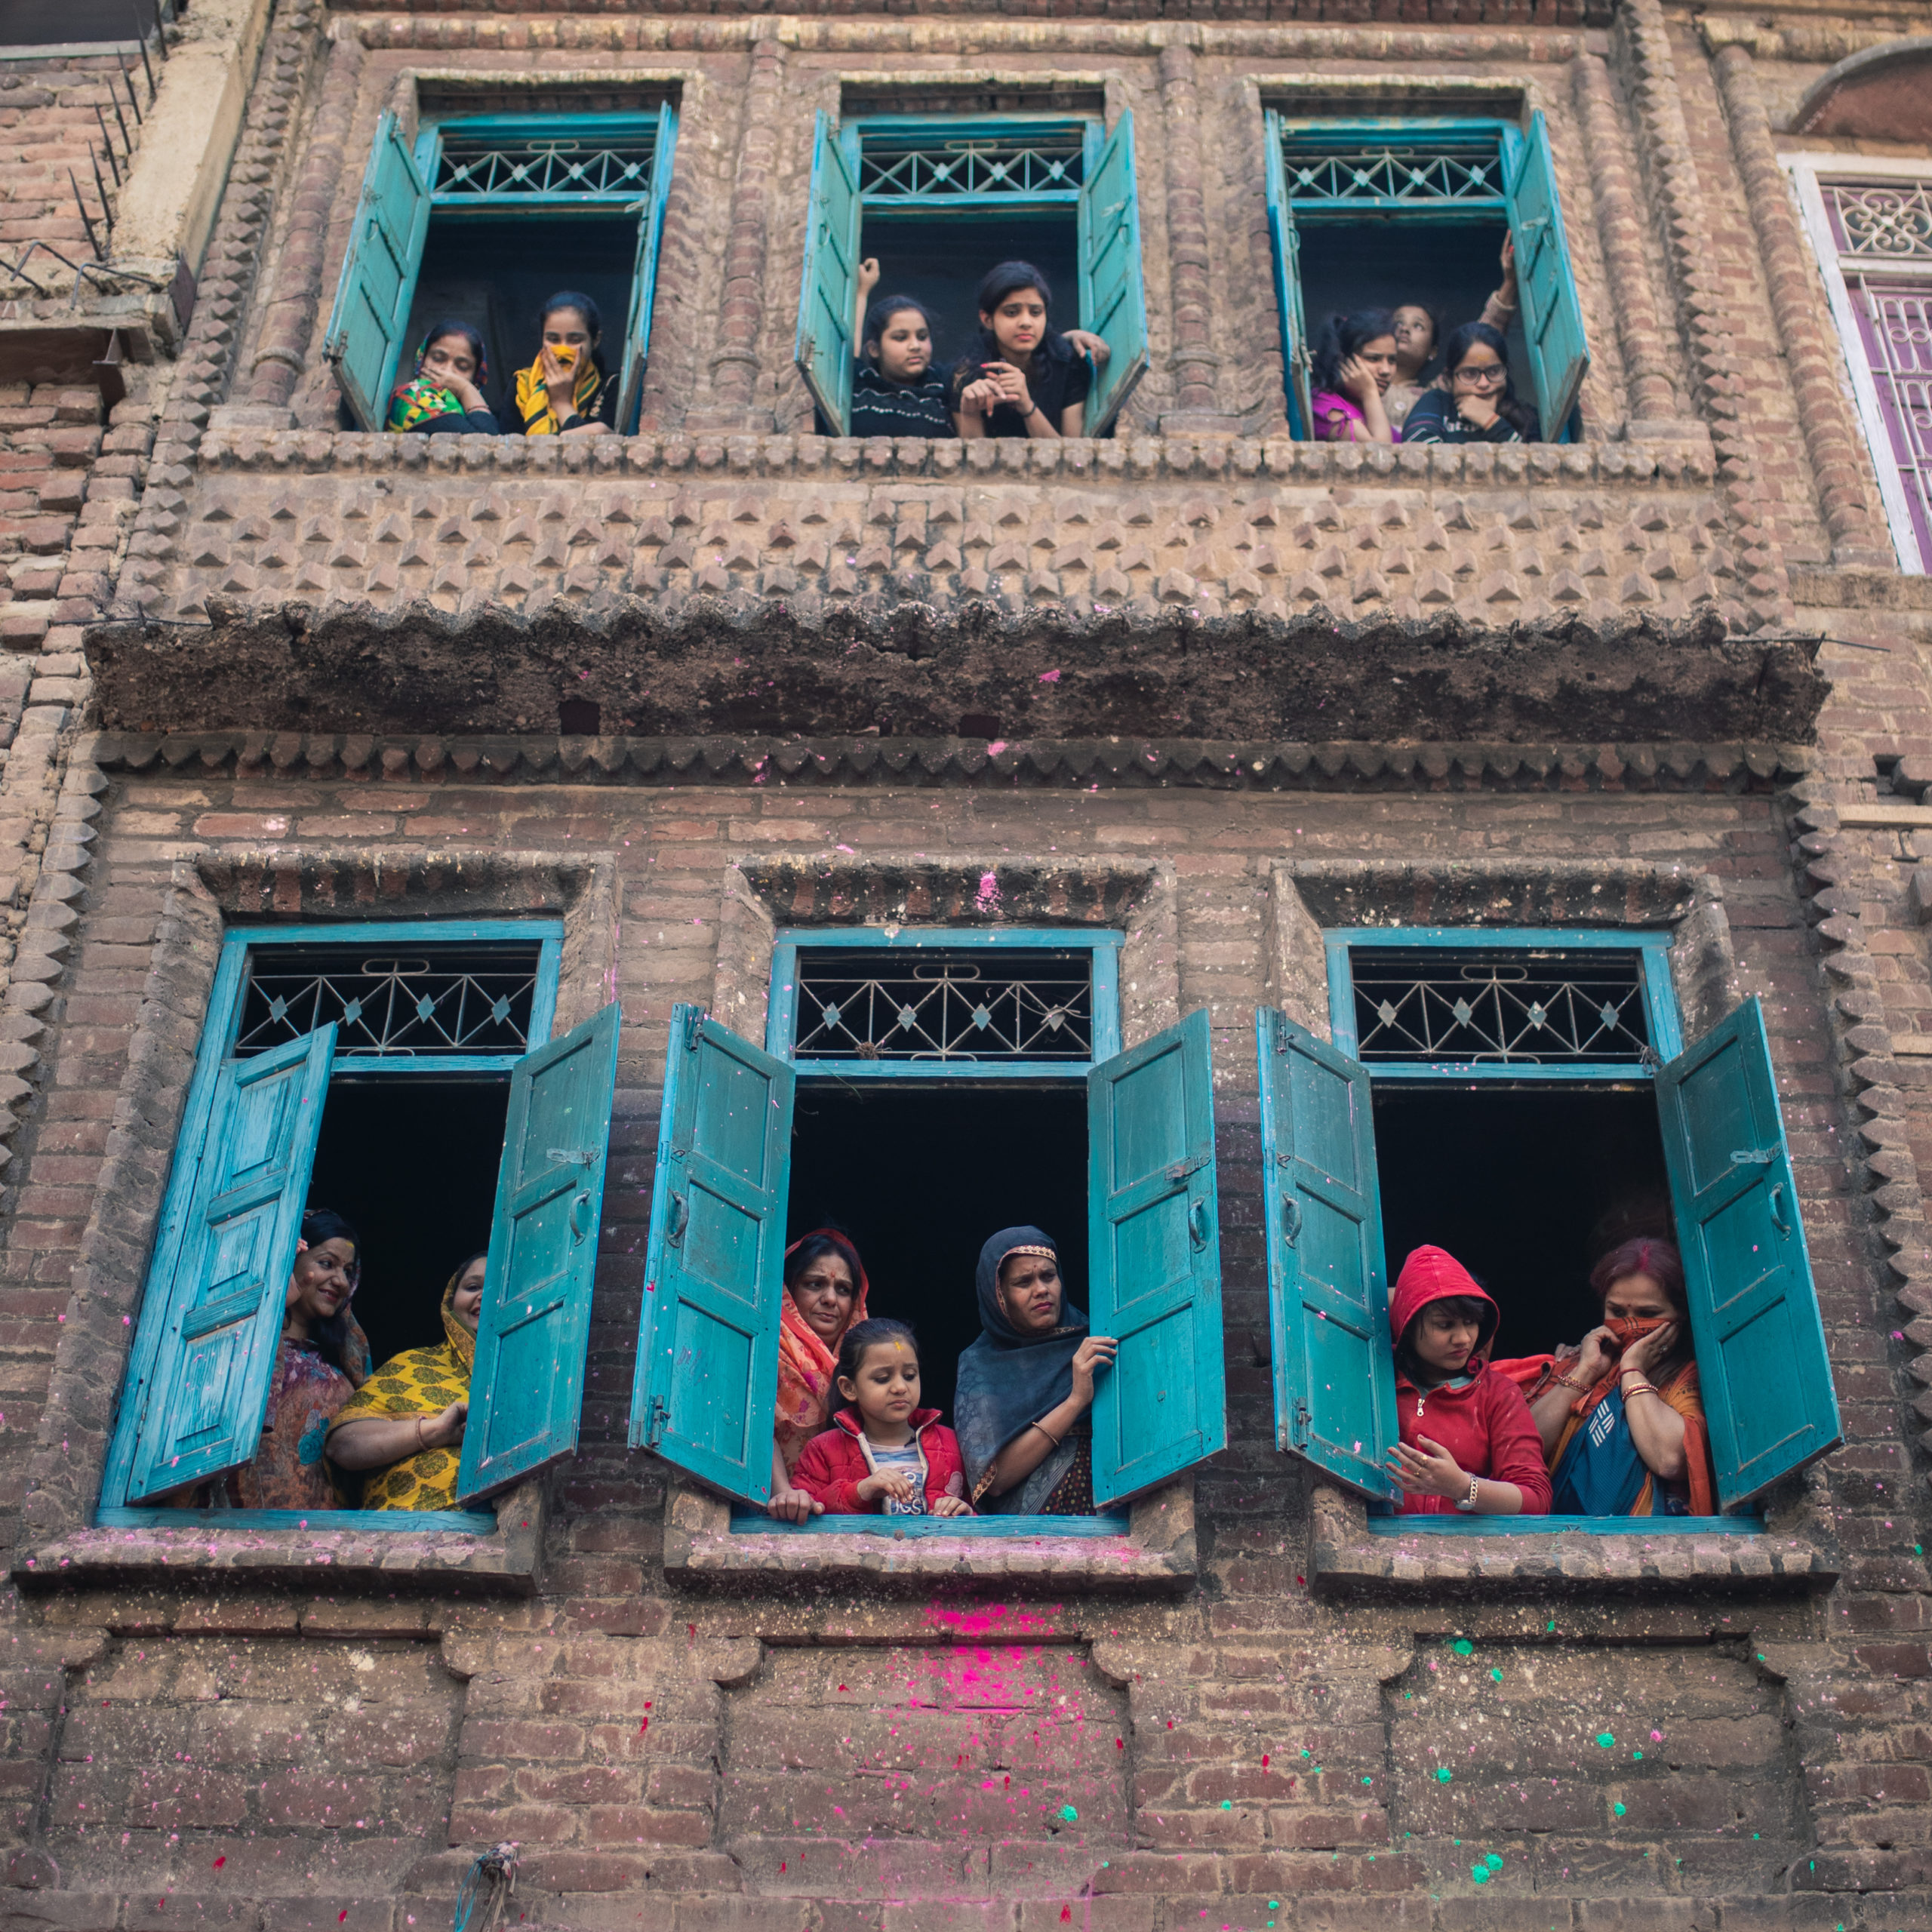
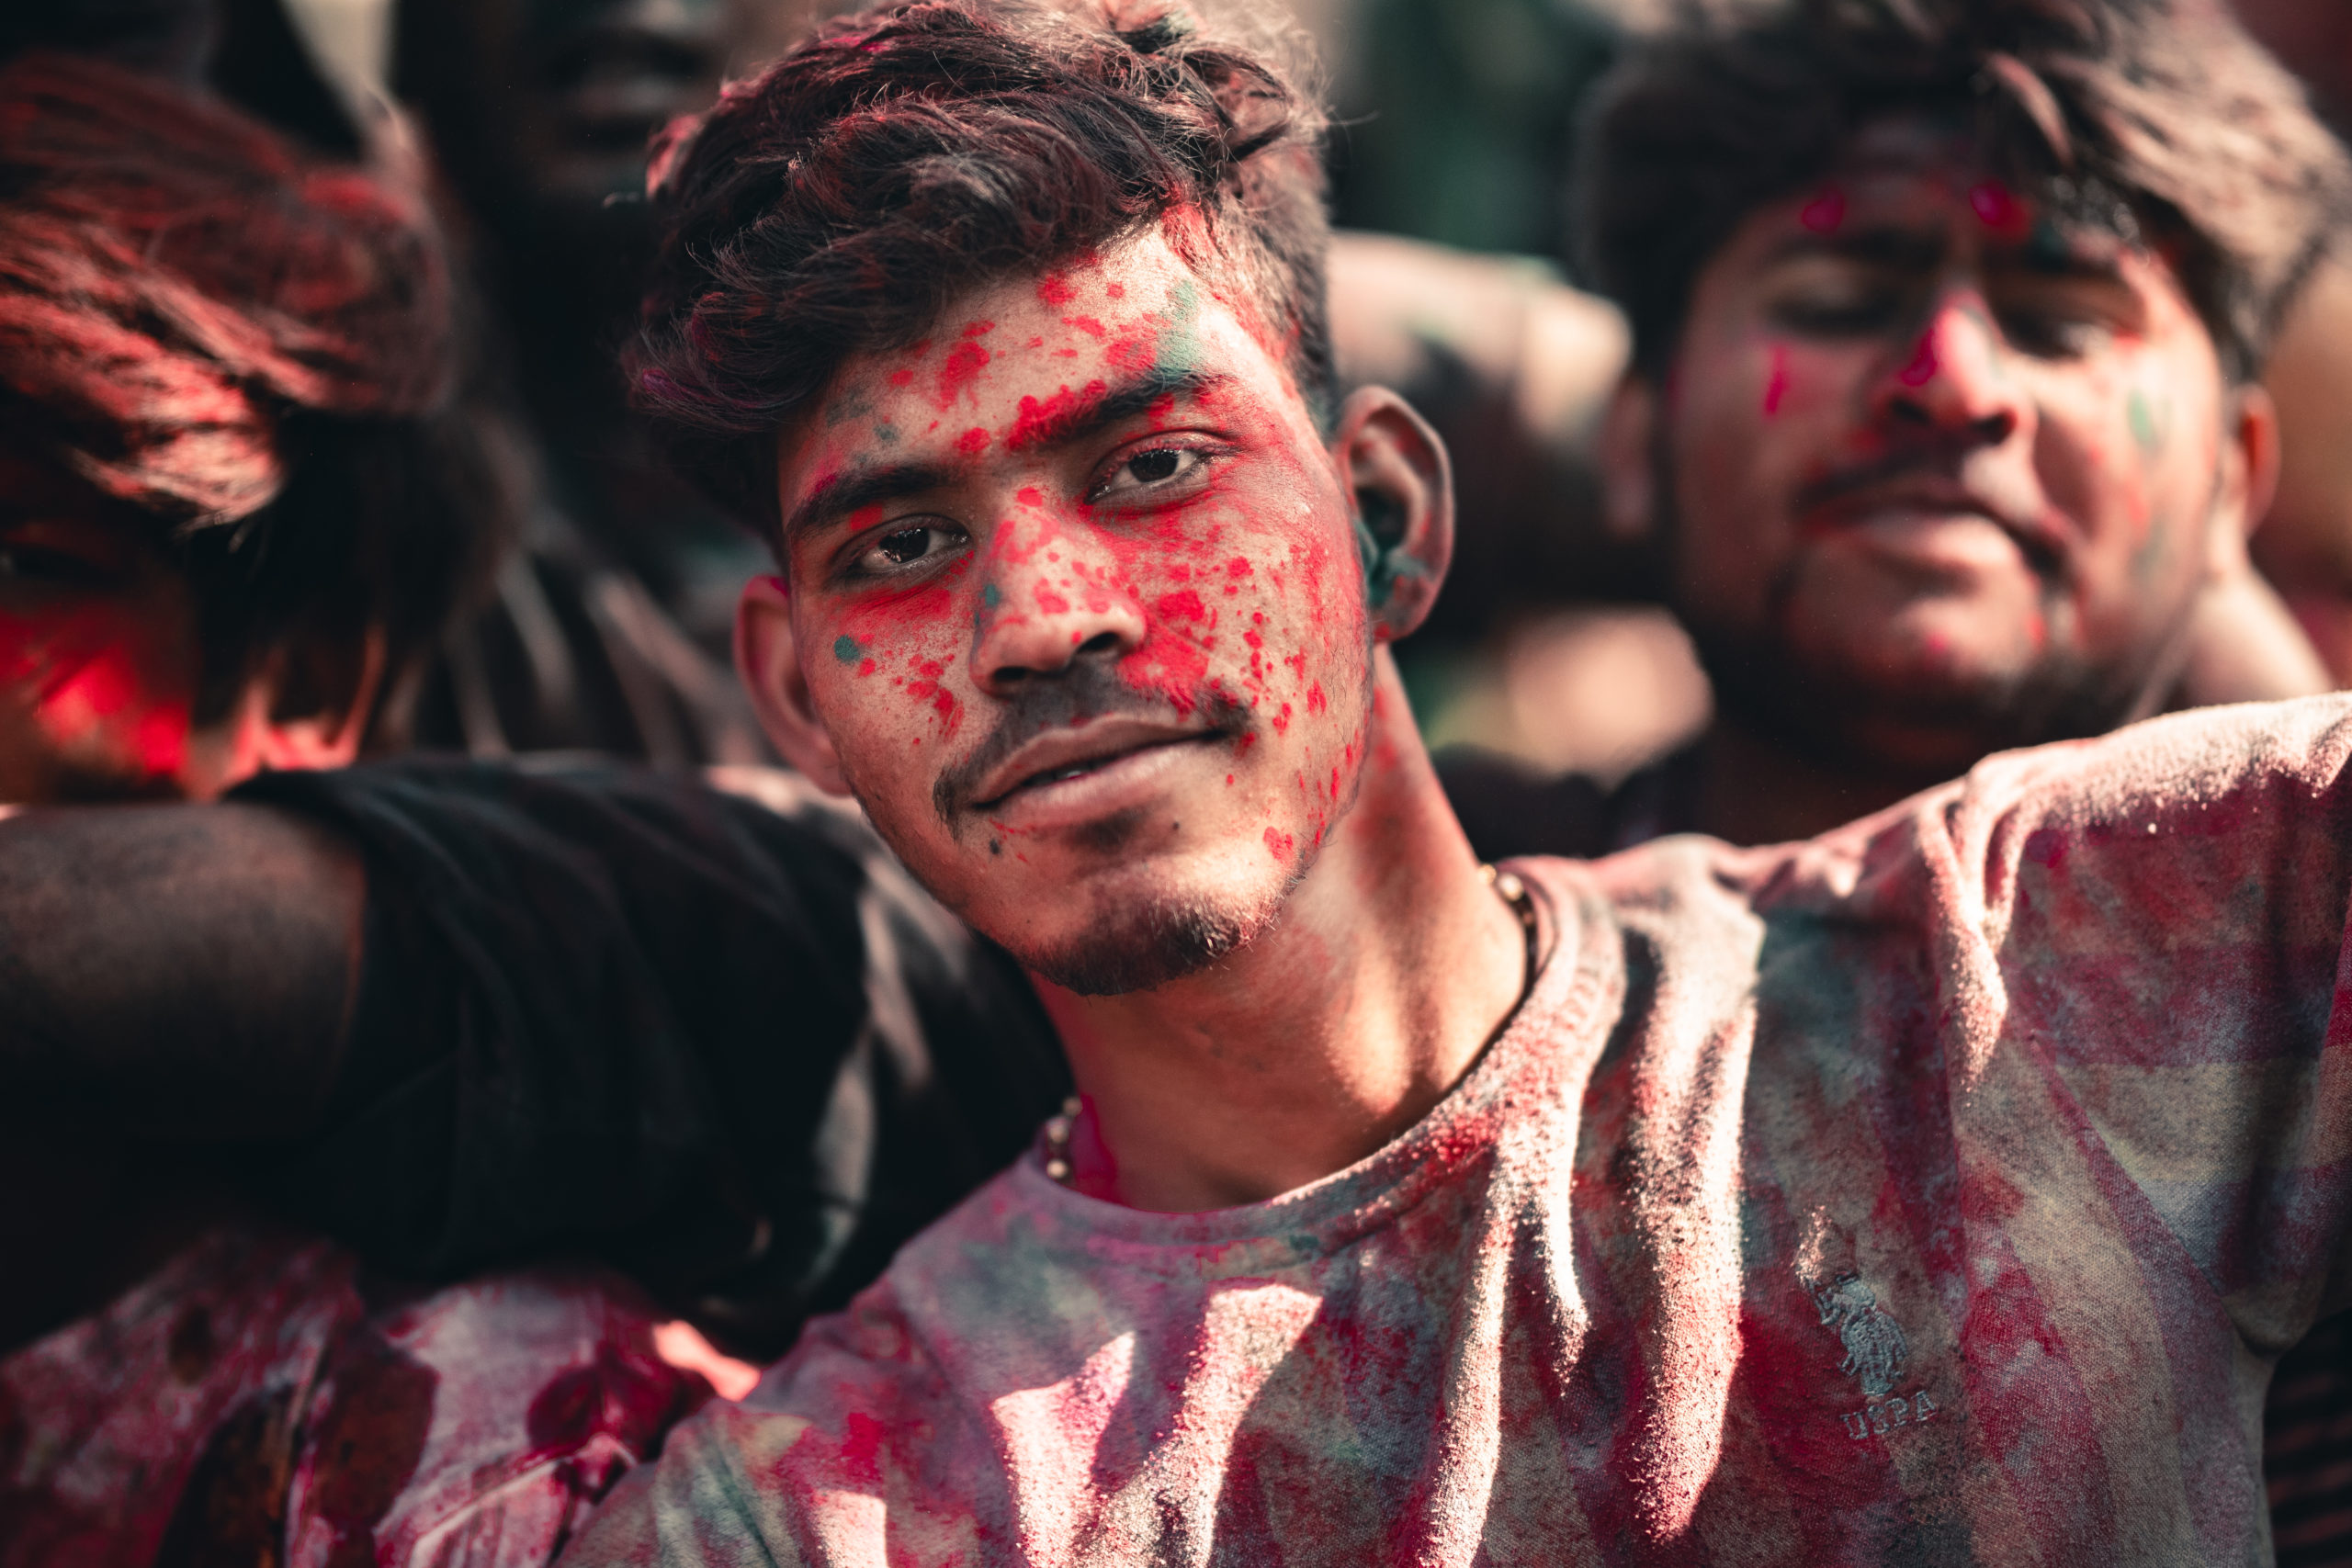
Holi Festival India Photography
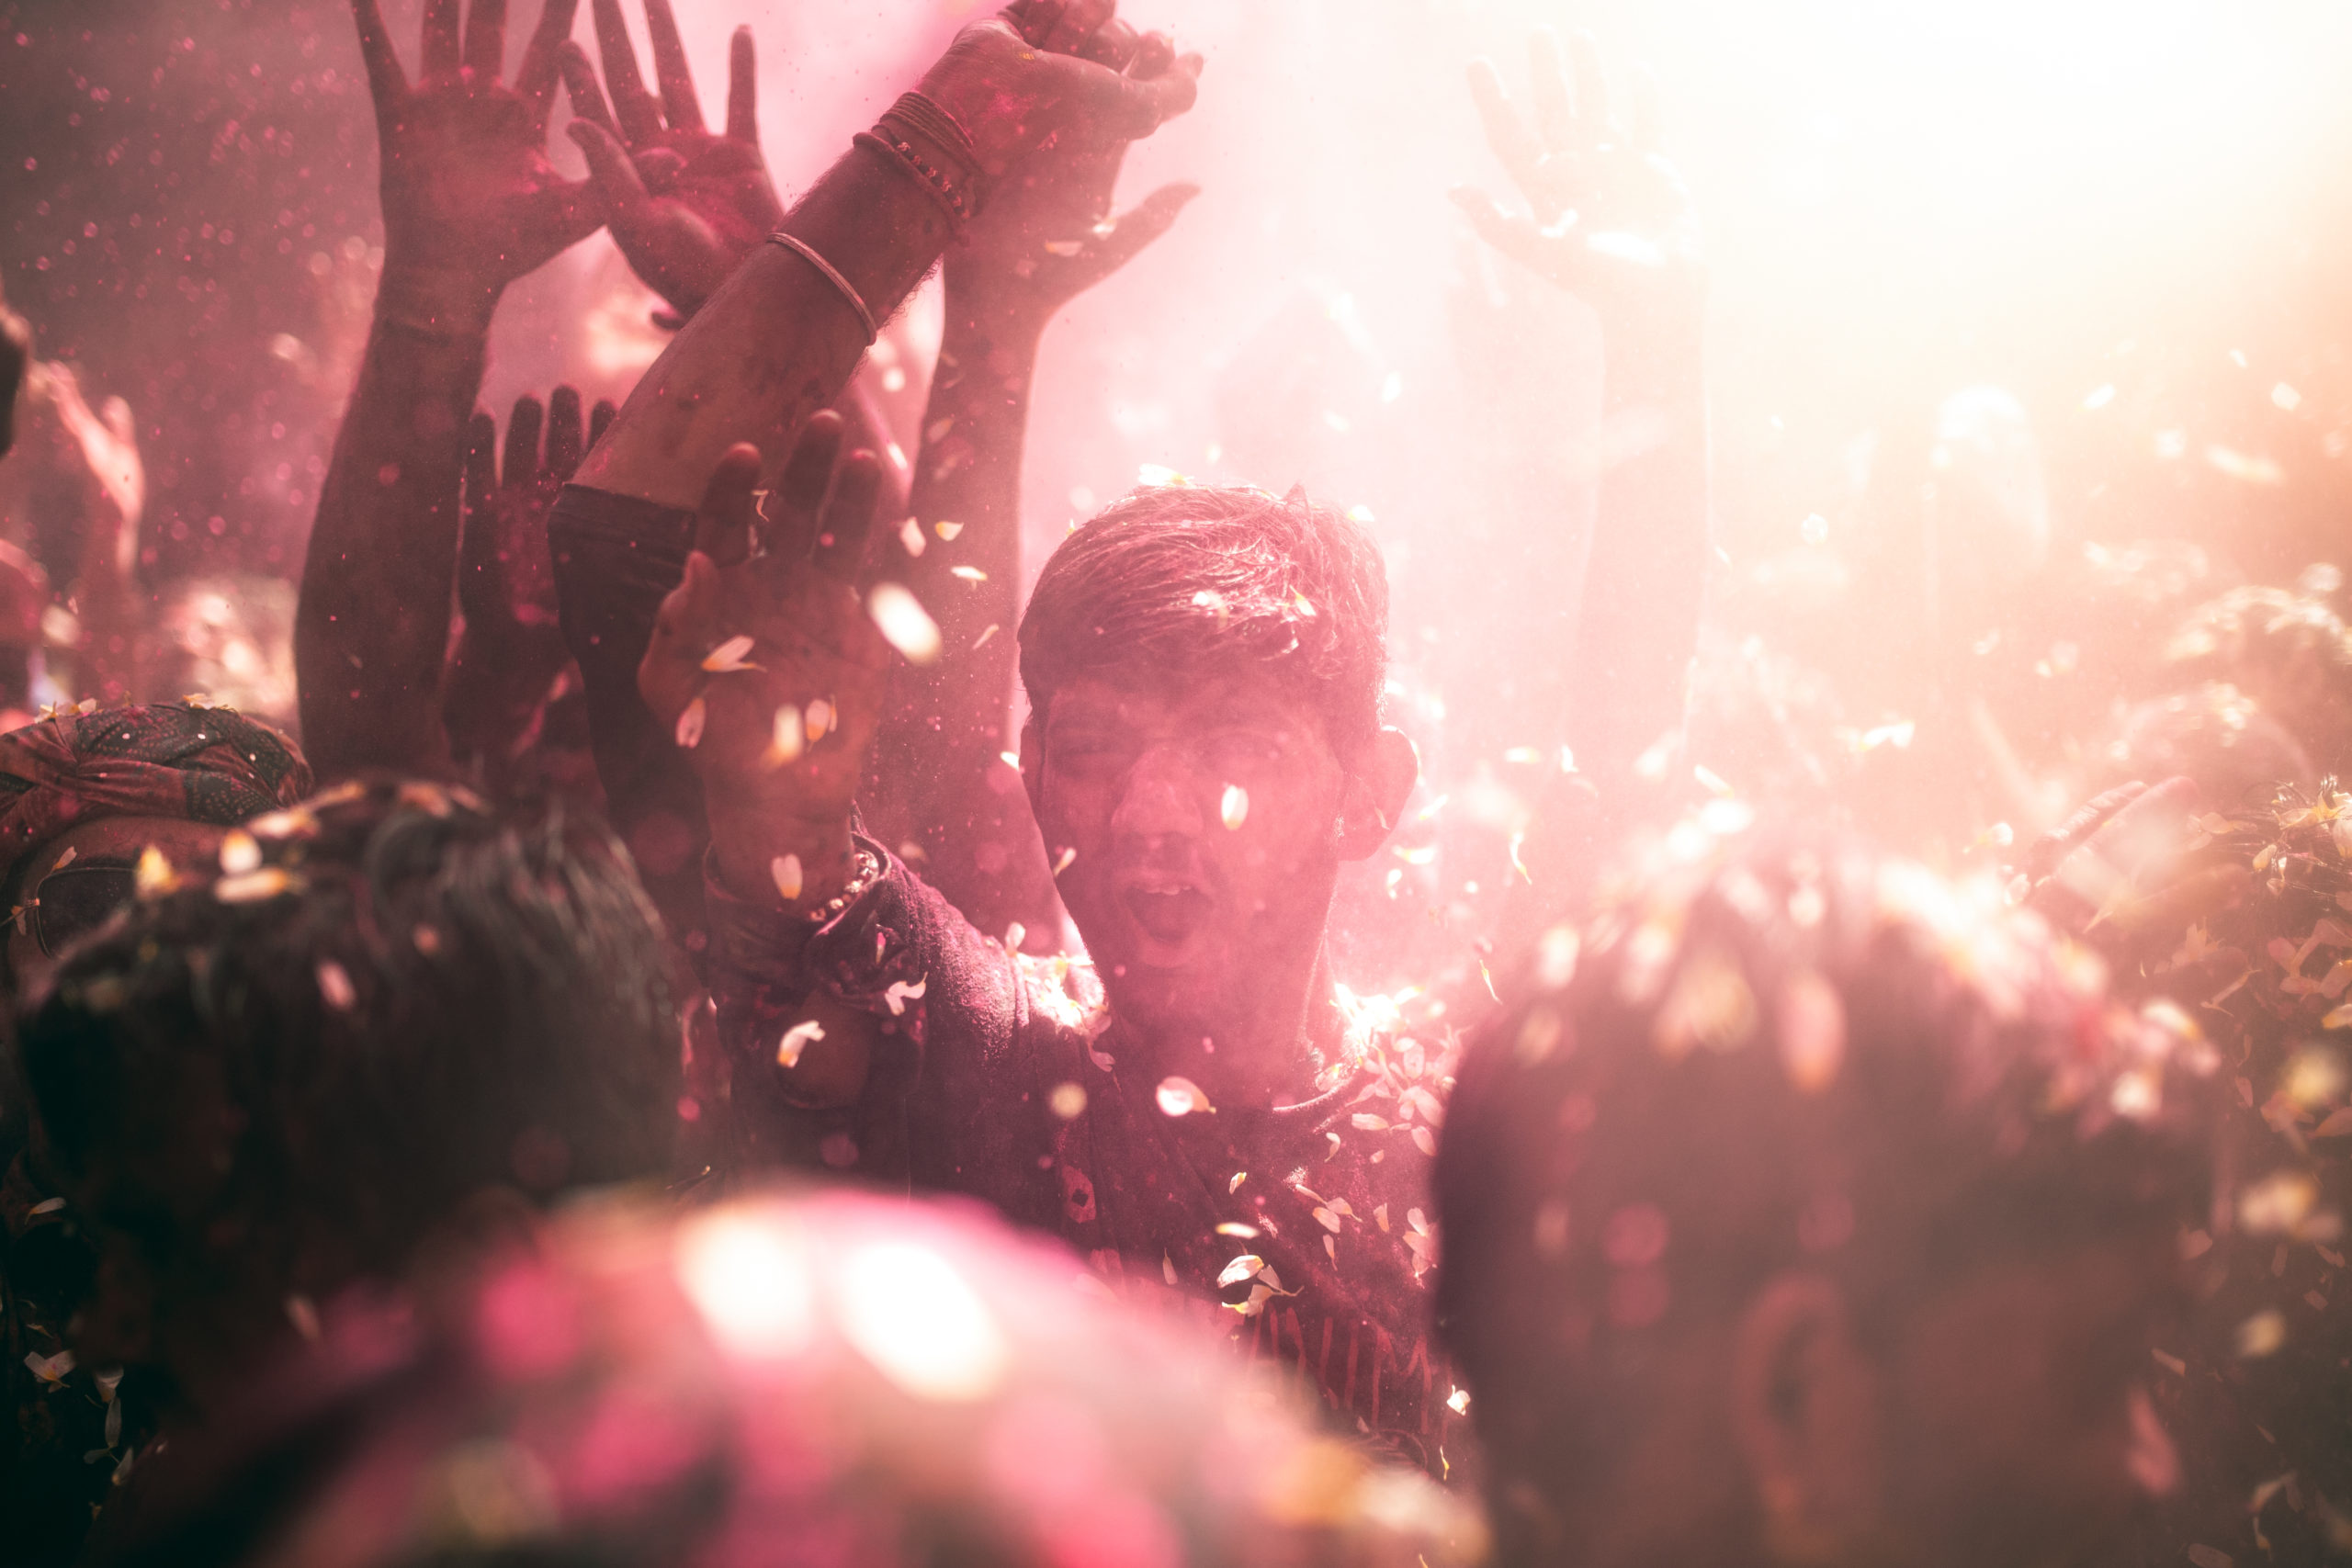
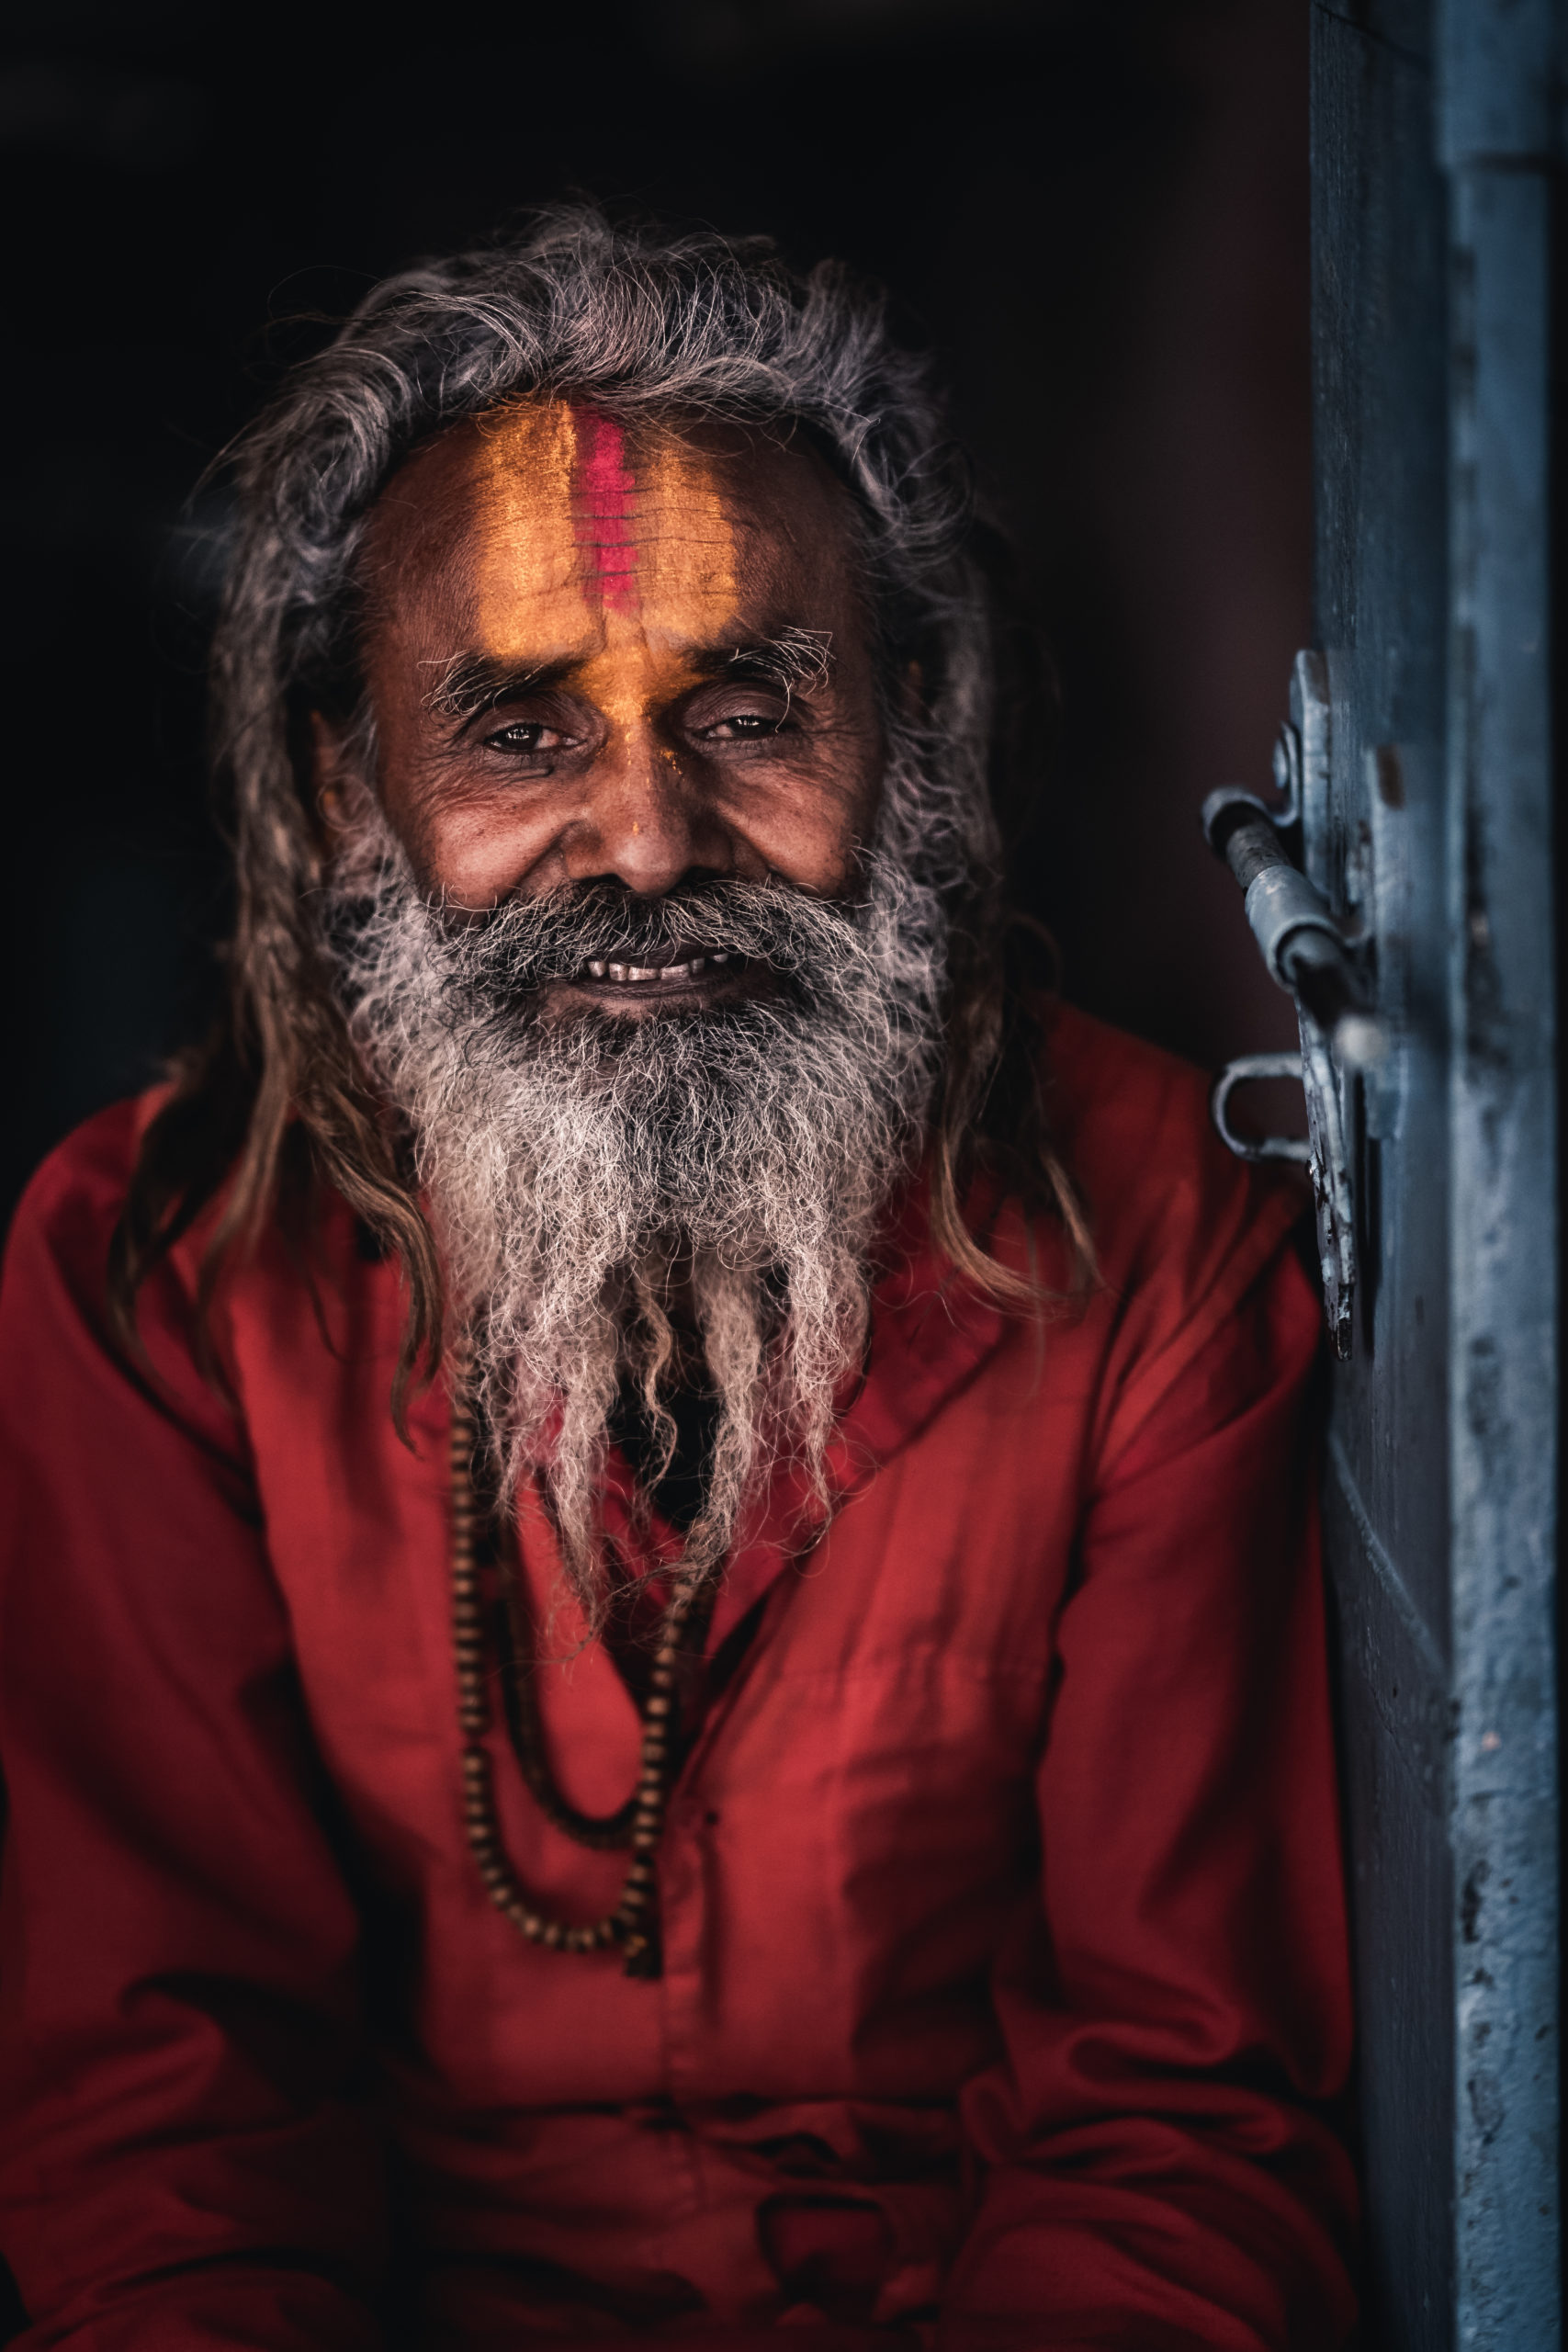
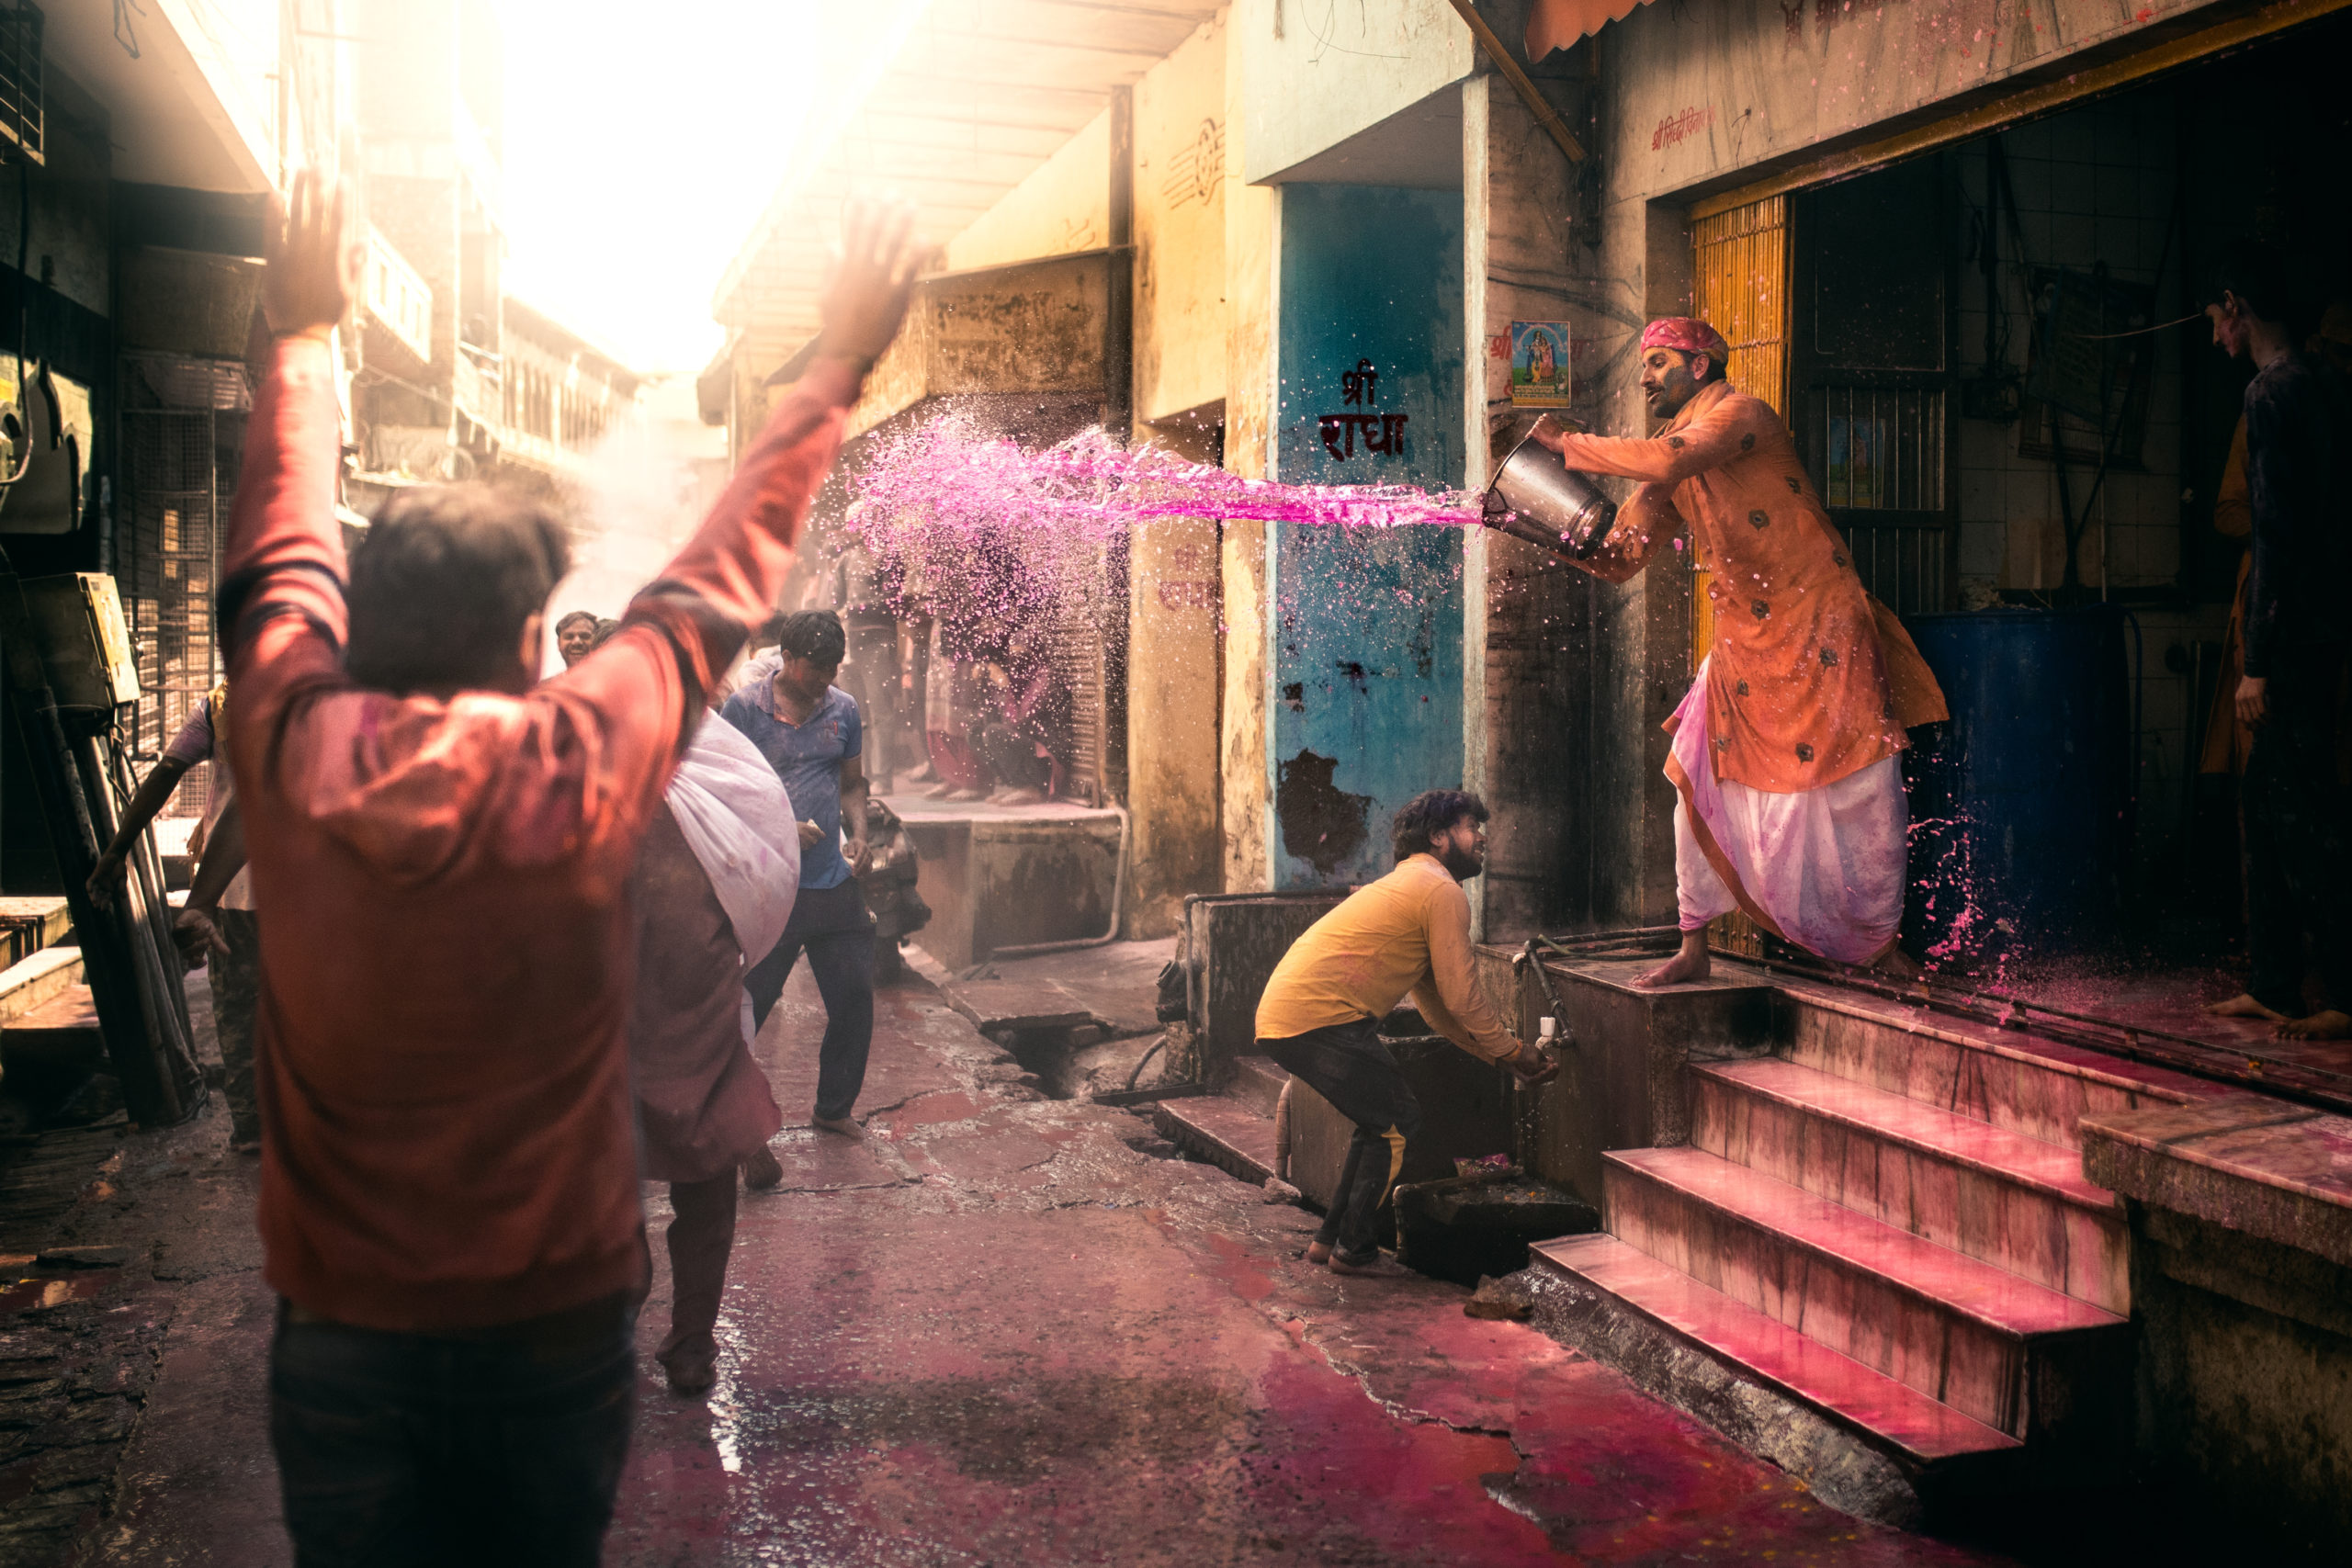
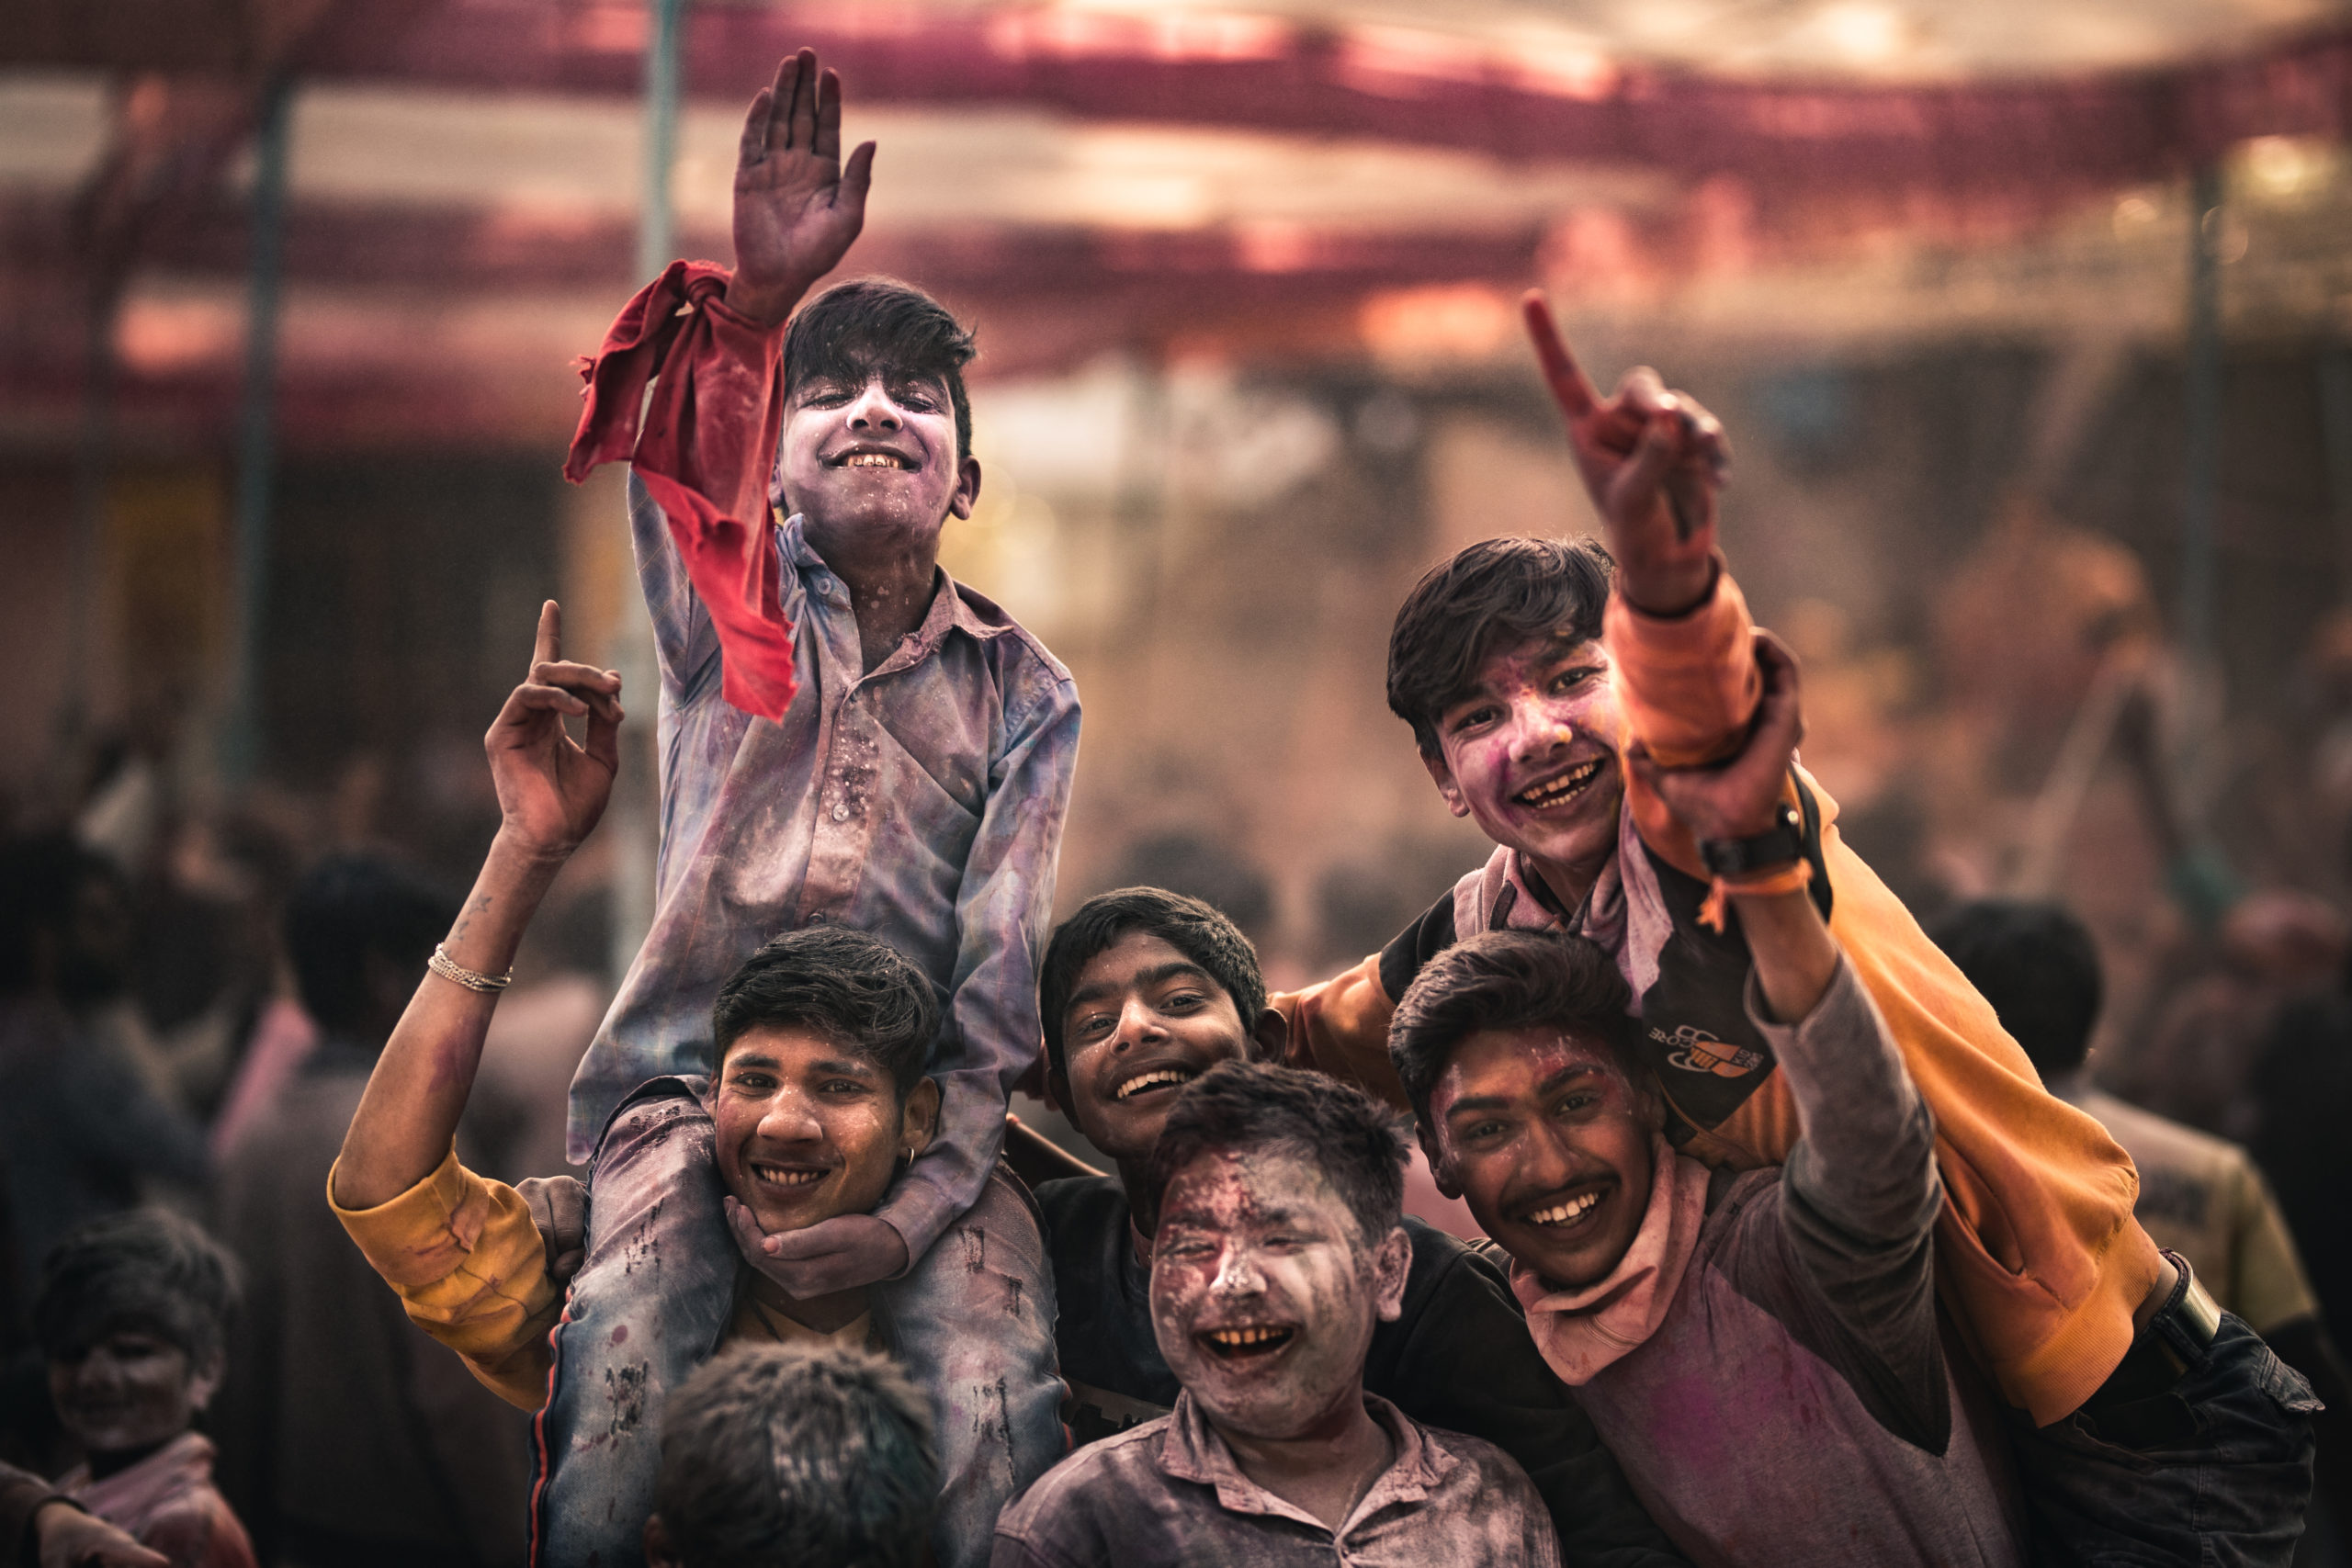
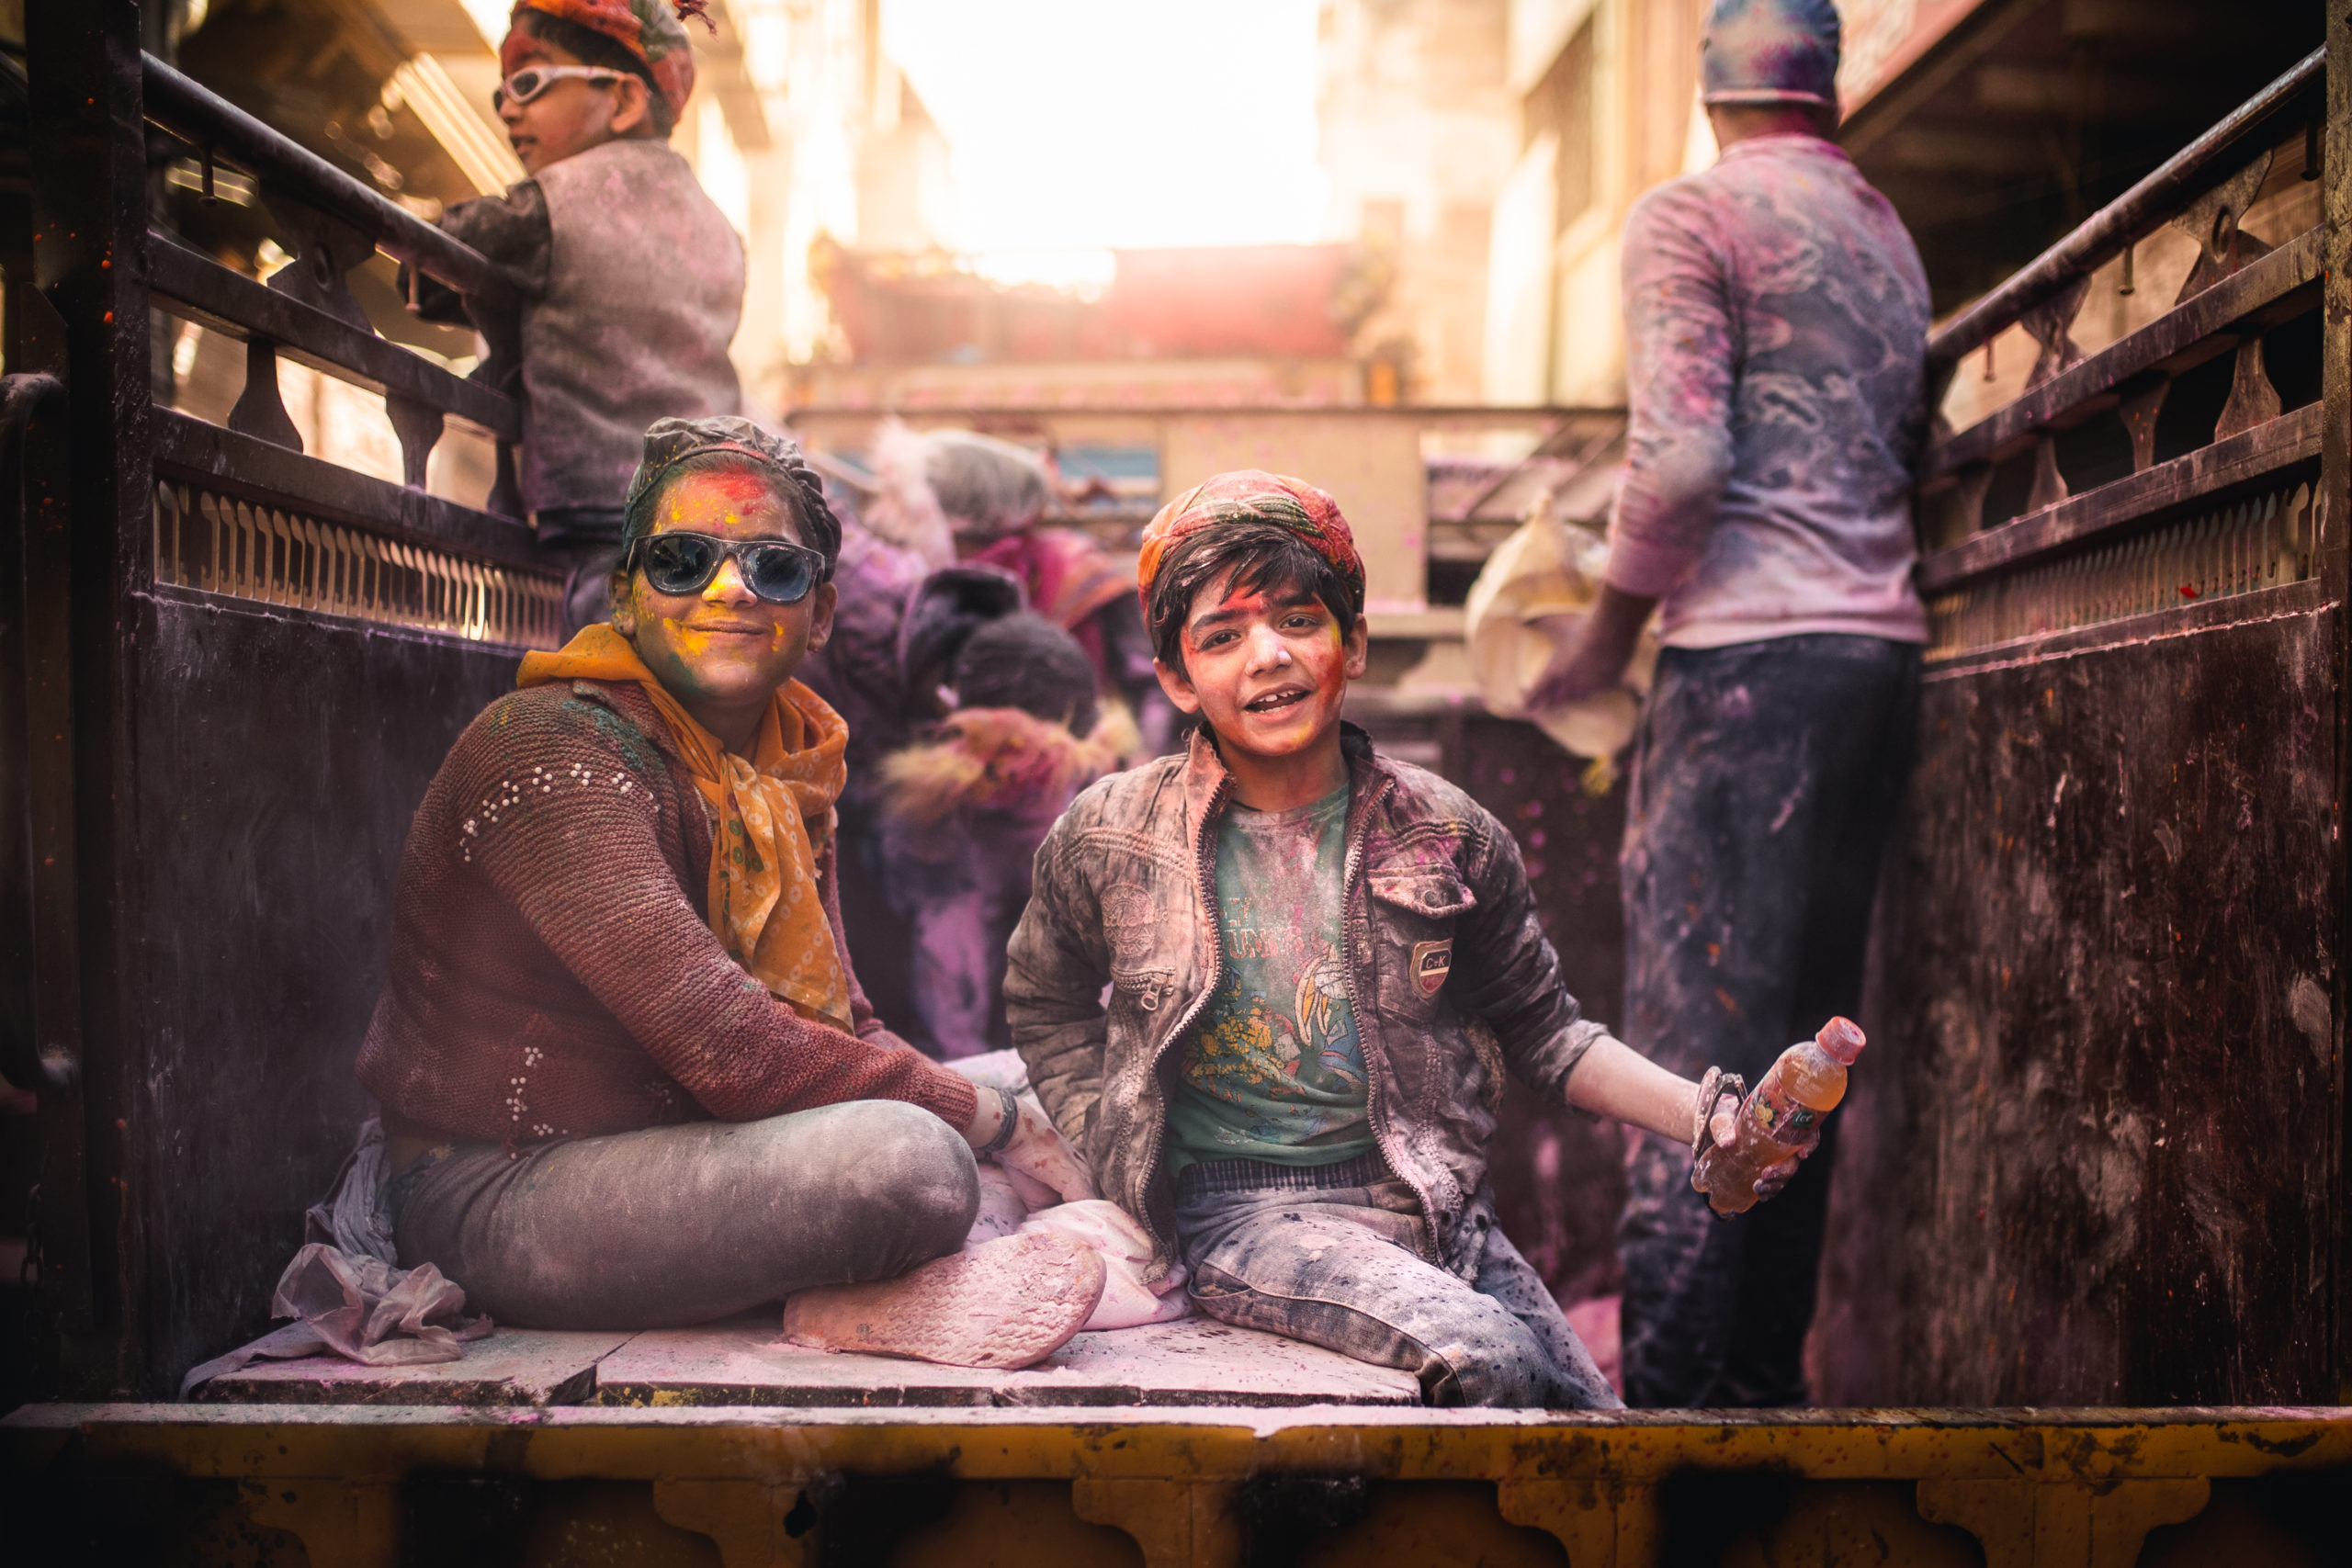
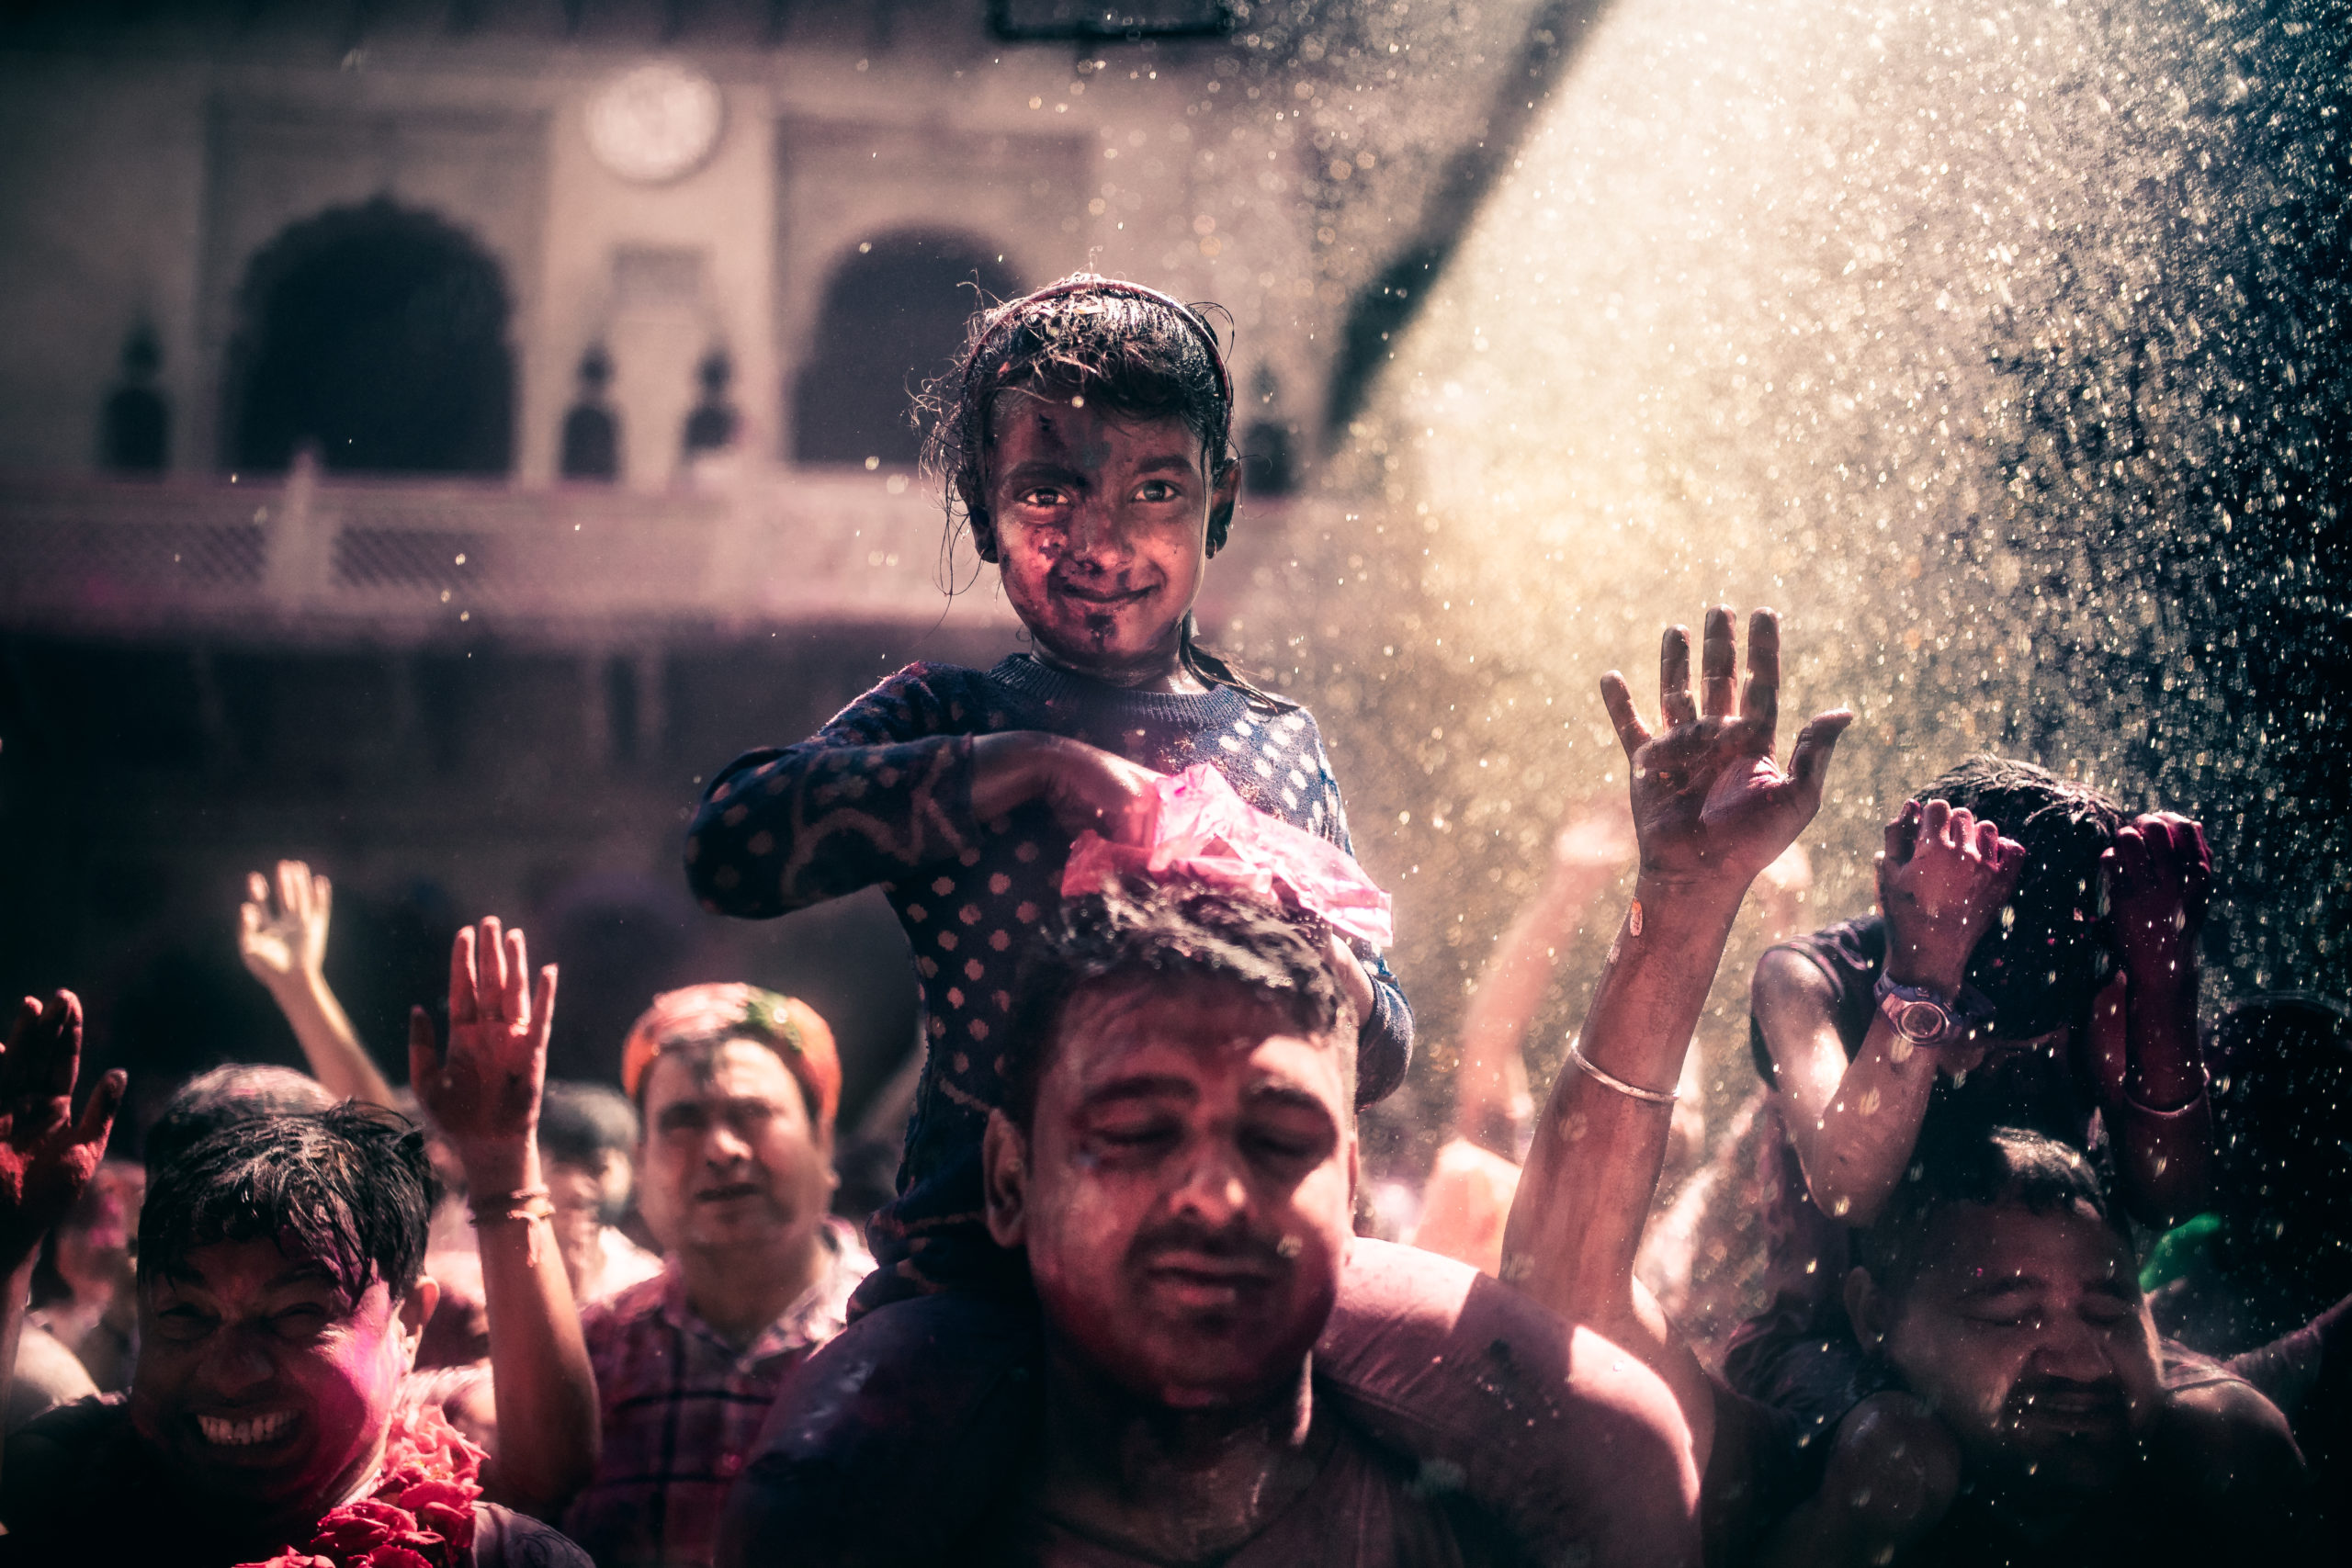
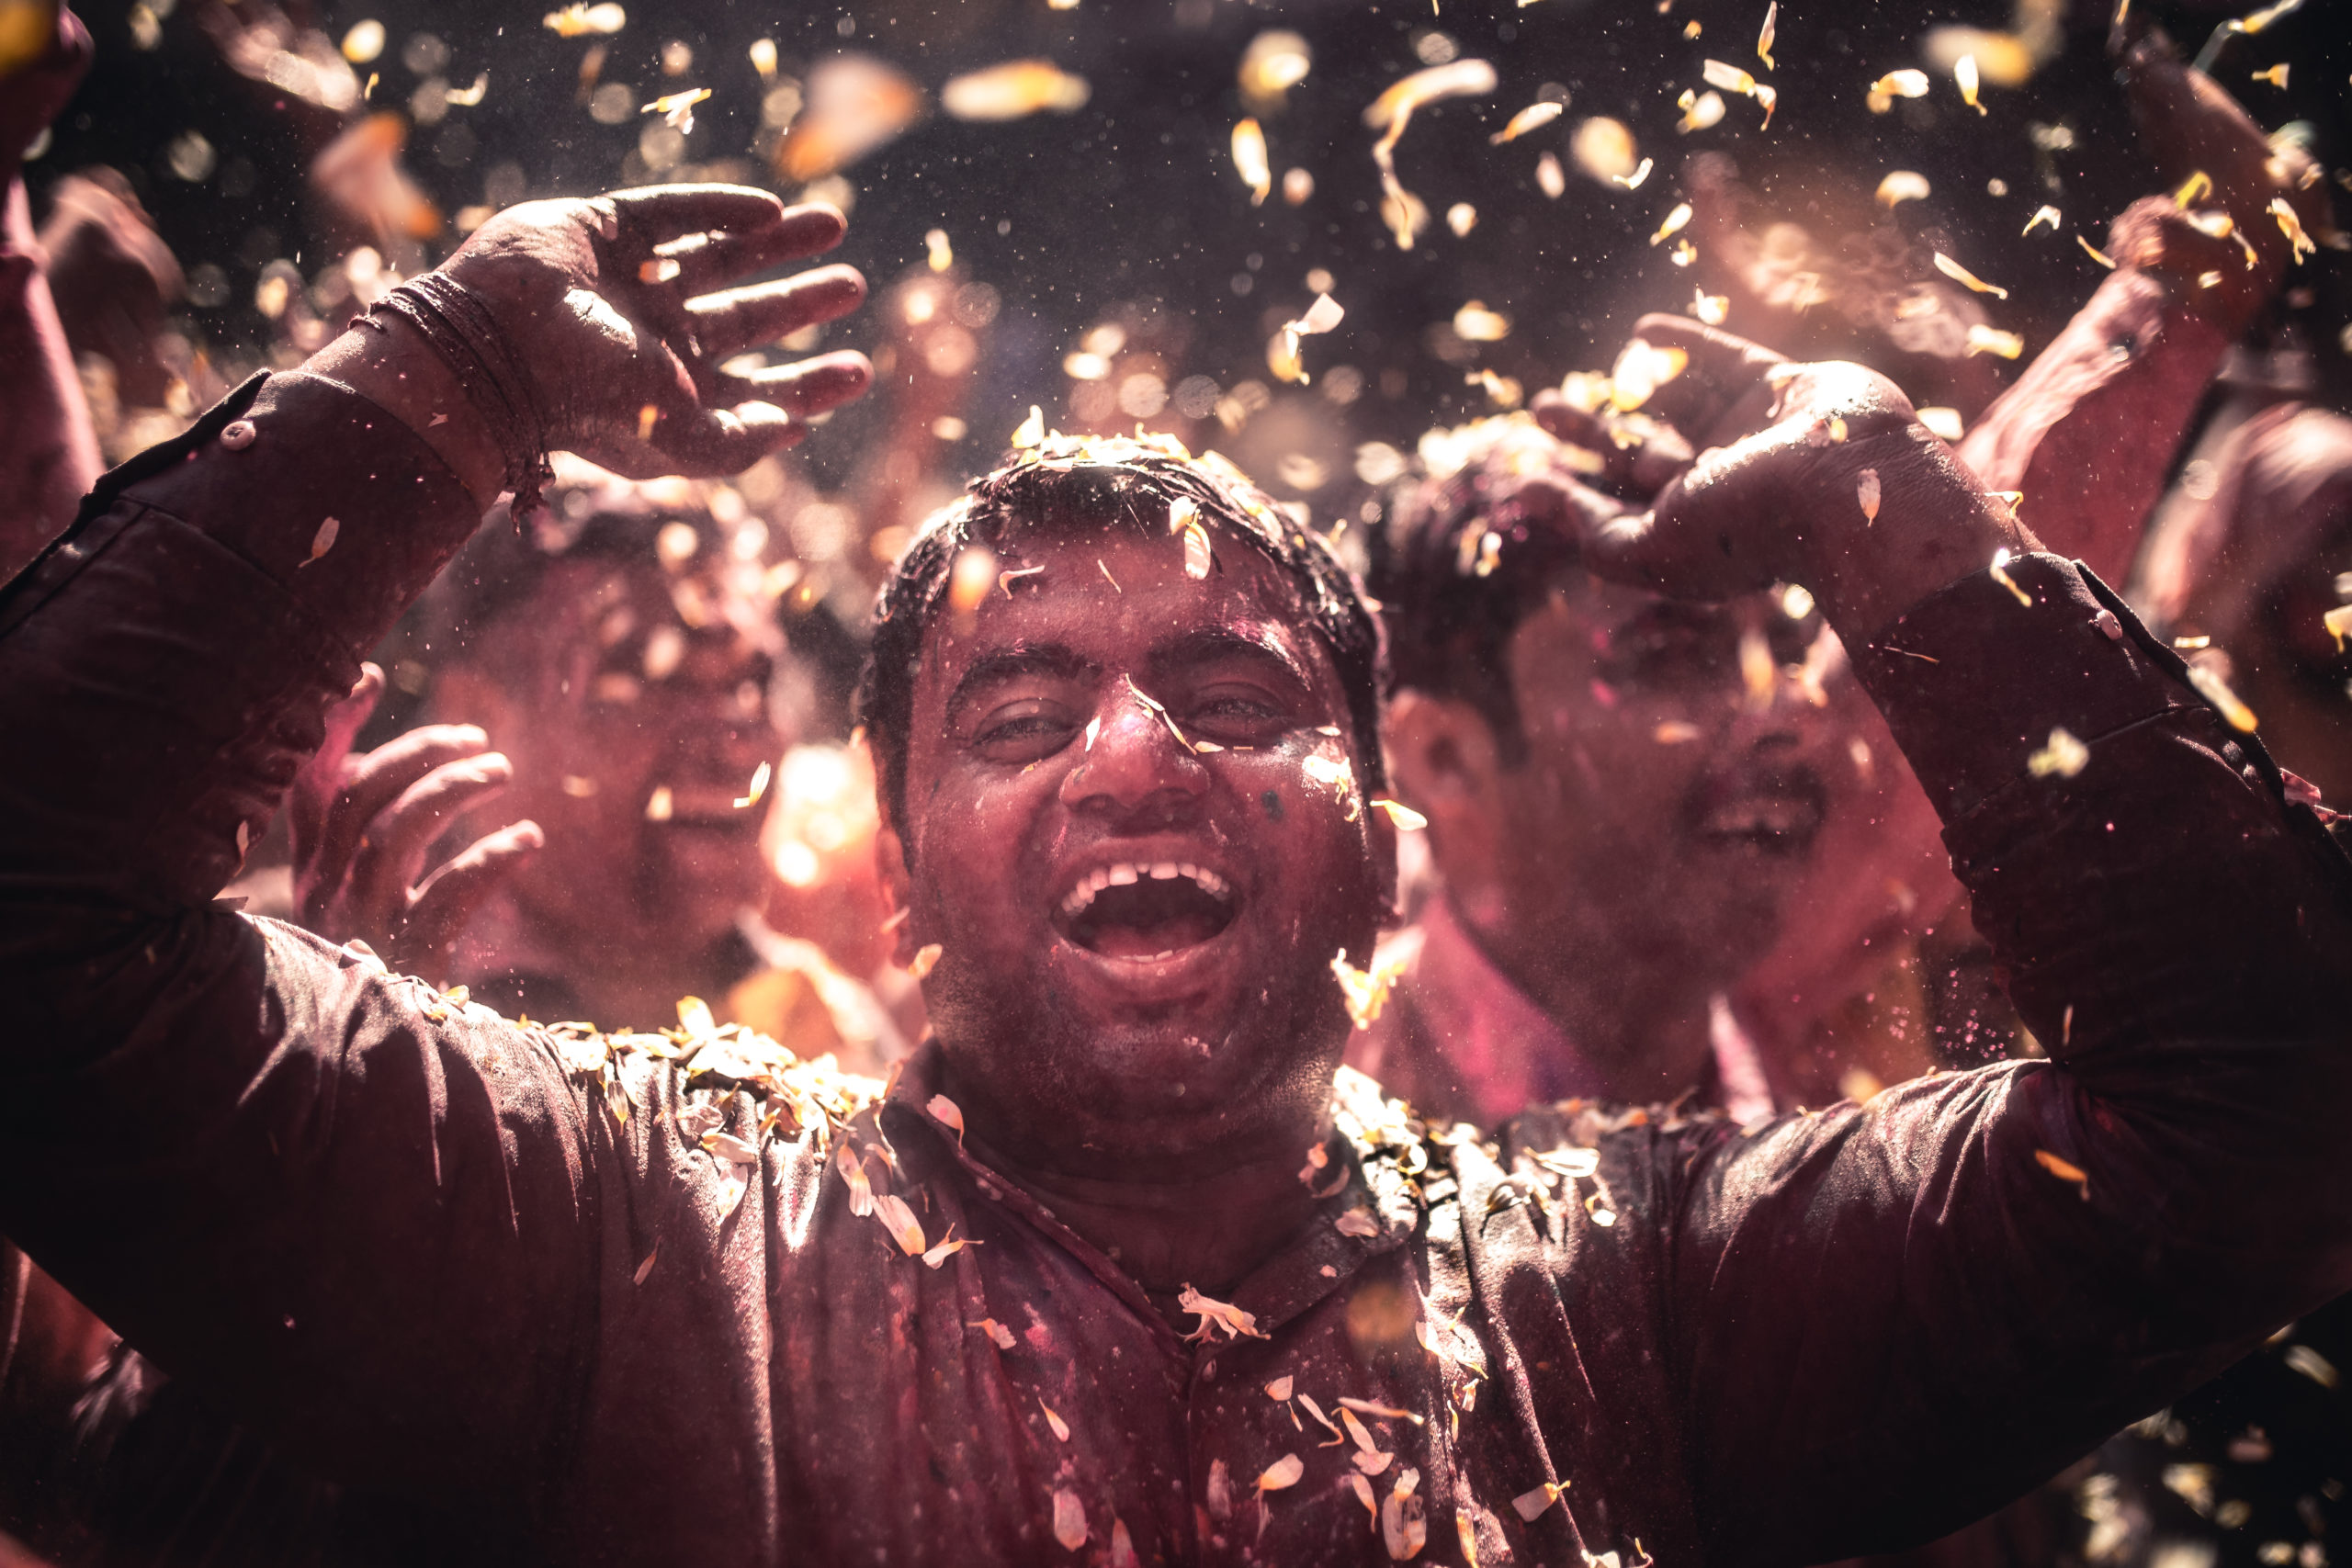
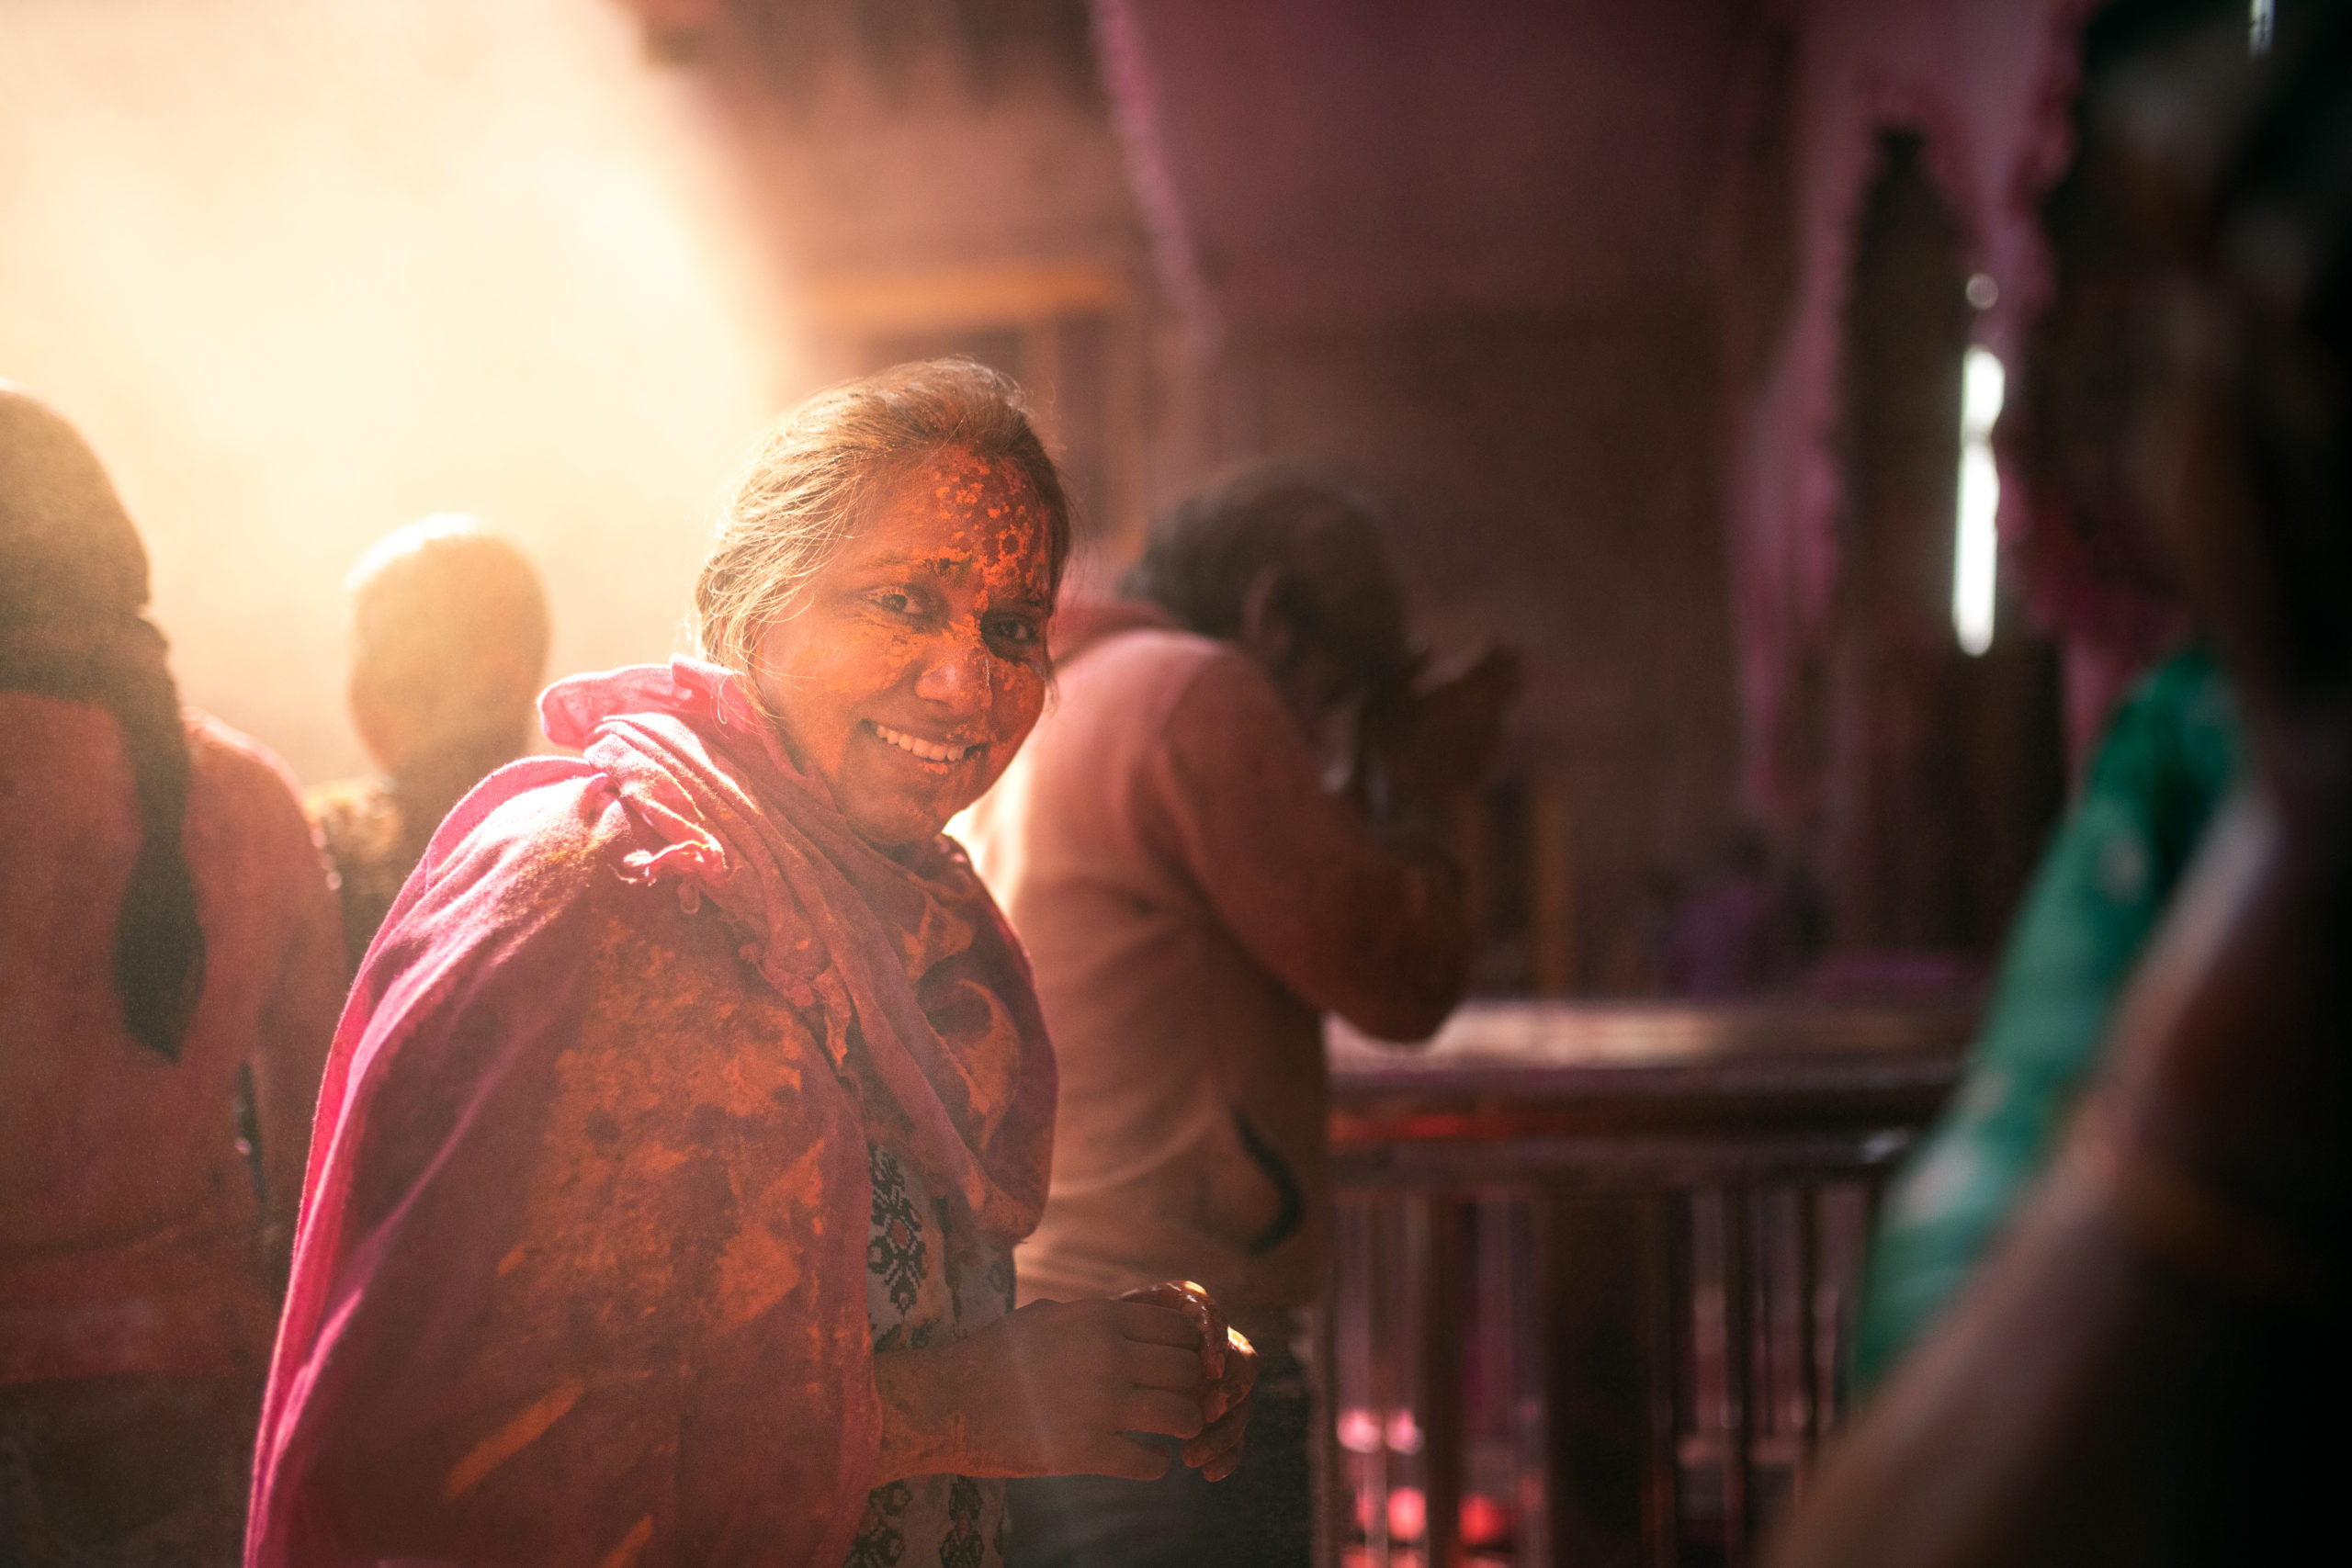
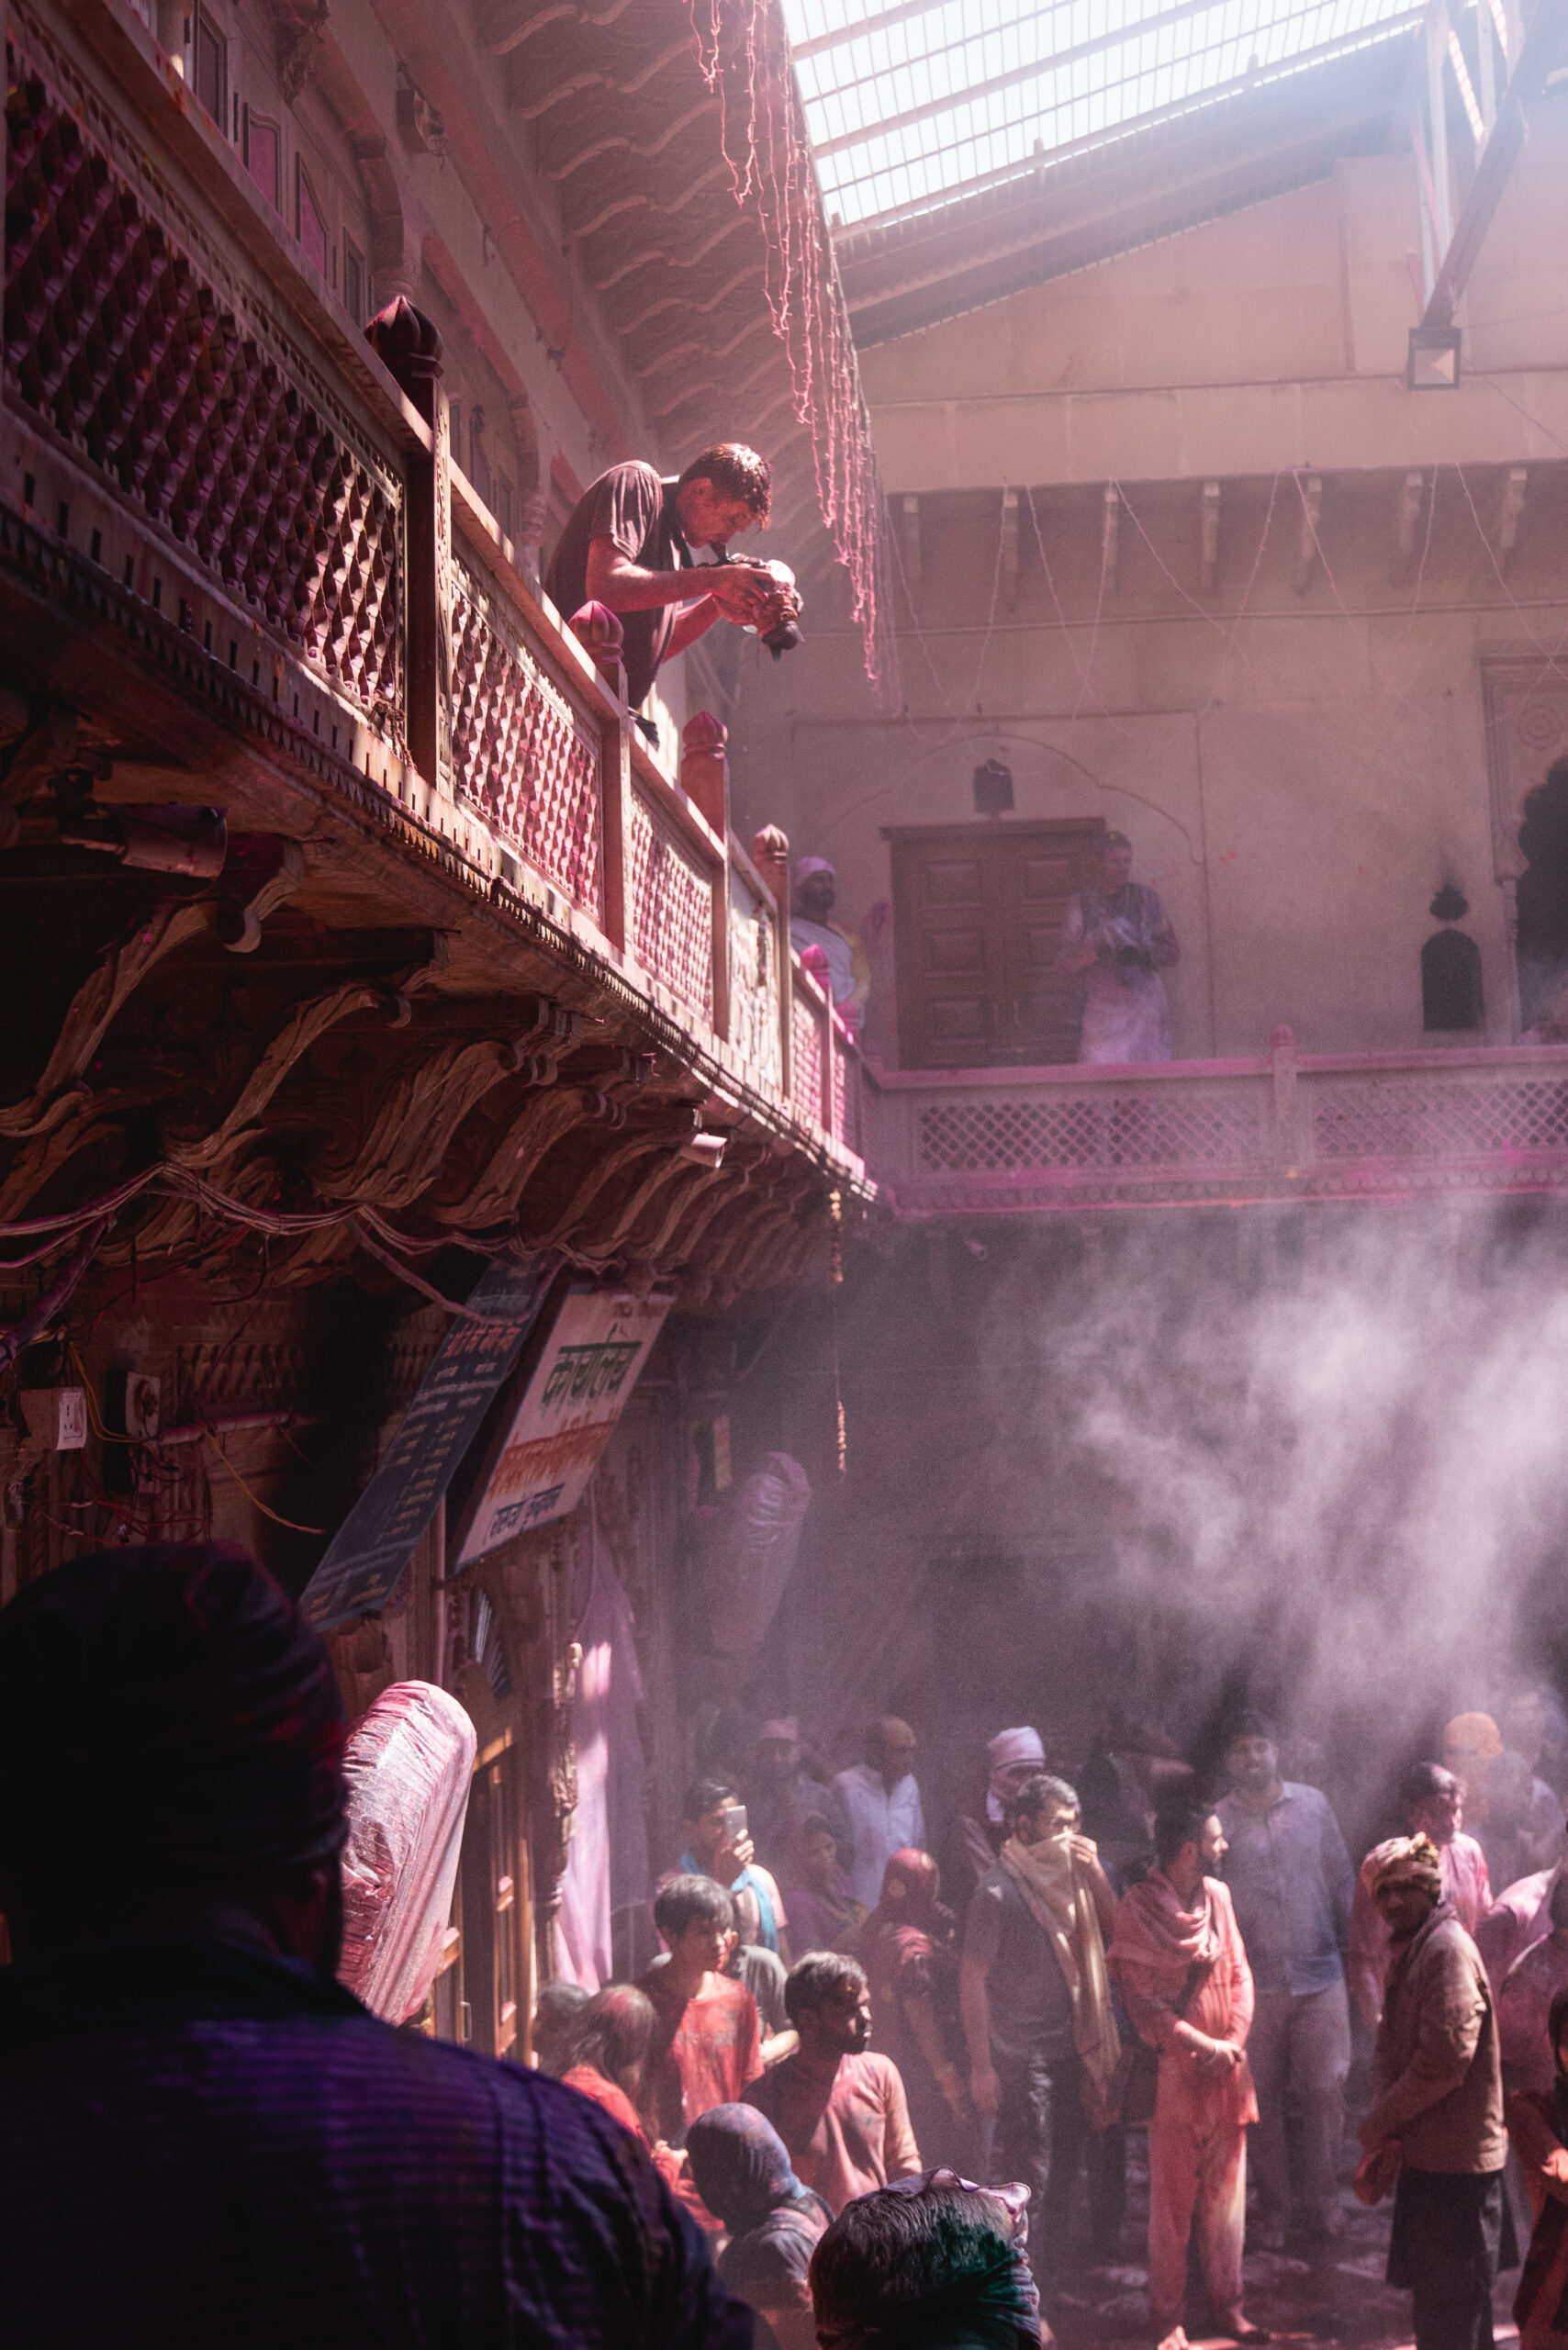
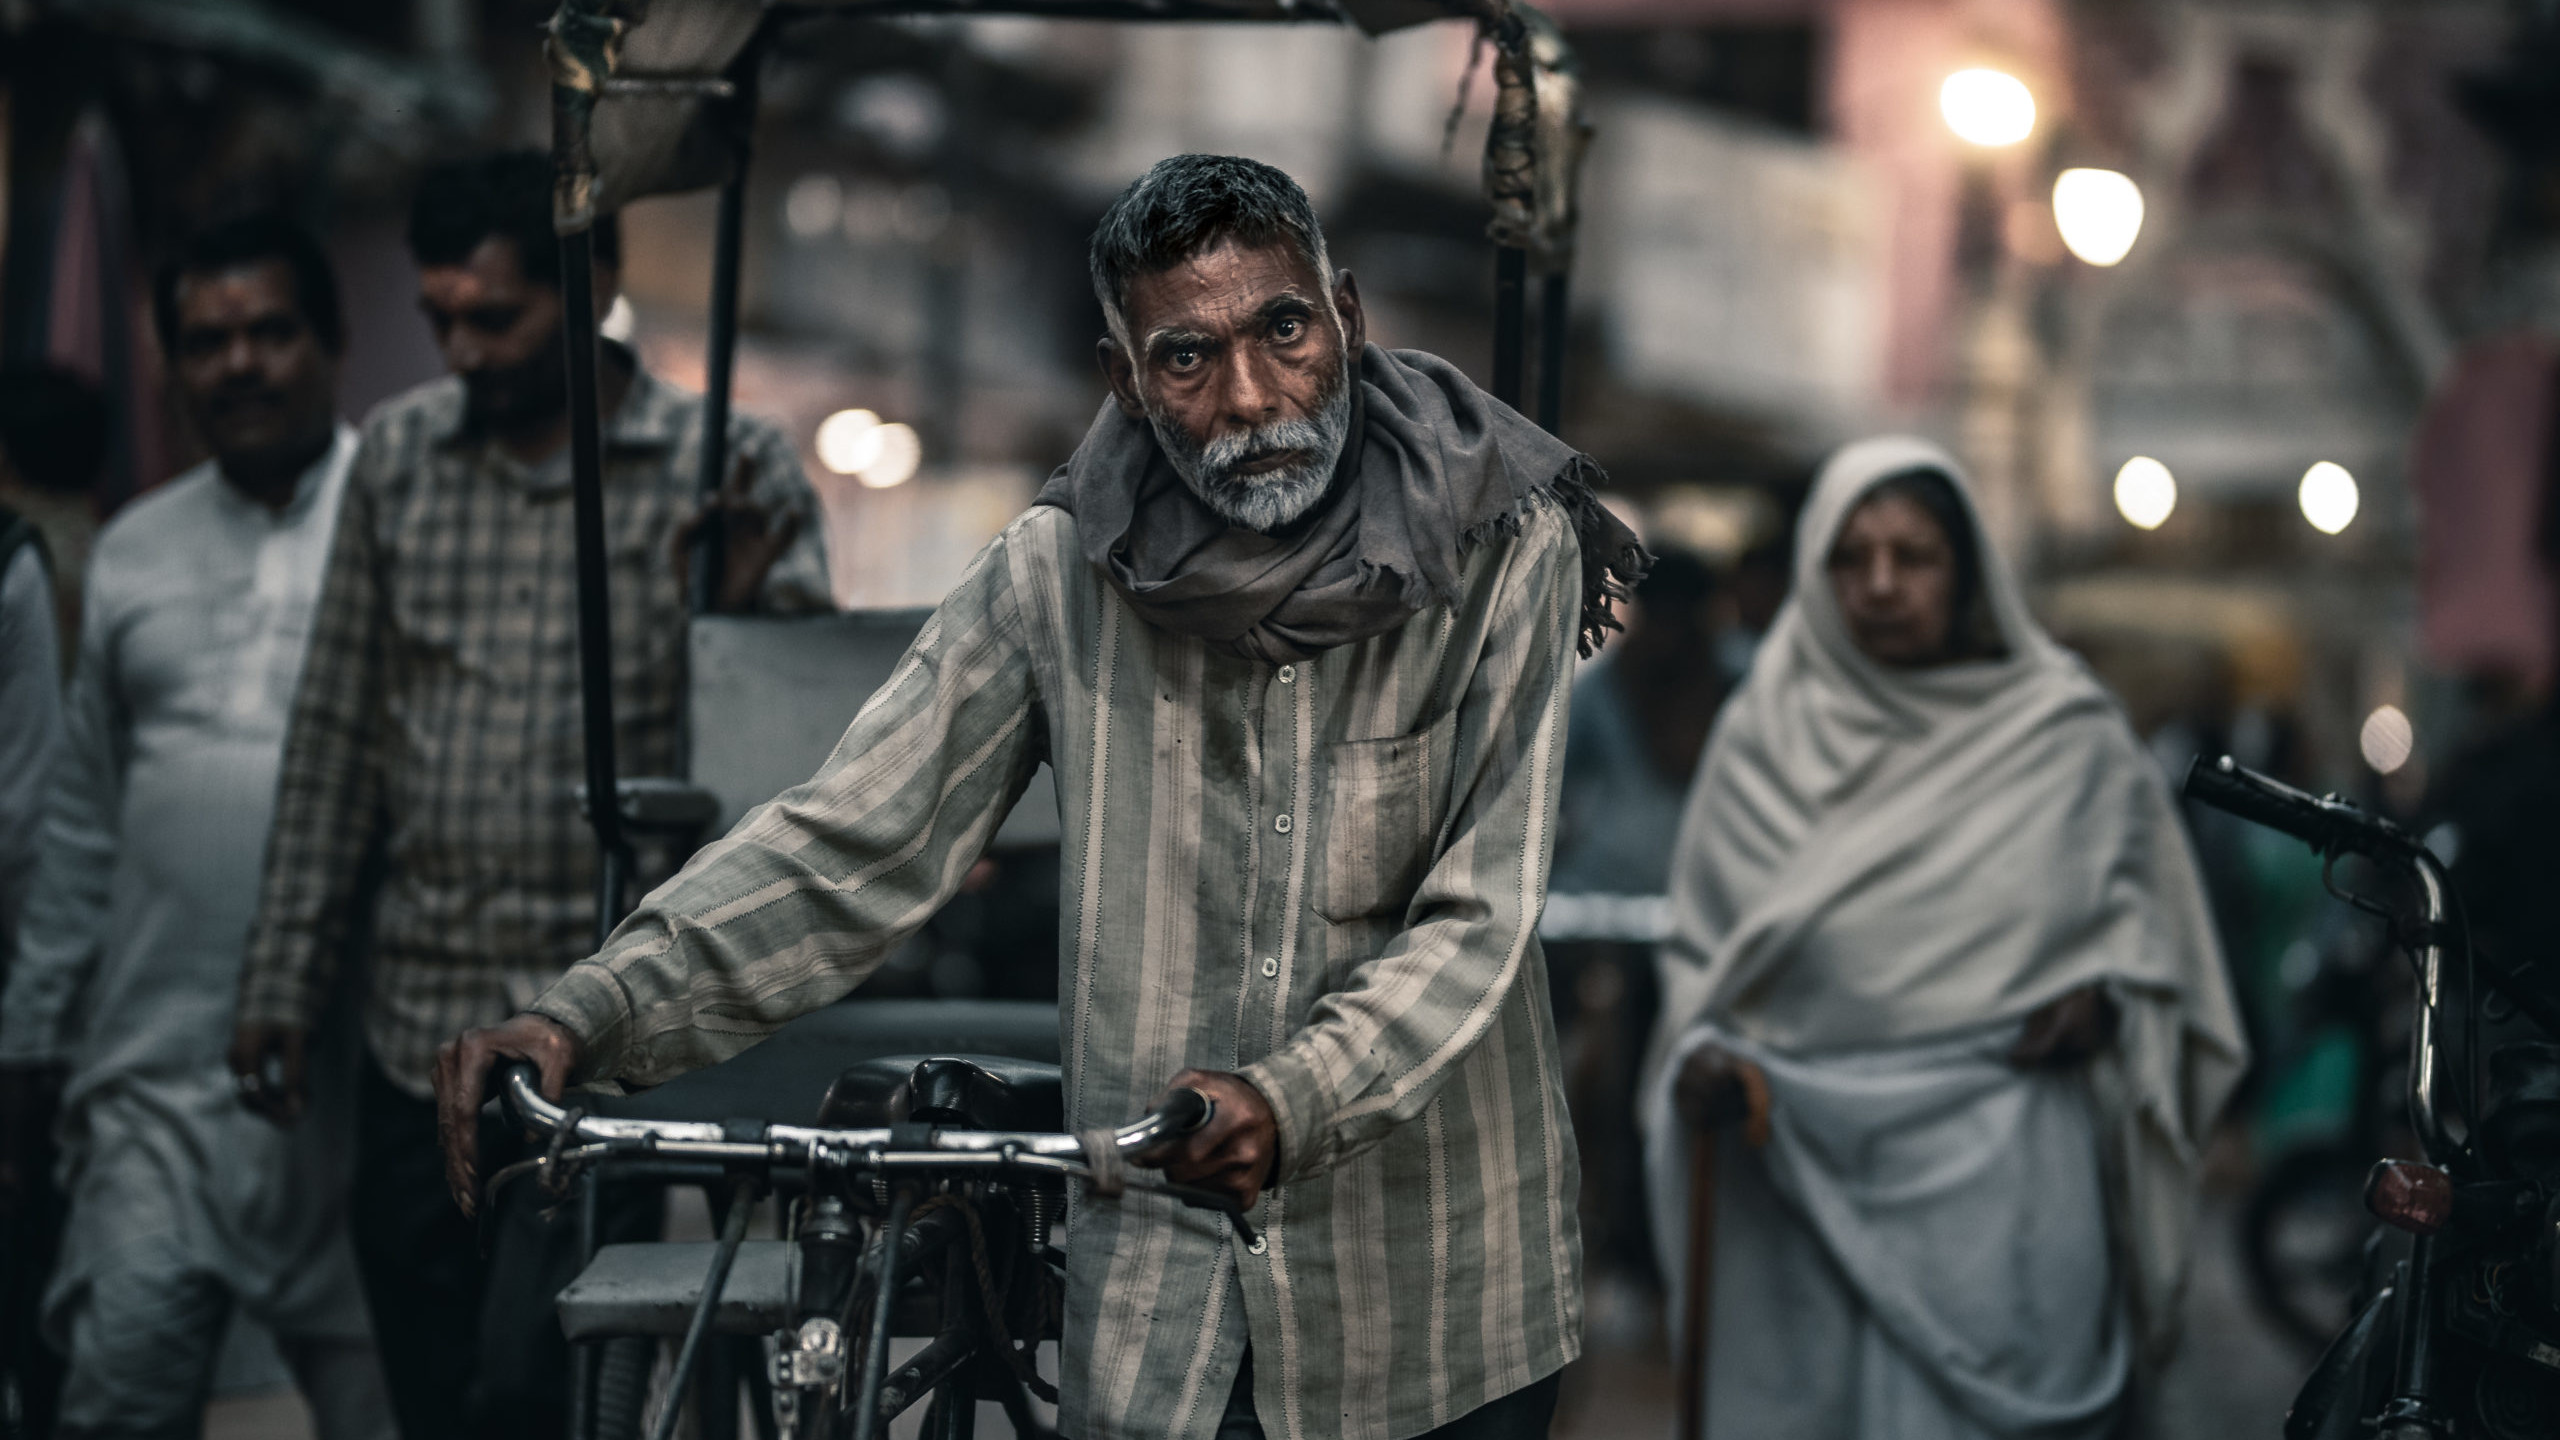
Just before returning home from Bhutan this past March, I made a personal stop in India. Somehow or another I got incredibly lucky as my project with MyBhutan wrapped up just as the famous Holi Festival of Colors had begun.
Experiencing and photographing the festival had always been on my bucket list.

Losar Festival Photography
A photography collection capturing Bhutan's Losar Celebration
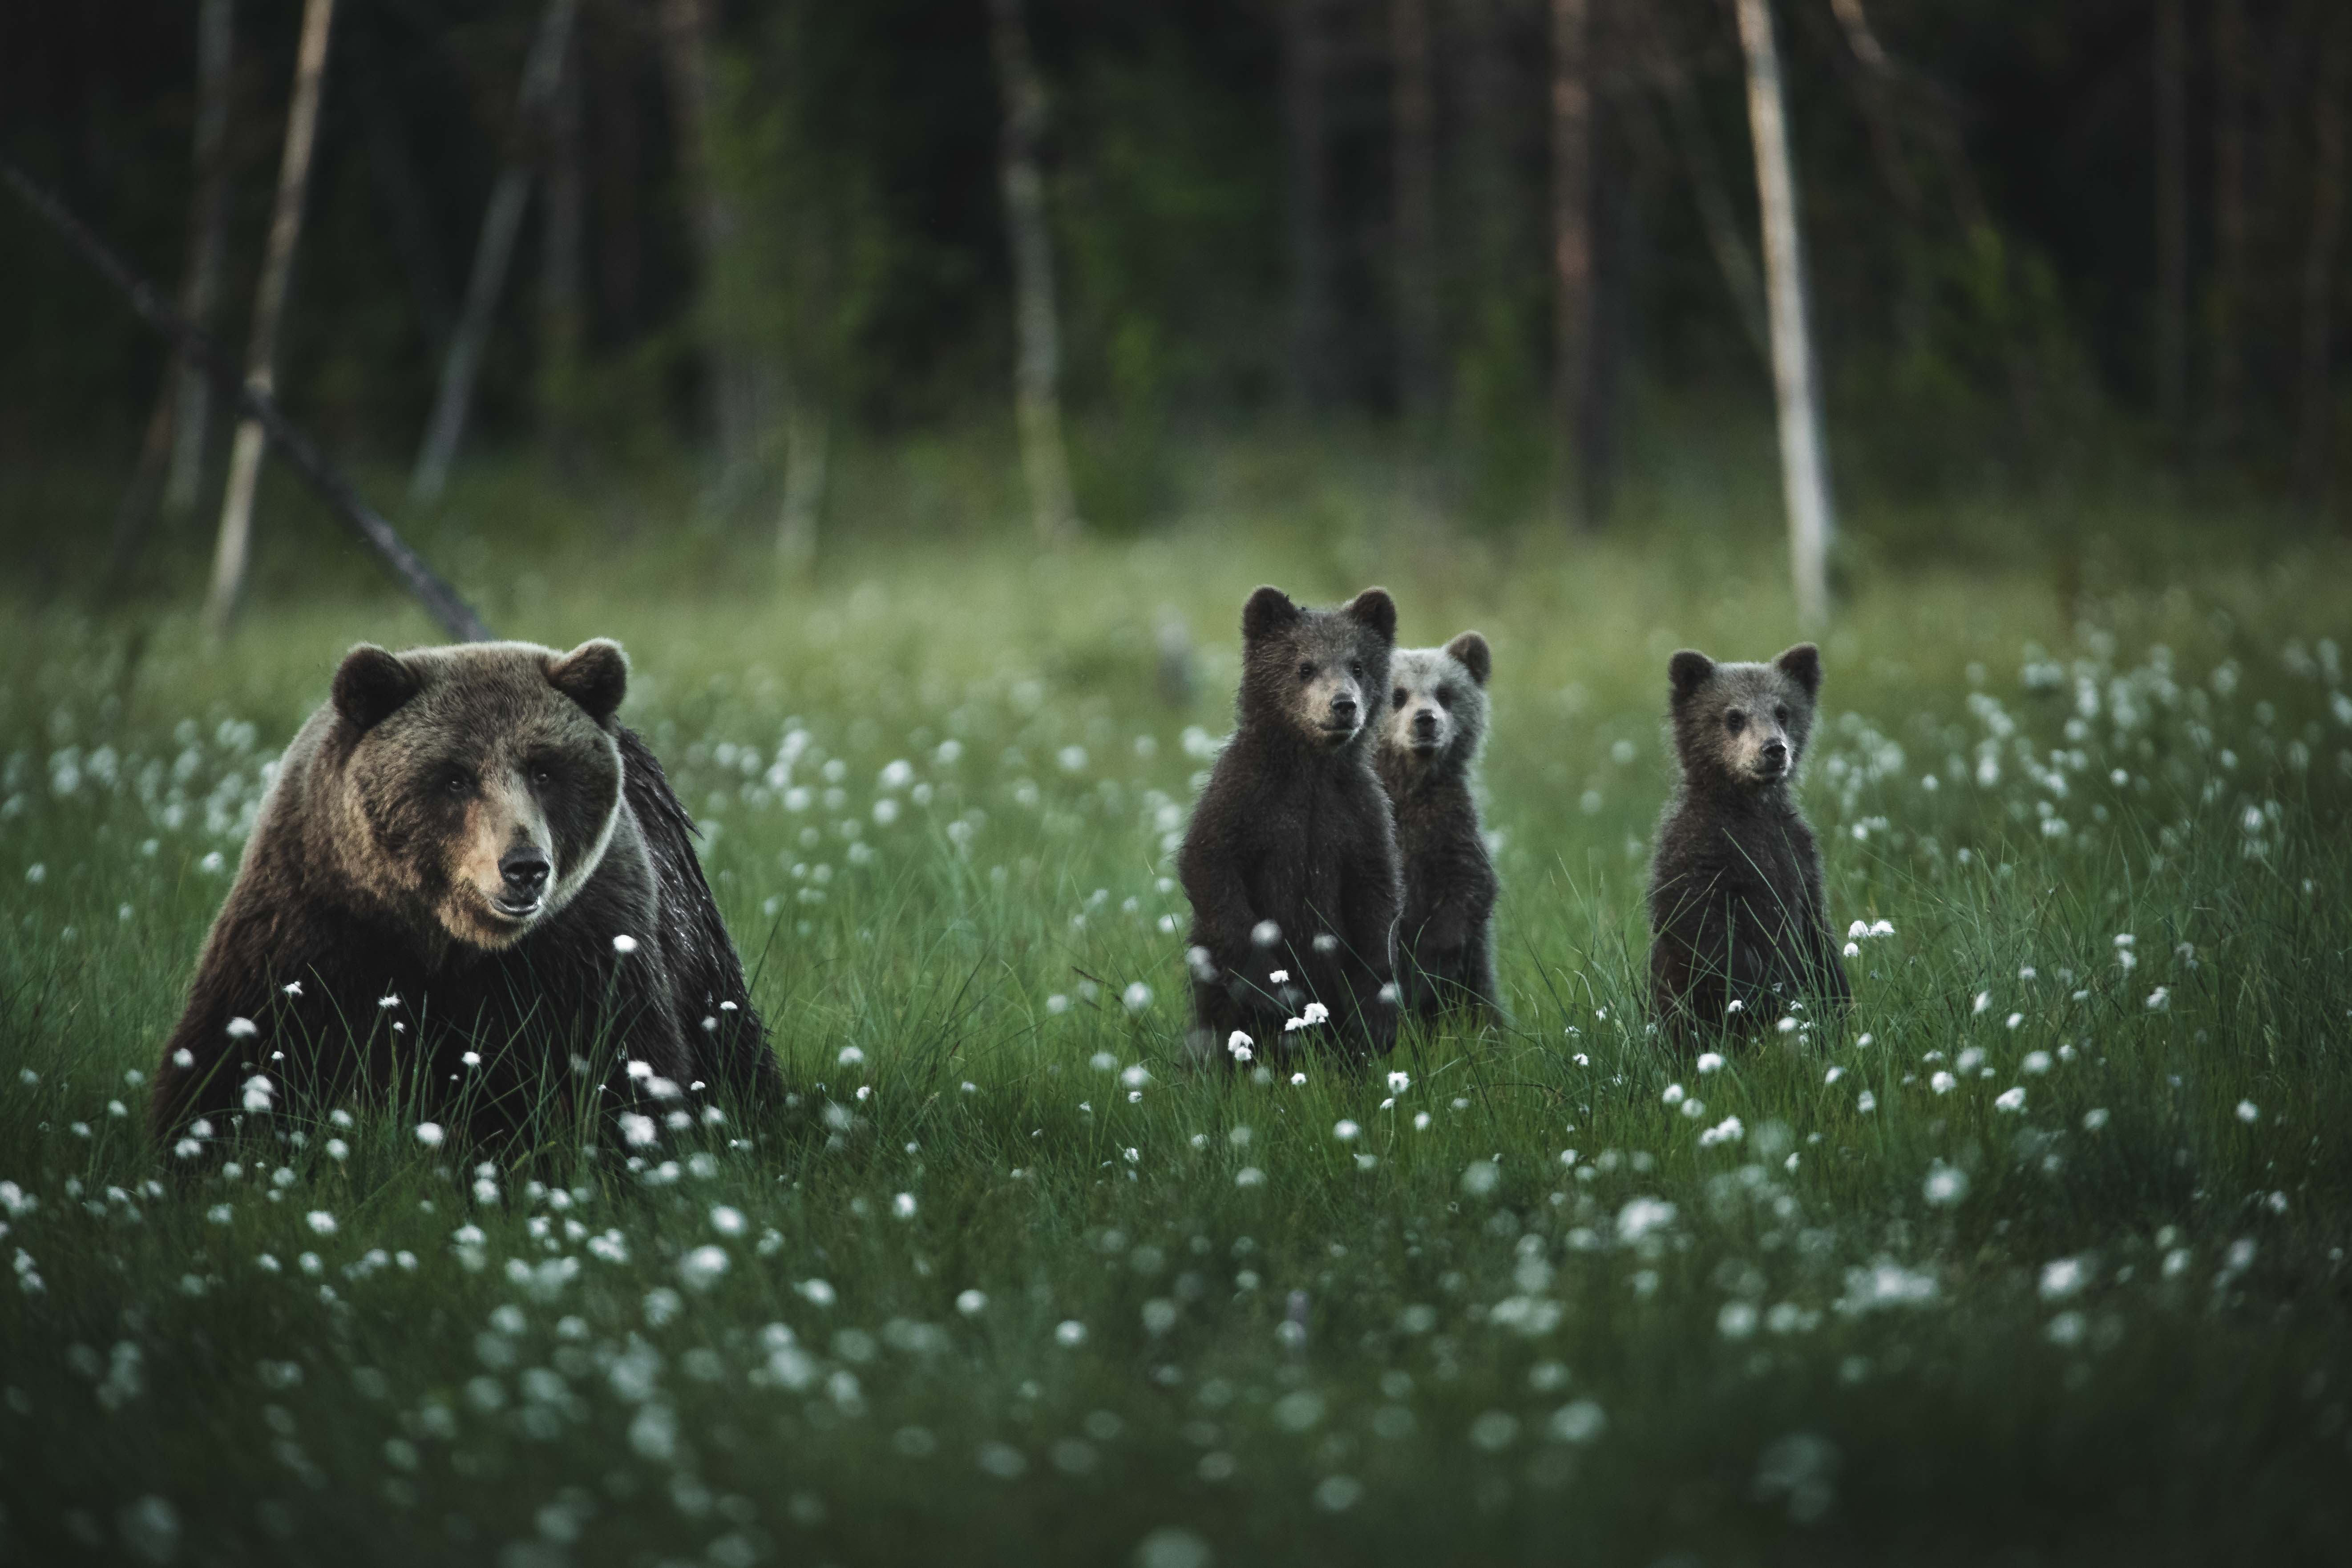
Cinematic Wild Brown Bears Film
A short collection of footage that I shot while photographing wild brown bears in the forests of eastern Finland.
Music by Benjamin James, licensed on Music Bed.
4K Footage available for licensing.
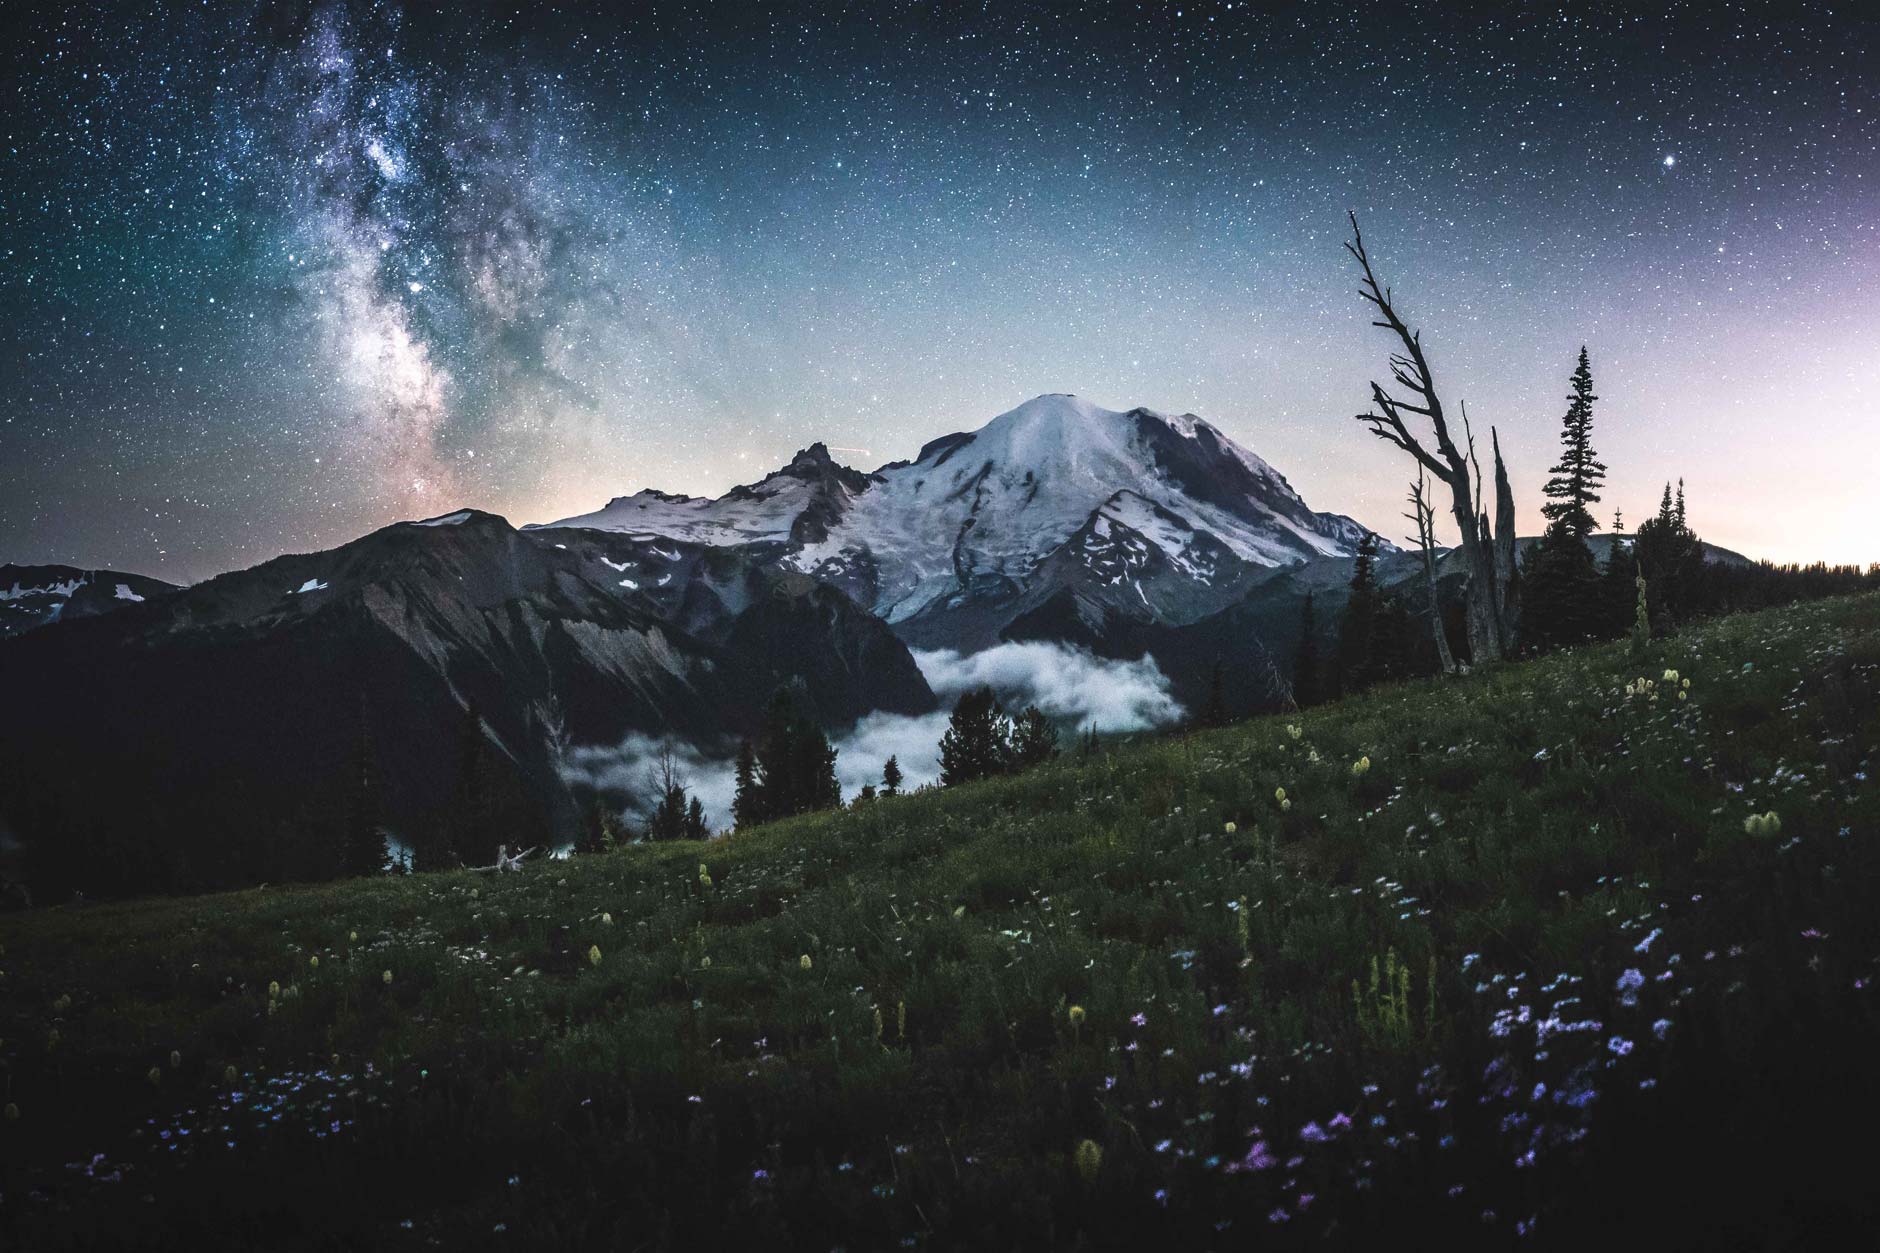
Mount Rainier Timelapse & Aerial Film
A scenic timelapse & cinematic aerial film shot over the course of three short trips to Mount Rainier National Park in the Pacific Northwest during the Spring, Summer & Autumn. All aerial footage was shot legally, outside of the boundaries of the National Park. Enjoy!
All footage is available for licensing in 4K.
Contact: andrewstuderfilms@gmail.com
Avoiding 'Creative Ruts' as a Photographer
Whether you’ve been shooting in your spare time as a hobby or professionally, you’re bound to feel less motivated and inspired compared to back when you were first starting out. Dealing with a lack of inspiration is something that all artists face at some point and it’s never a fun thing to go through. I’ve been doing photography and video professionally for over the past four years and while I understand that’s not all that long, I’ve faced several periods where I’ve felt a lack of inspiration and fell into ‘a creative rut.’
Over the past couple years of doing something related to photo and video each and every day, I’ve begun to realize several things that I need to do to keep myself out of ‘creative ruts’ and inspired to create. They work really well for me and I hope that they work well for you too!
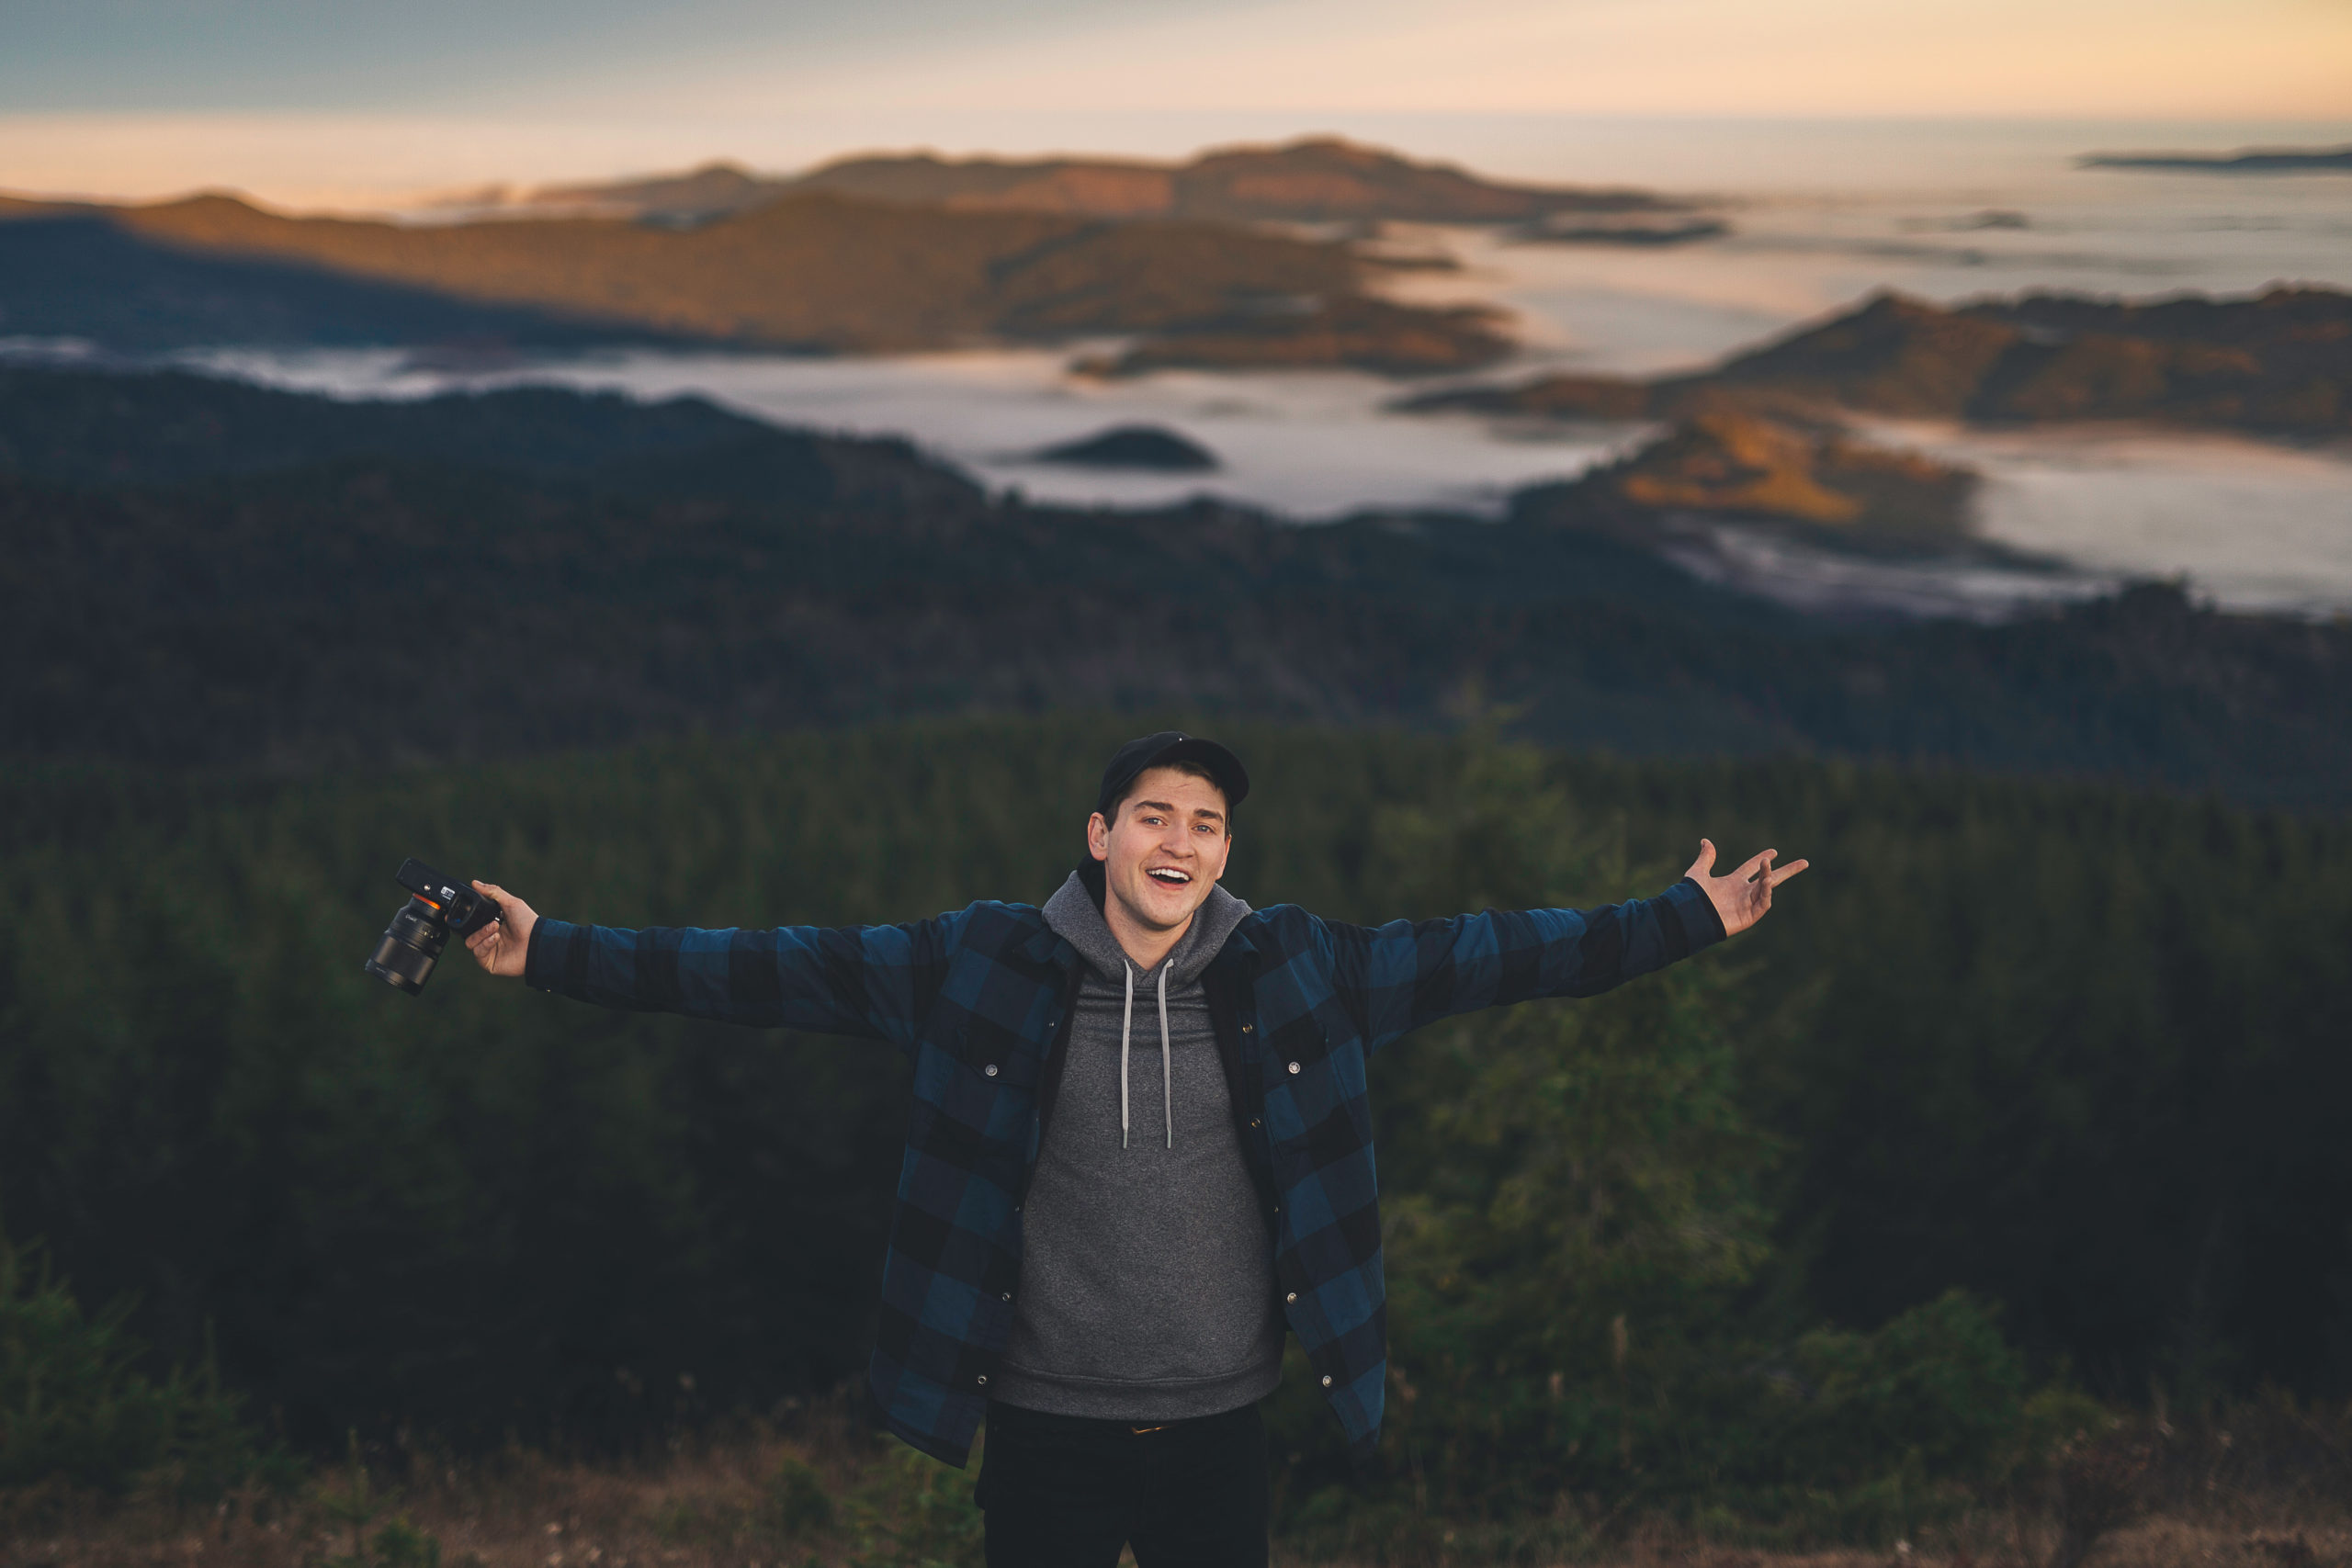
Photographer Andrew Studer shooting on the new iPhone 11 Pro Max
Excited about the new cameras and potential for photography, I recently picked up the brand new iPhone 11 Pro. I spent two days cruising around Oregon and capturing a few photos and videos. In this review, I focus on the brand new night mode & Ultra Wide lens while also touching a little bit on the portrait modes.
Overall, I’m extremely impressed with the new capabilities! I think that the iPhone 11 Pro’s new night mode is a complete game changer! I was shooting handheld 3s exposures that came out perfectly sharp.
The ultrawide lens is also a great addition! I feel like it has a neat way of making a subject appear to be more fun and dynamic. I typically don’t use wide angle lenses in my photography but I had a ton of fun testing it out!
Big thanks to Ryan Braden & Blake Allen for helping out and filming the BTS footage! Also thanks to Ukaia Rogers for the tech help!

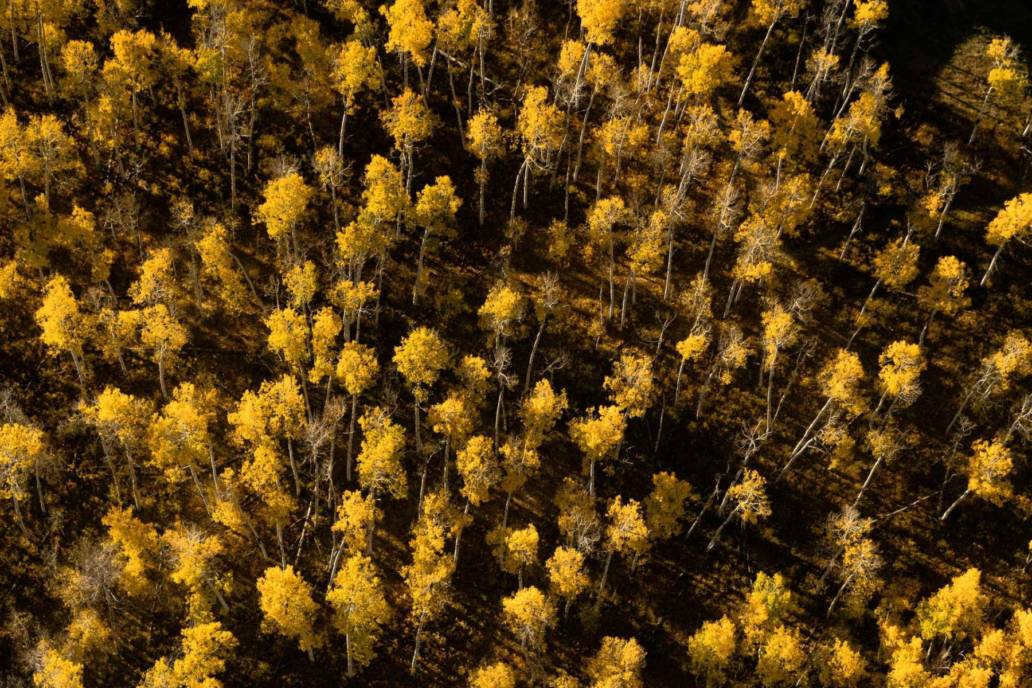
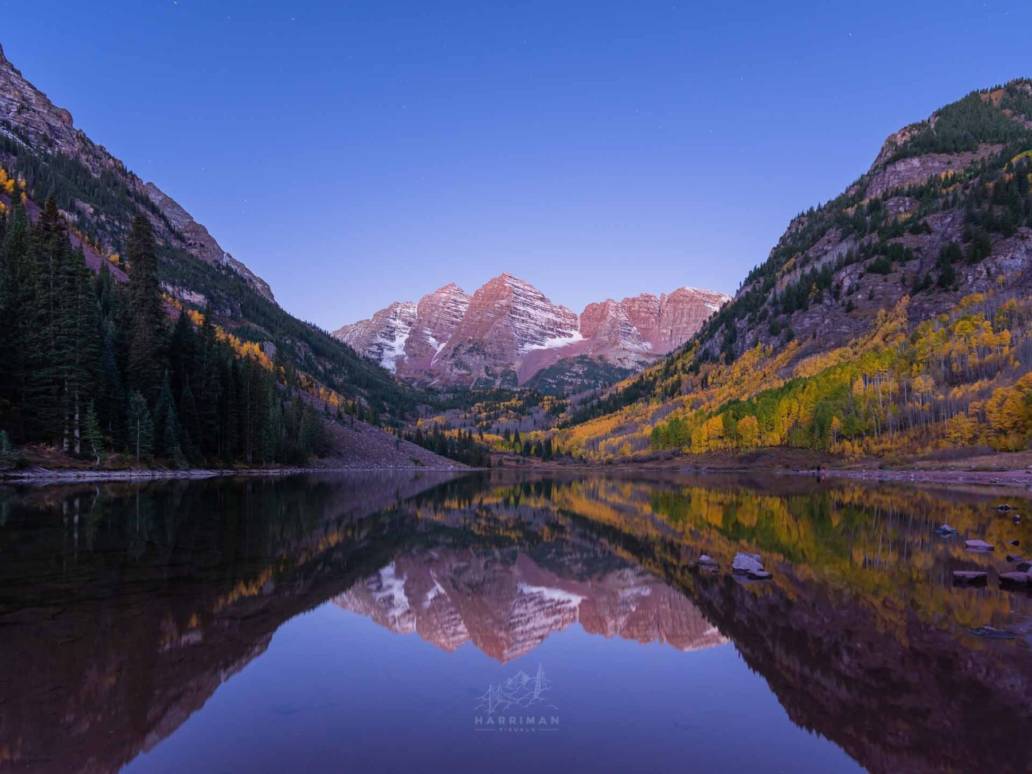
Autumn in Aspen
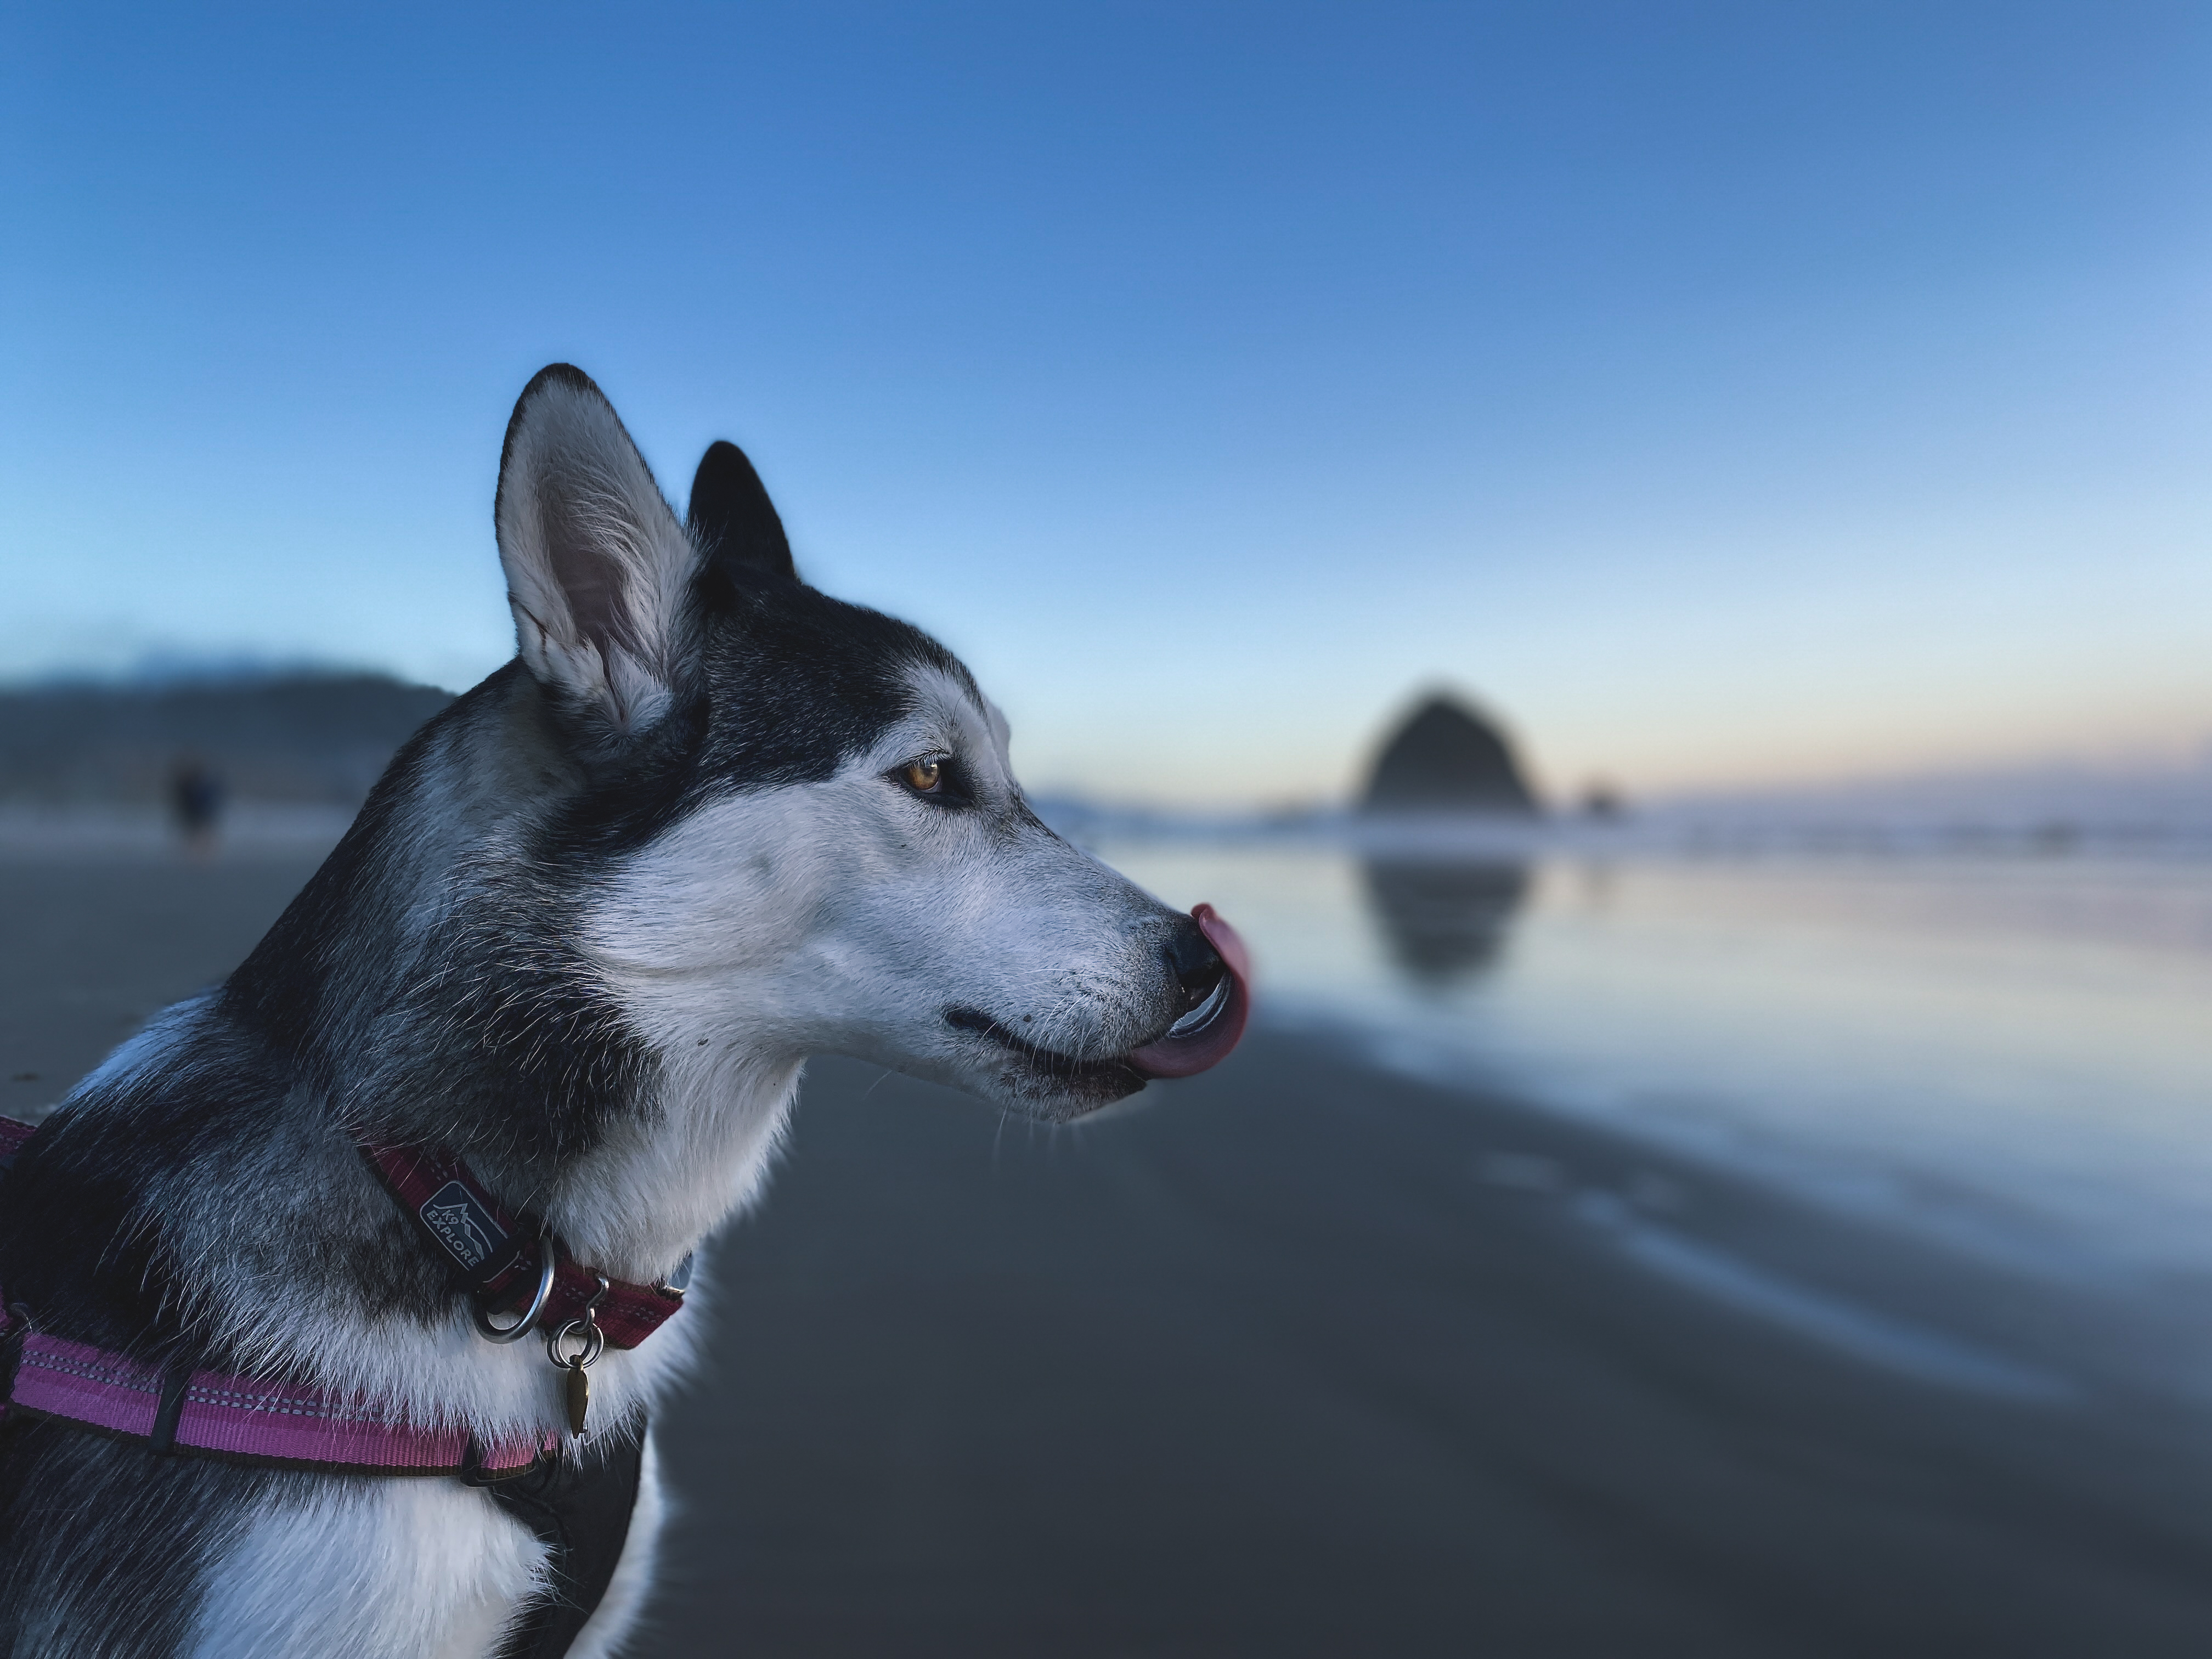
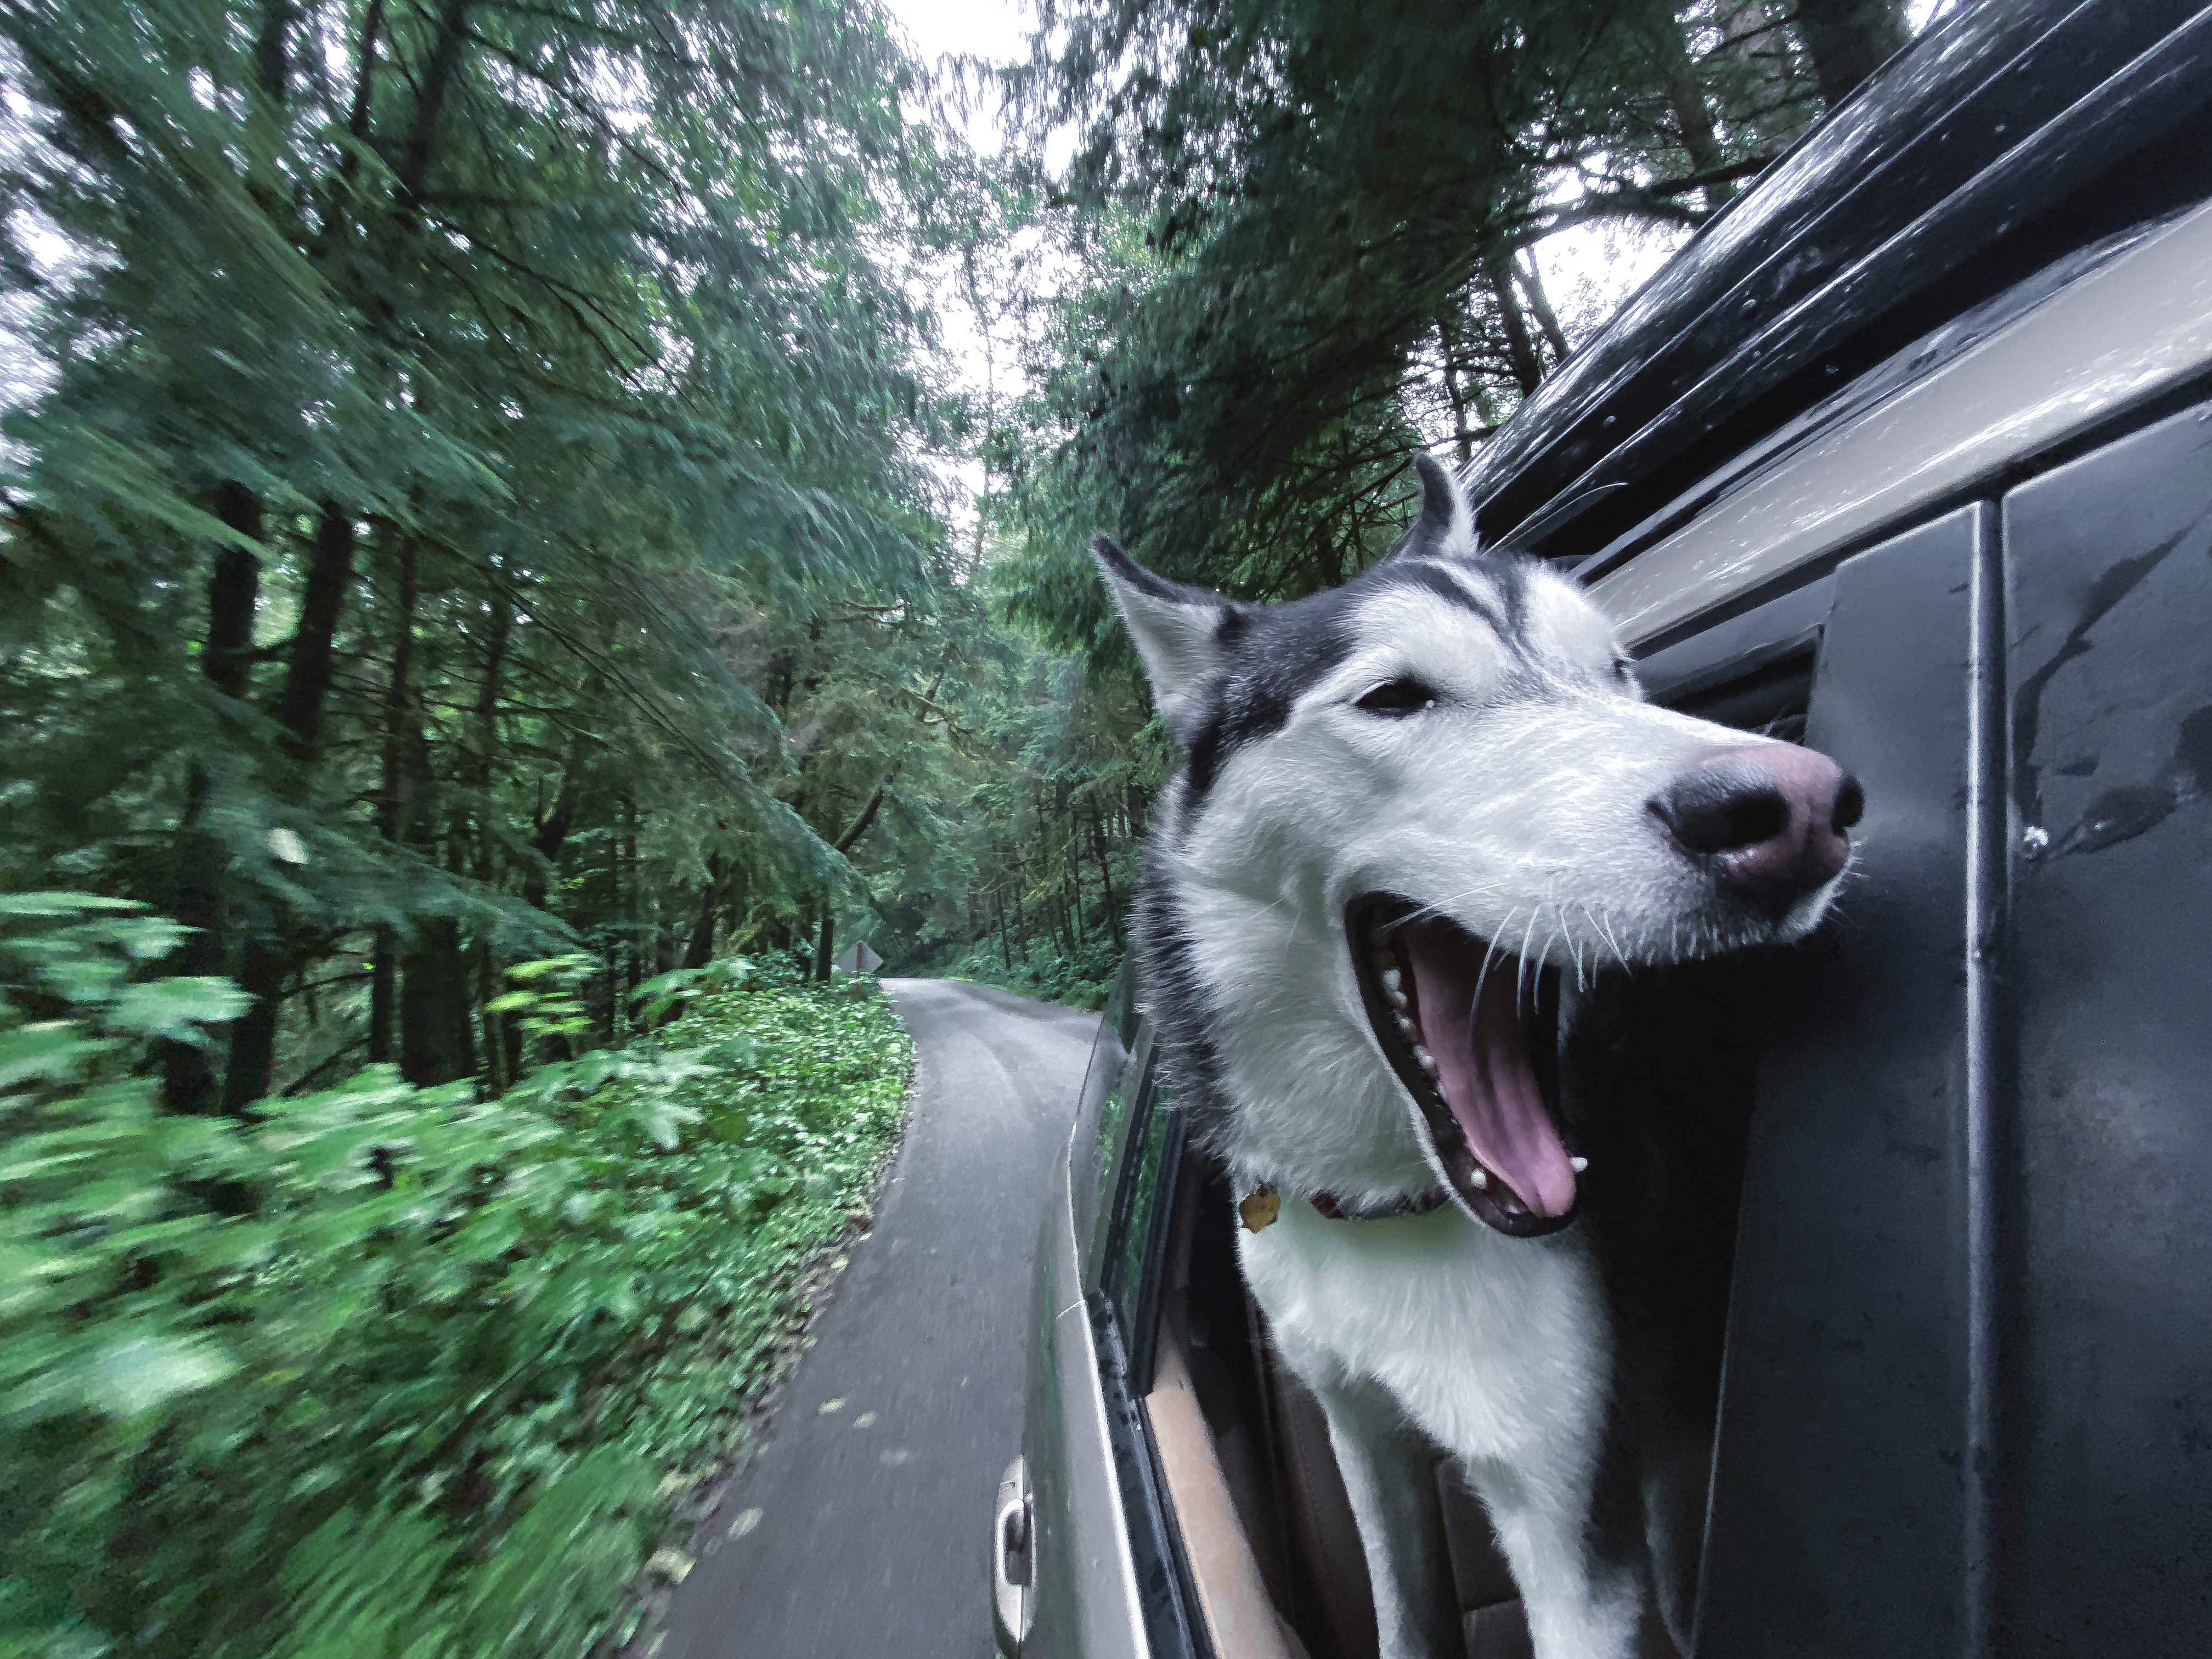
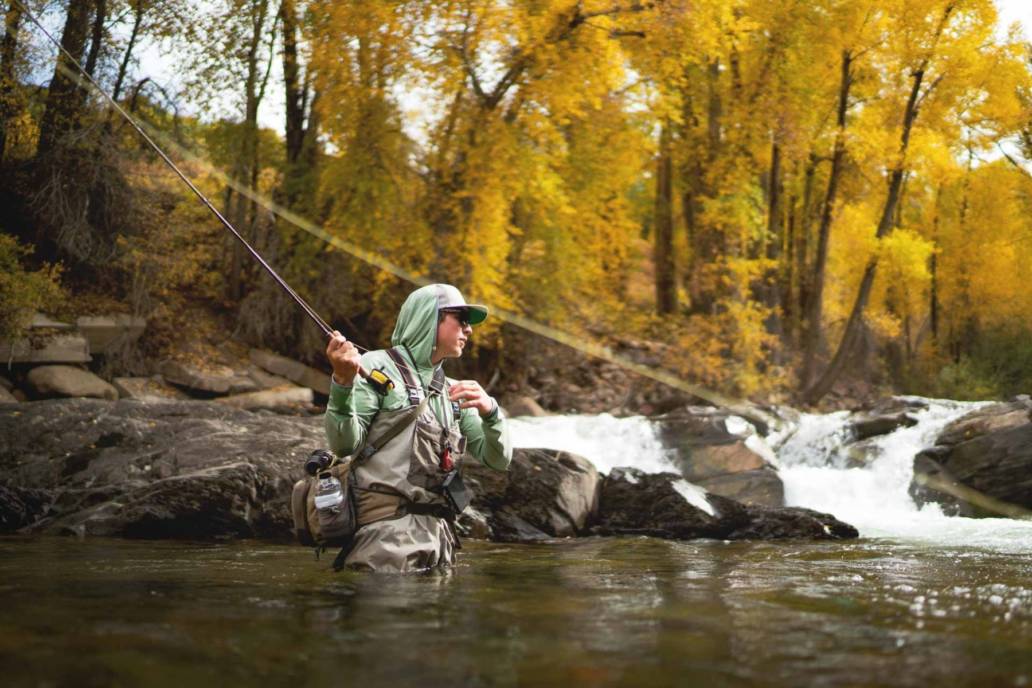
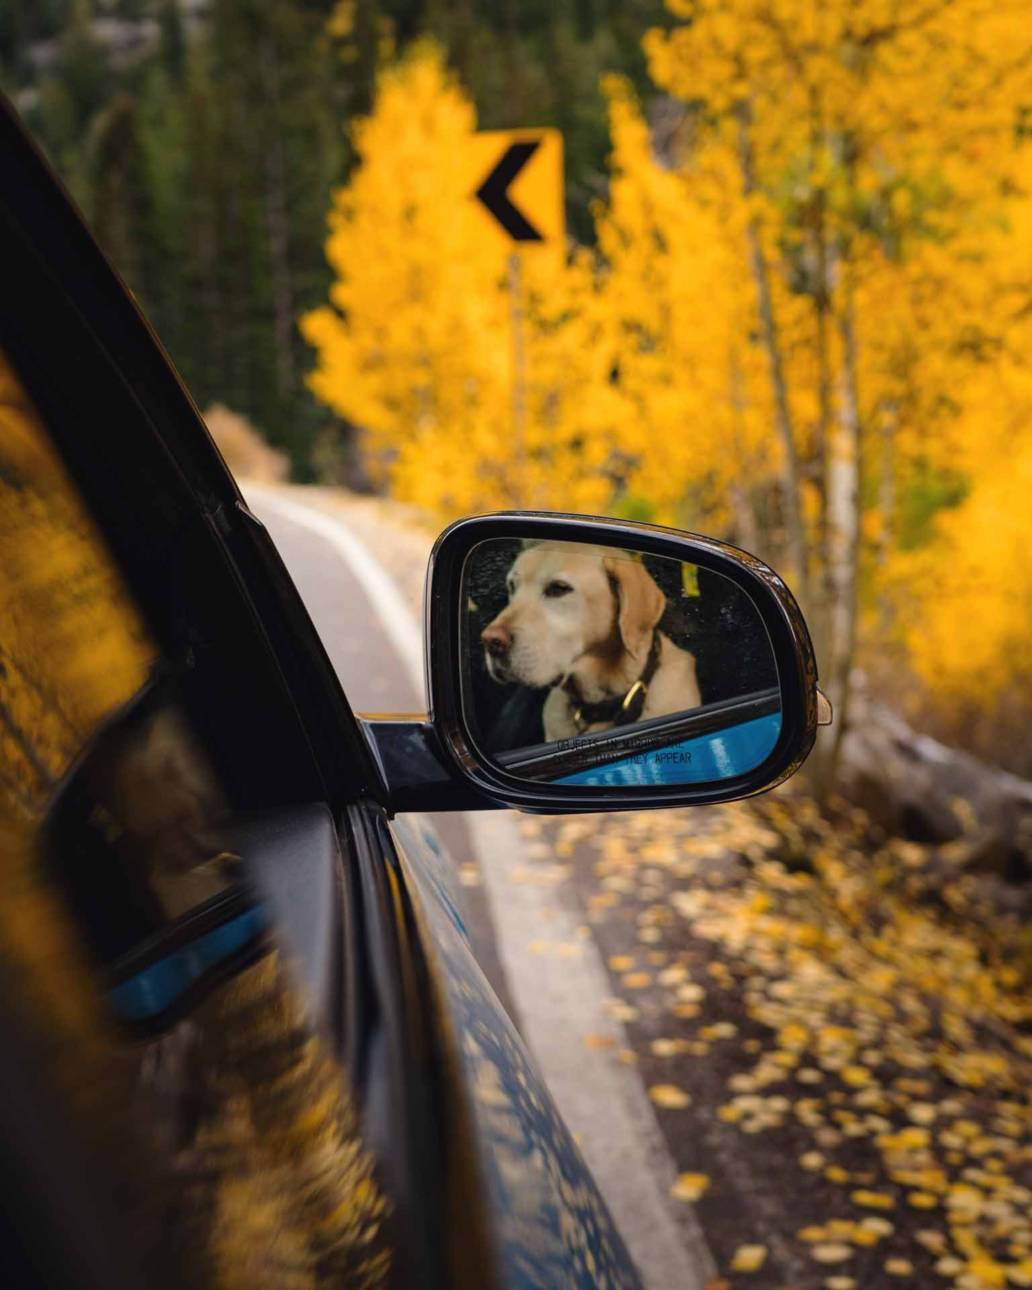
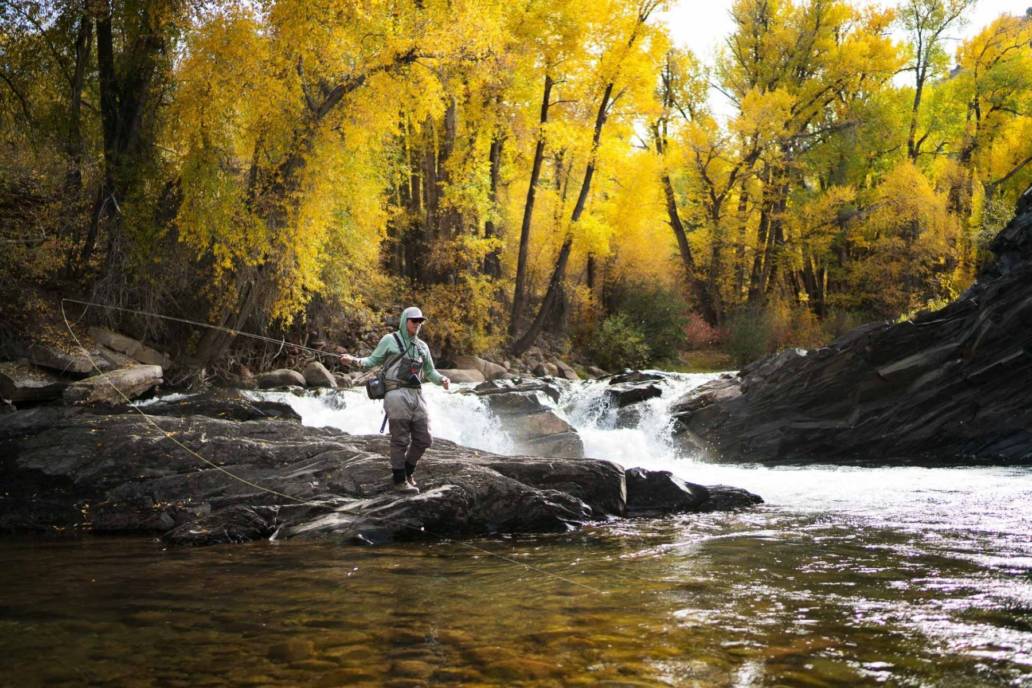
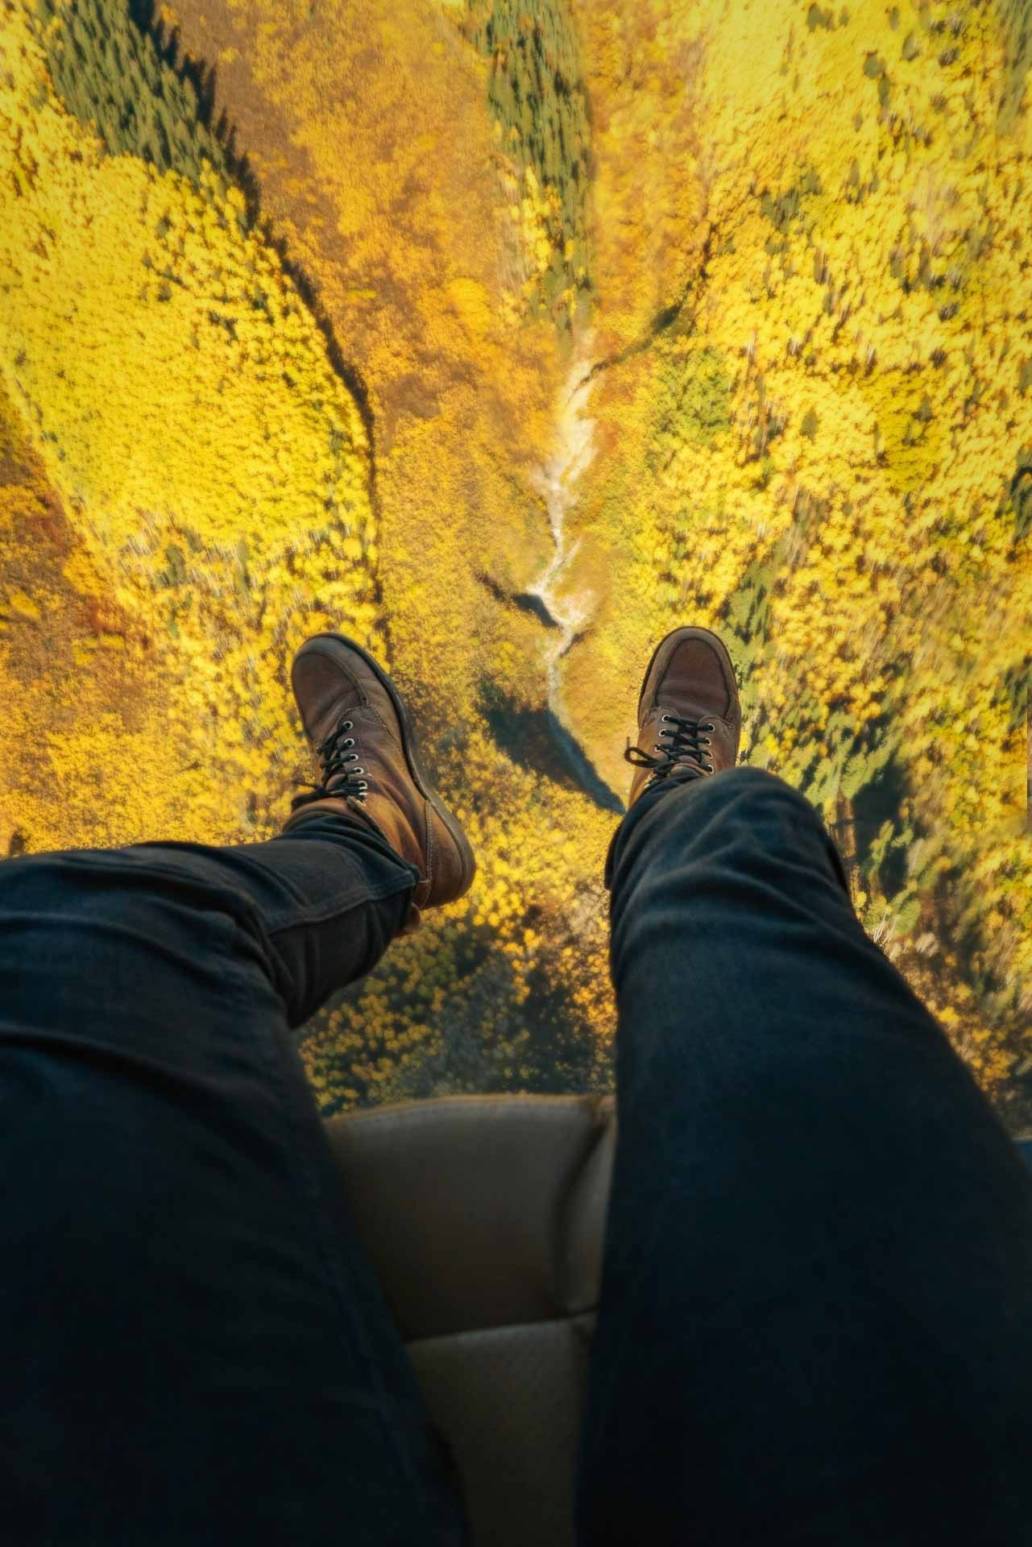
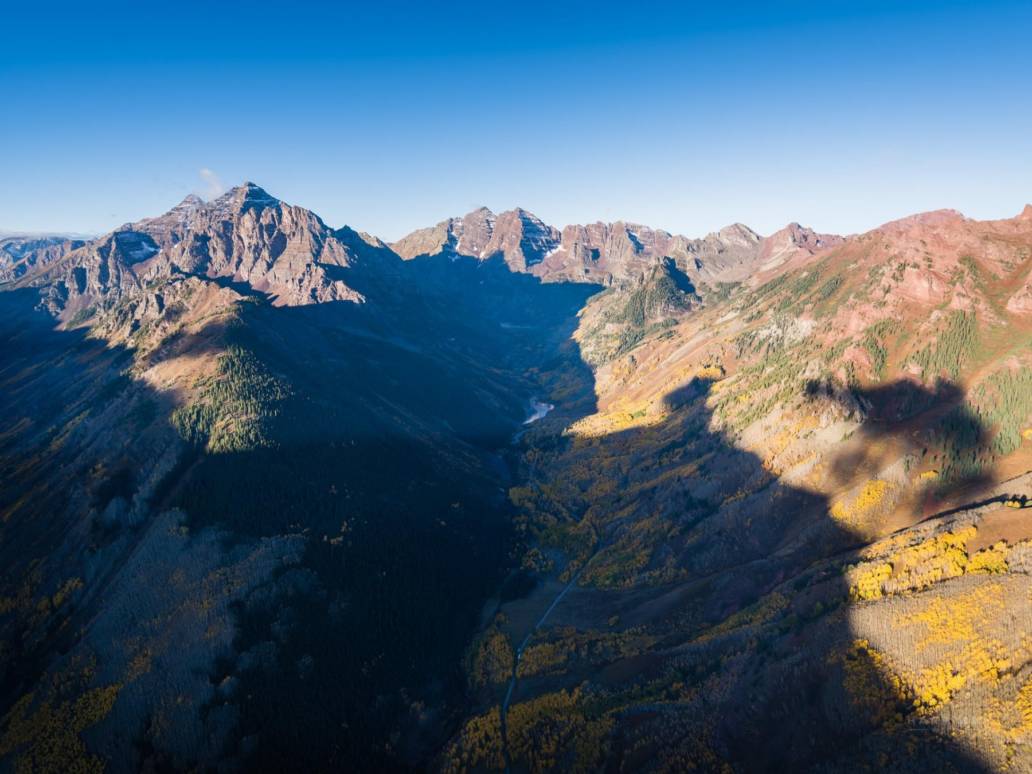
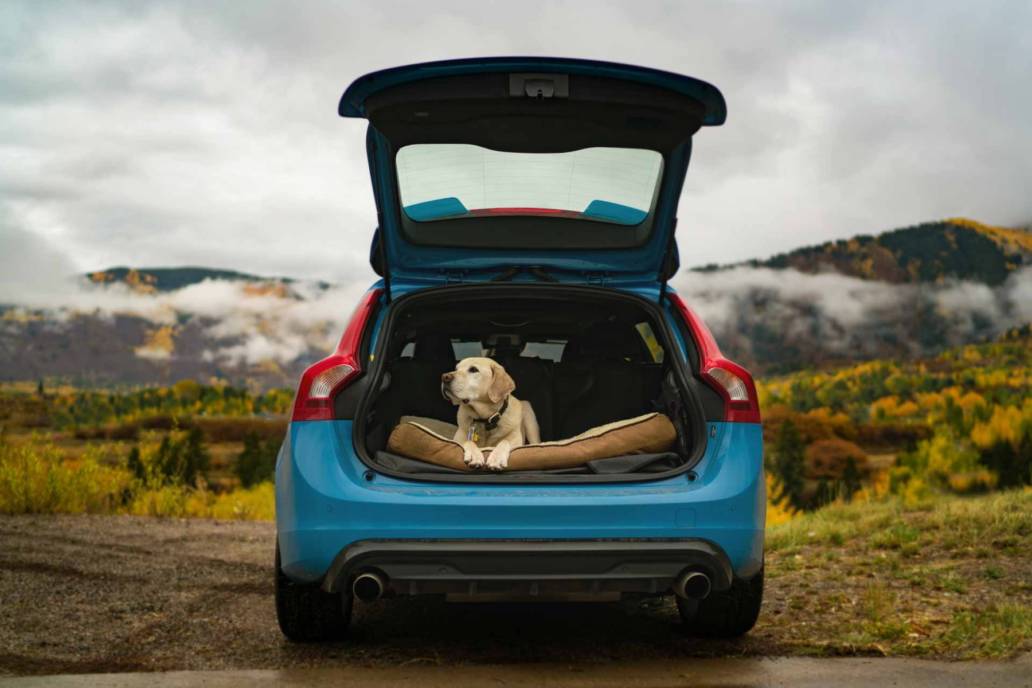
This past fall, Toby Harrimanand I decided to hit the road and head to Aspen, Coloradoto see what we could do with the fall colors I knew would be popping up as the weather cooled down. I’m originally from the area and knew that fall is one of the most beautiful times to visit the area and would potentially make for really great imagery.
My past experience proved fruitful once again, as we got some really great stuff. From fly fishing to driving my parent’s dog up the insanely beautiful Independence pass, we definitely got what we came for. Seriously, right around when the leaves are turning is the perfect time to visit.


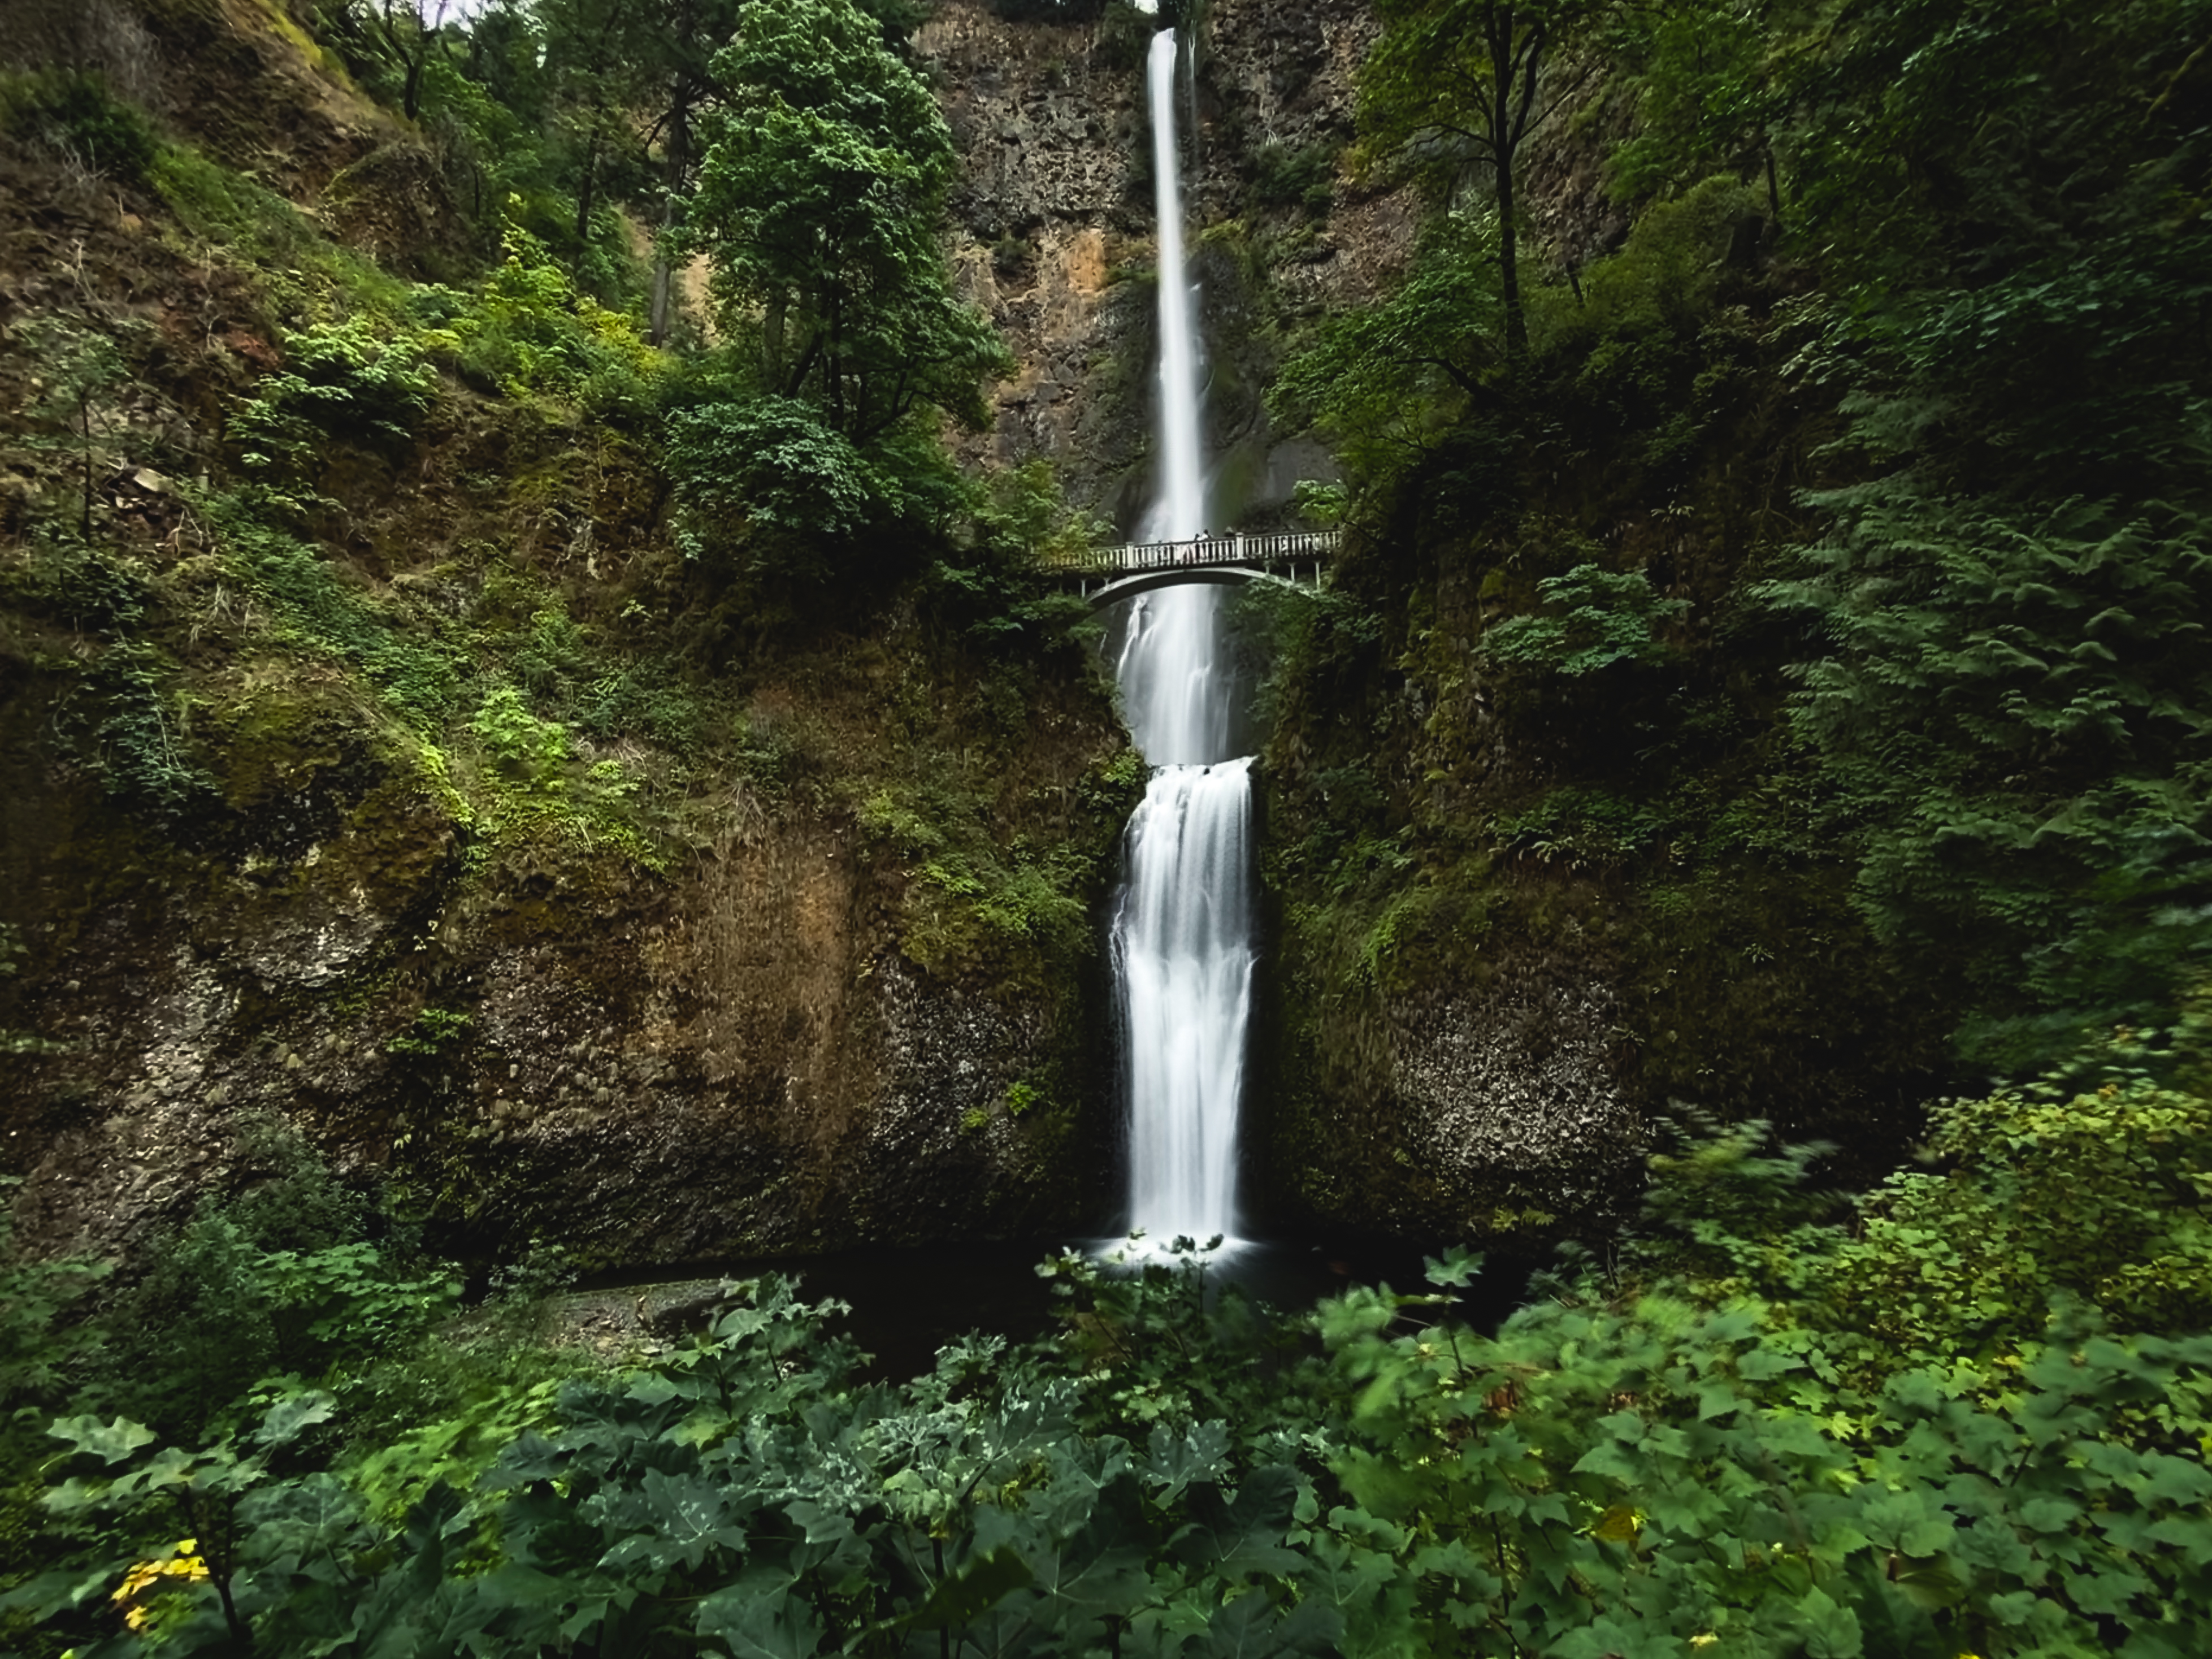
Photographing Waterfalls
The following is a collection of some of my favorite landscape photography and scenic videos of waterfalls that I have captured over the years in the Pacific Northwest.
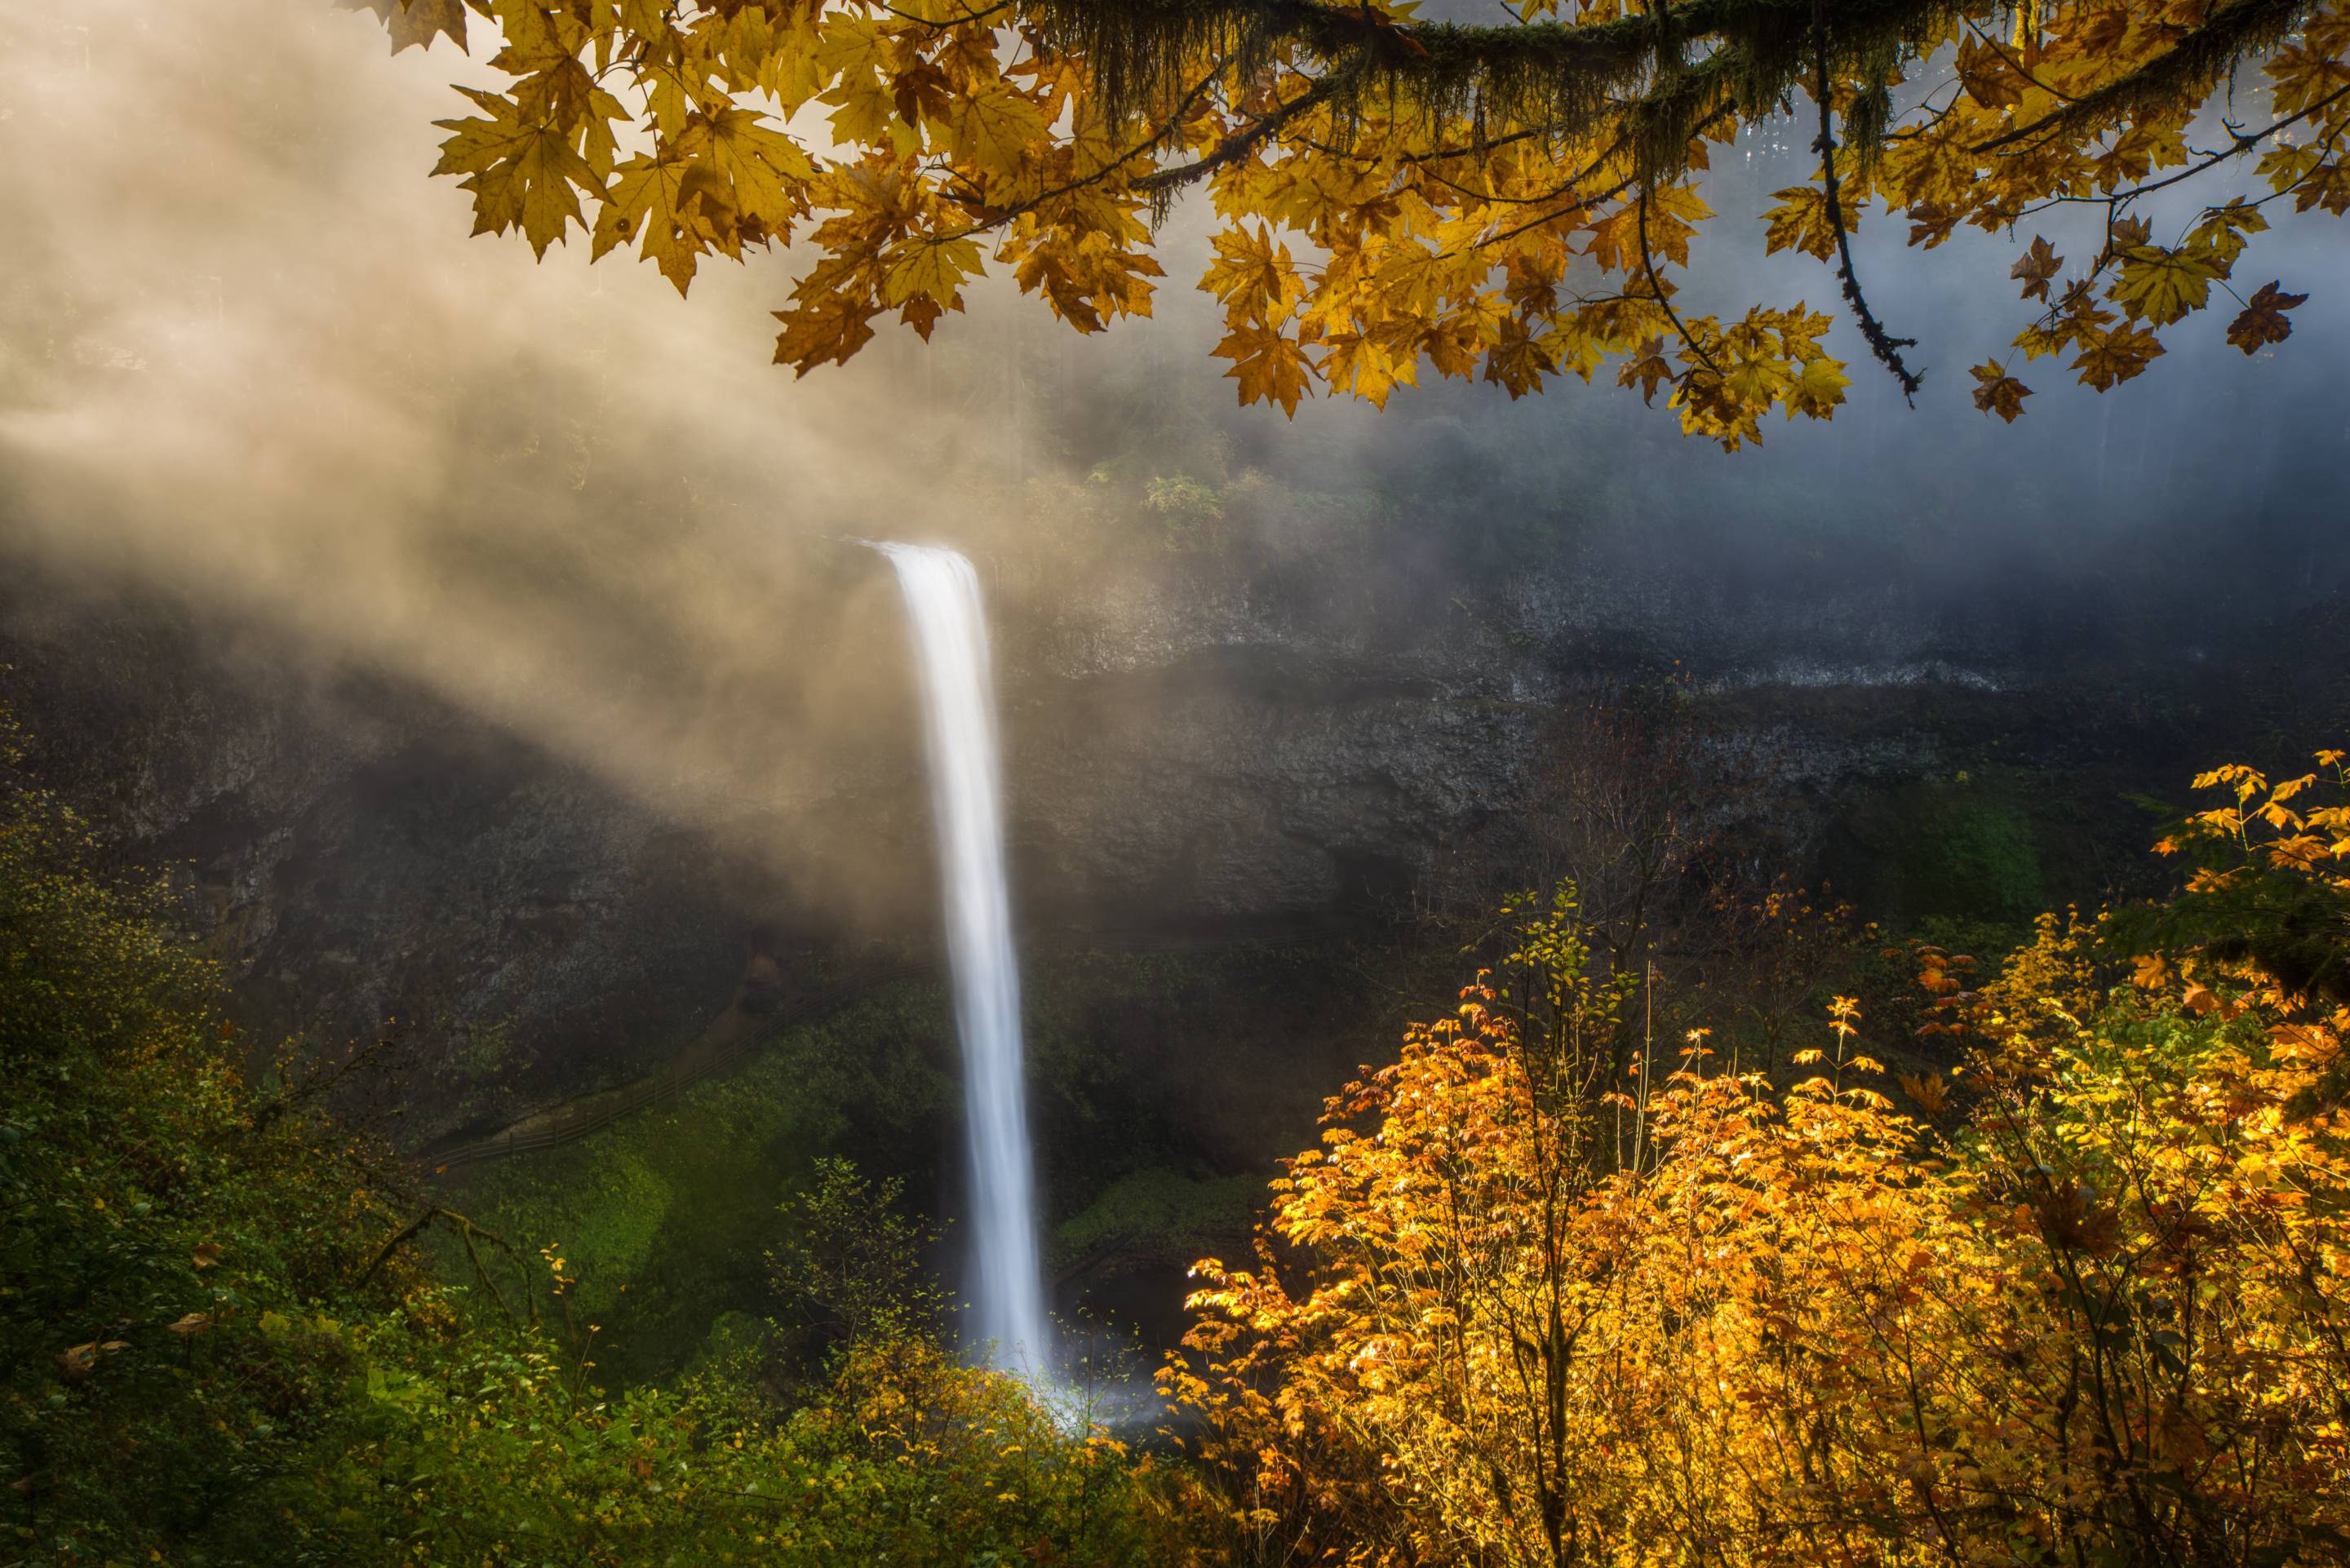
This is a photo I captured of South Falls in Silver Falls State Park, Oregon during Fall. The many deciduous trees in the area make it the perfect spot to capture fall color. The beautiful orange leaves that surround the waterfalls combined with the warmth of the early morning light beams made this one of my favorite photos that I’ve taken from the park.

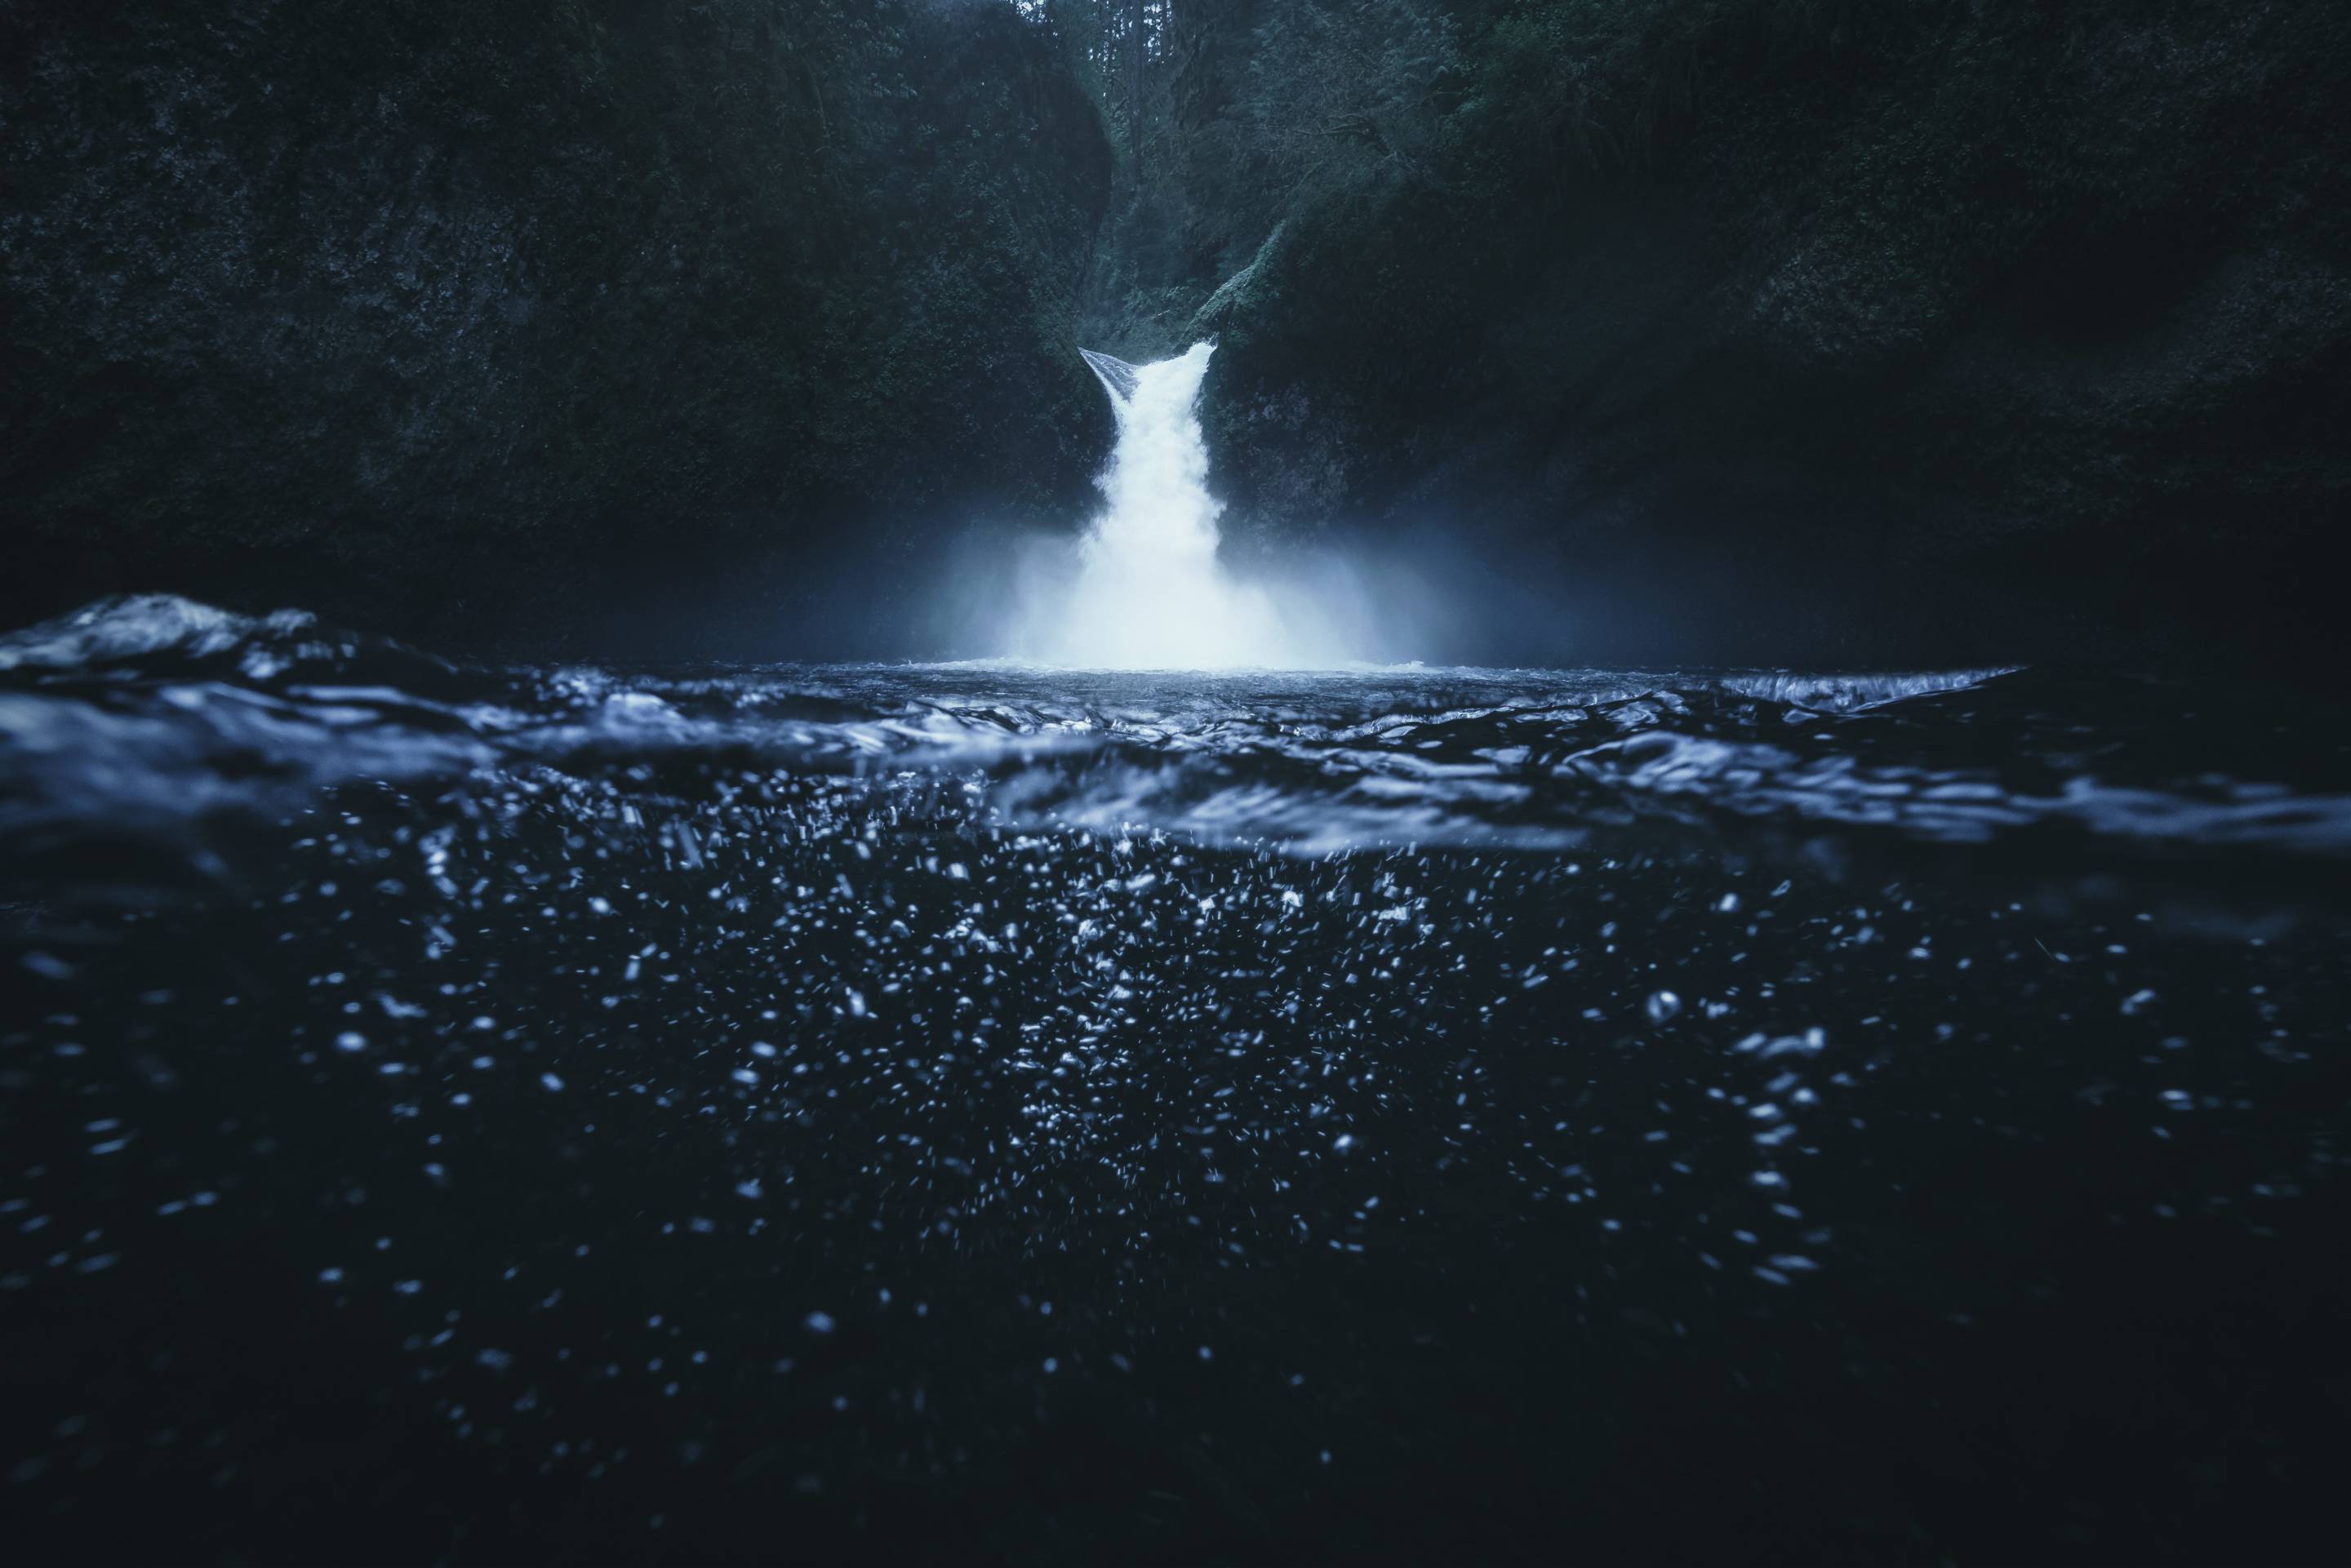
Here is a photo of Punchbowl Falls in the Columbia River Gorge, Oregon. I shot this image using my underwater housing. As of now, the landscape around this waterfall is unfortunately very damaged closed off due to a massive wildfire that occurred in the summer of 2017.
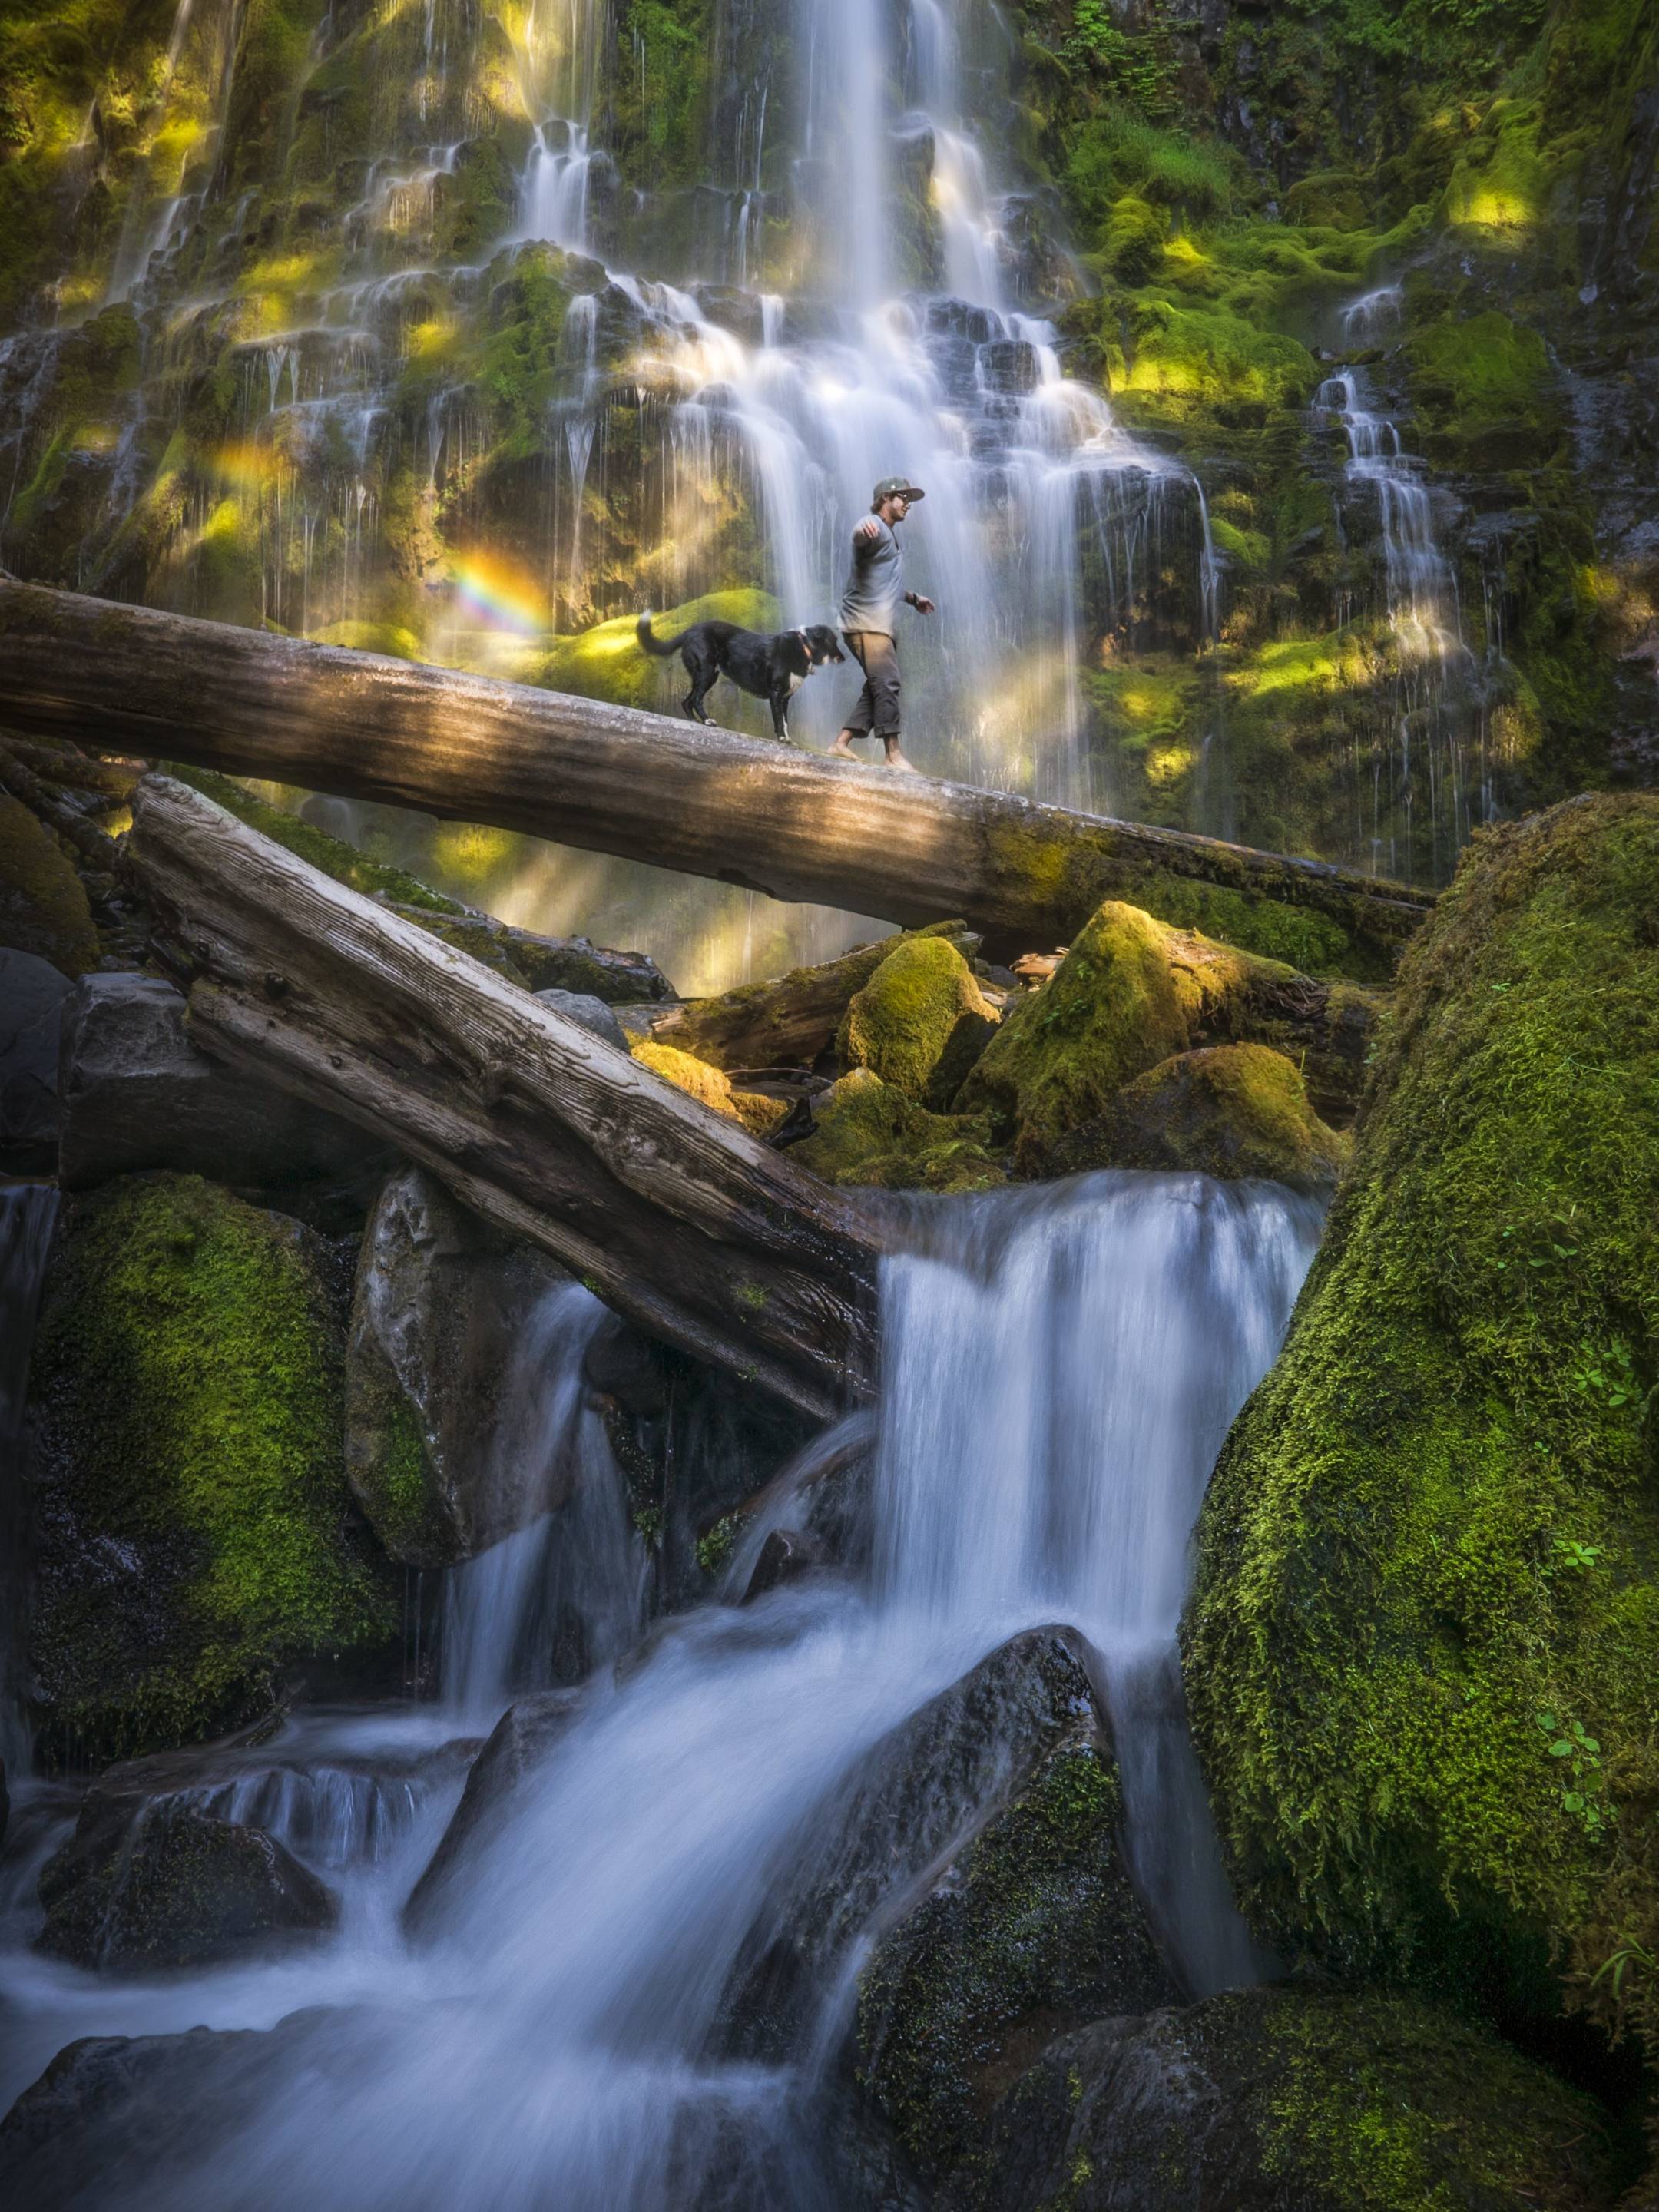
My all time favorite image was also captured at Proxy Falls. I'm especially proud of this image because it captures a really special, un-staged moment. Before I even had my camera out, I saw this man walking with his dog across the log and knew I had to capture it. I quickly rushed into the flow and setup my camera and tripod with just enough time to ask him if he'd be willing to hold still for the photo.
Below is Havasau Falls in the Grand Canyon, Arizona. It’s such an incredible waterfall because of how remote it is. After a ten mile hike down into the canyon, it was so rewarding to be able to swim and relax next to this beautiful waterfall.
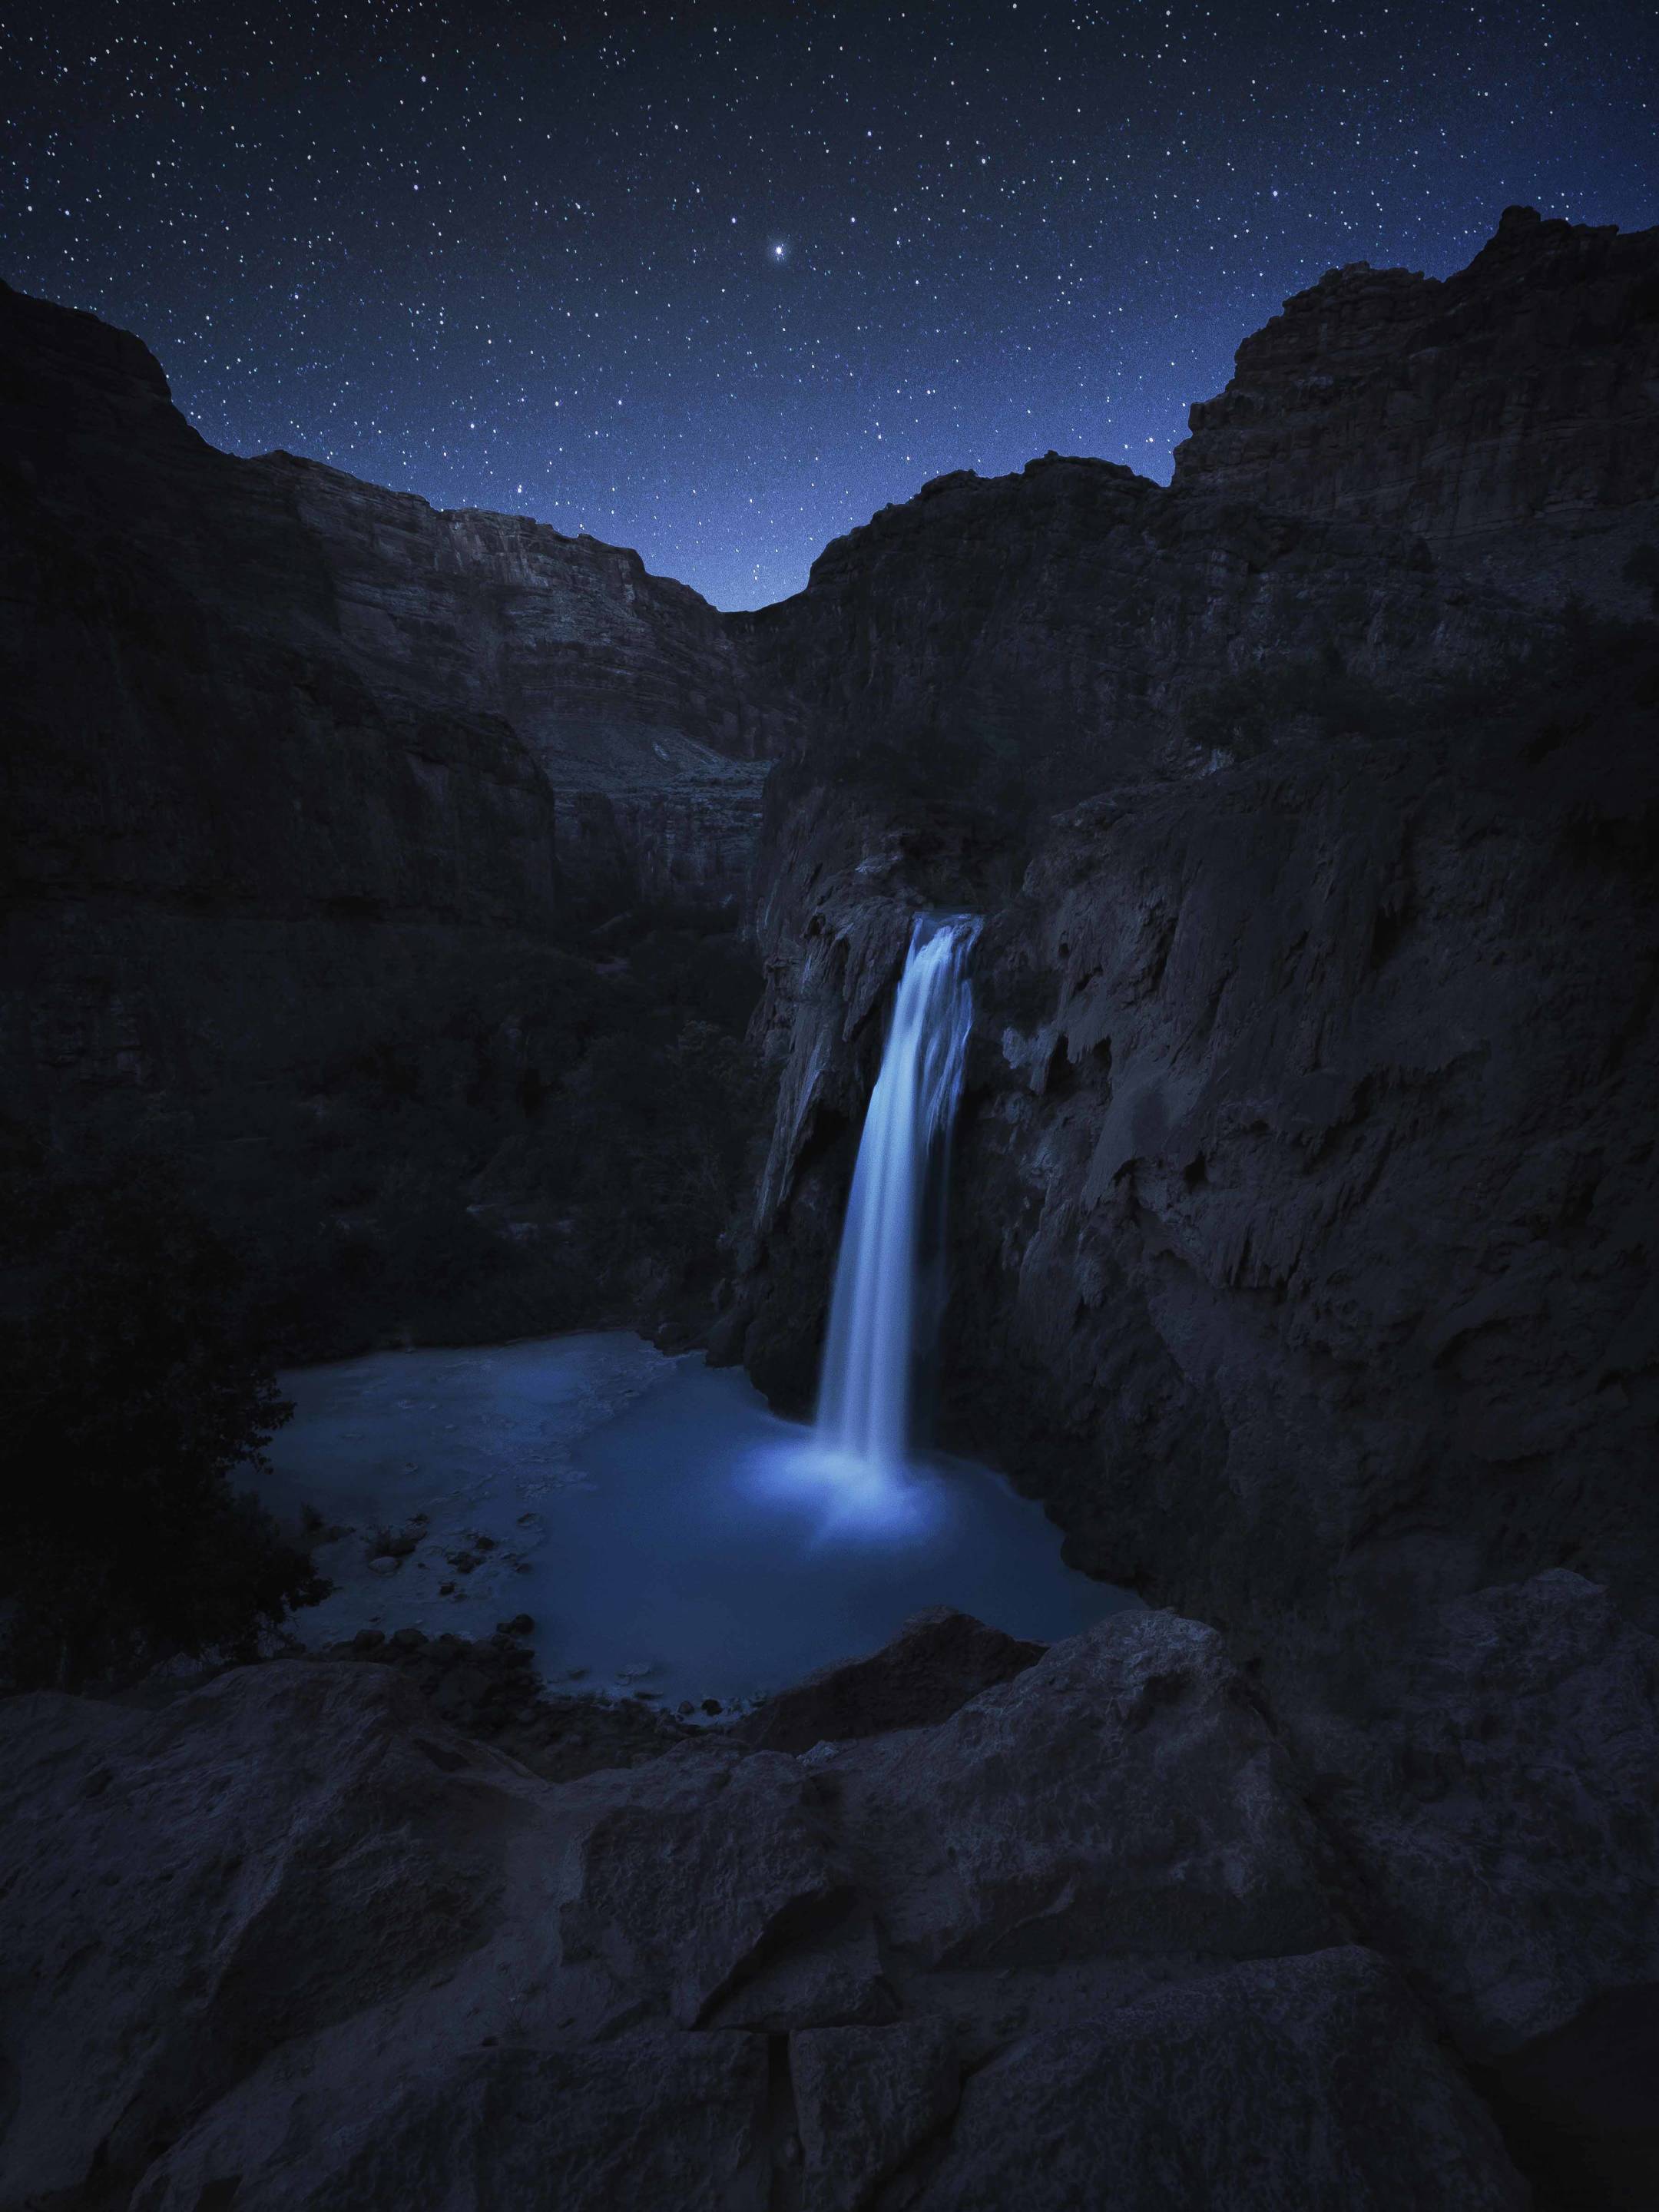
Havasupai Falls is famous for it’s vibrant turquoise blue water that is enhanced in the afternoon light. While I loved photographing the unique color of this waterfall during the day time, I especially enjoyed shooting it under the starlight. Because you’re so far away from any towns and light pollution, the stars in the Grand Canyon are so bright and plentiful making it the perfect place to do night photography.


These two images were both taken at Oneonta Falls in the Columbia River Gorge, Oregon during different seasons. Oneonta Falls is also one of my favorite waterfalls in Oregon. After a brief, quarter mile trek up a gorge through the river you’re greeted by Oneonta Falls. It’s a wonderful spot to spend a hot summer afternoon – or cold, winter day. Unfortunately, this spot is also currently closed off because of the wildfire. The forest above was completely burned causing frequent landslides to fall into the gorge.

Sometimes, excessive rain or snow can allow for some beautifully unique conditions at waterfalls. The image on the left is of Elowah Falls in the Columbia River Gorge, Oregon. The two smaller side falls are not usually there but I was lucky enough to capture them during a very rainy winter.
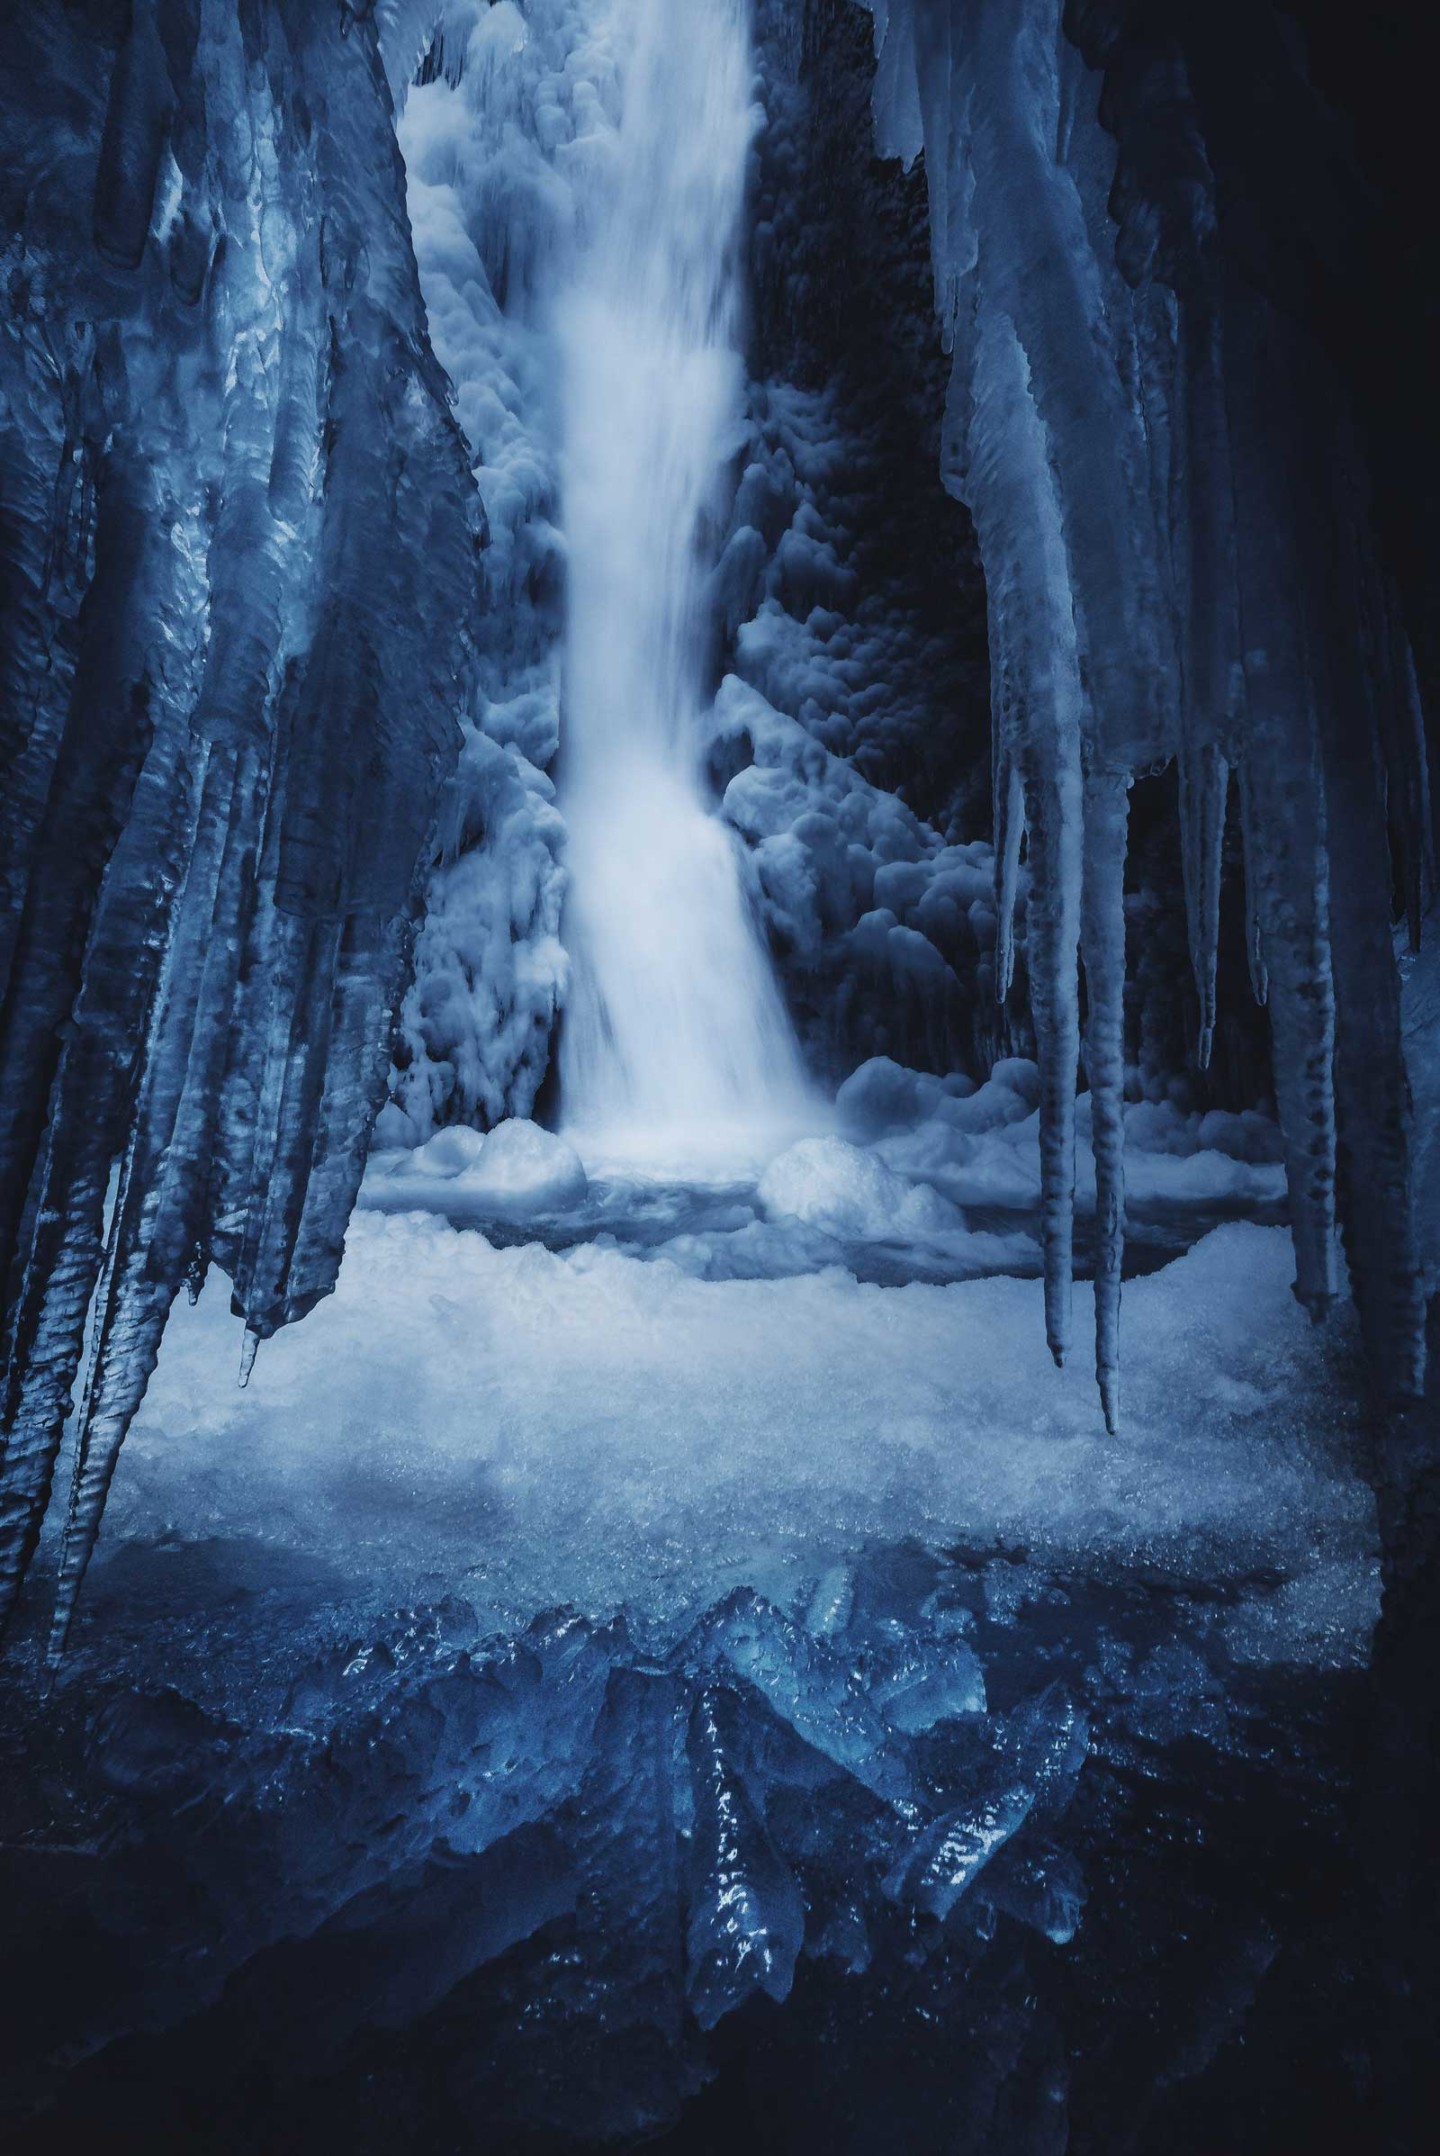
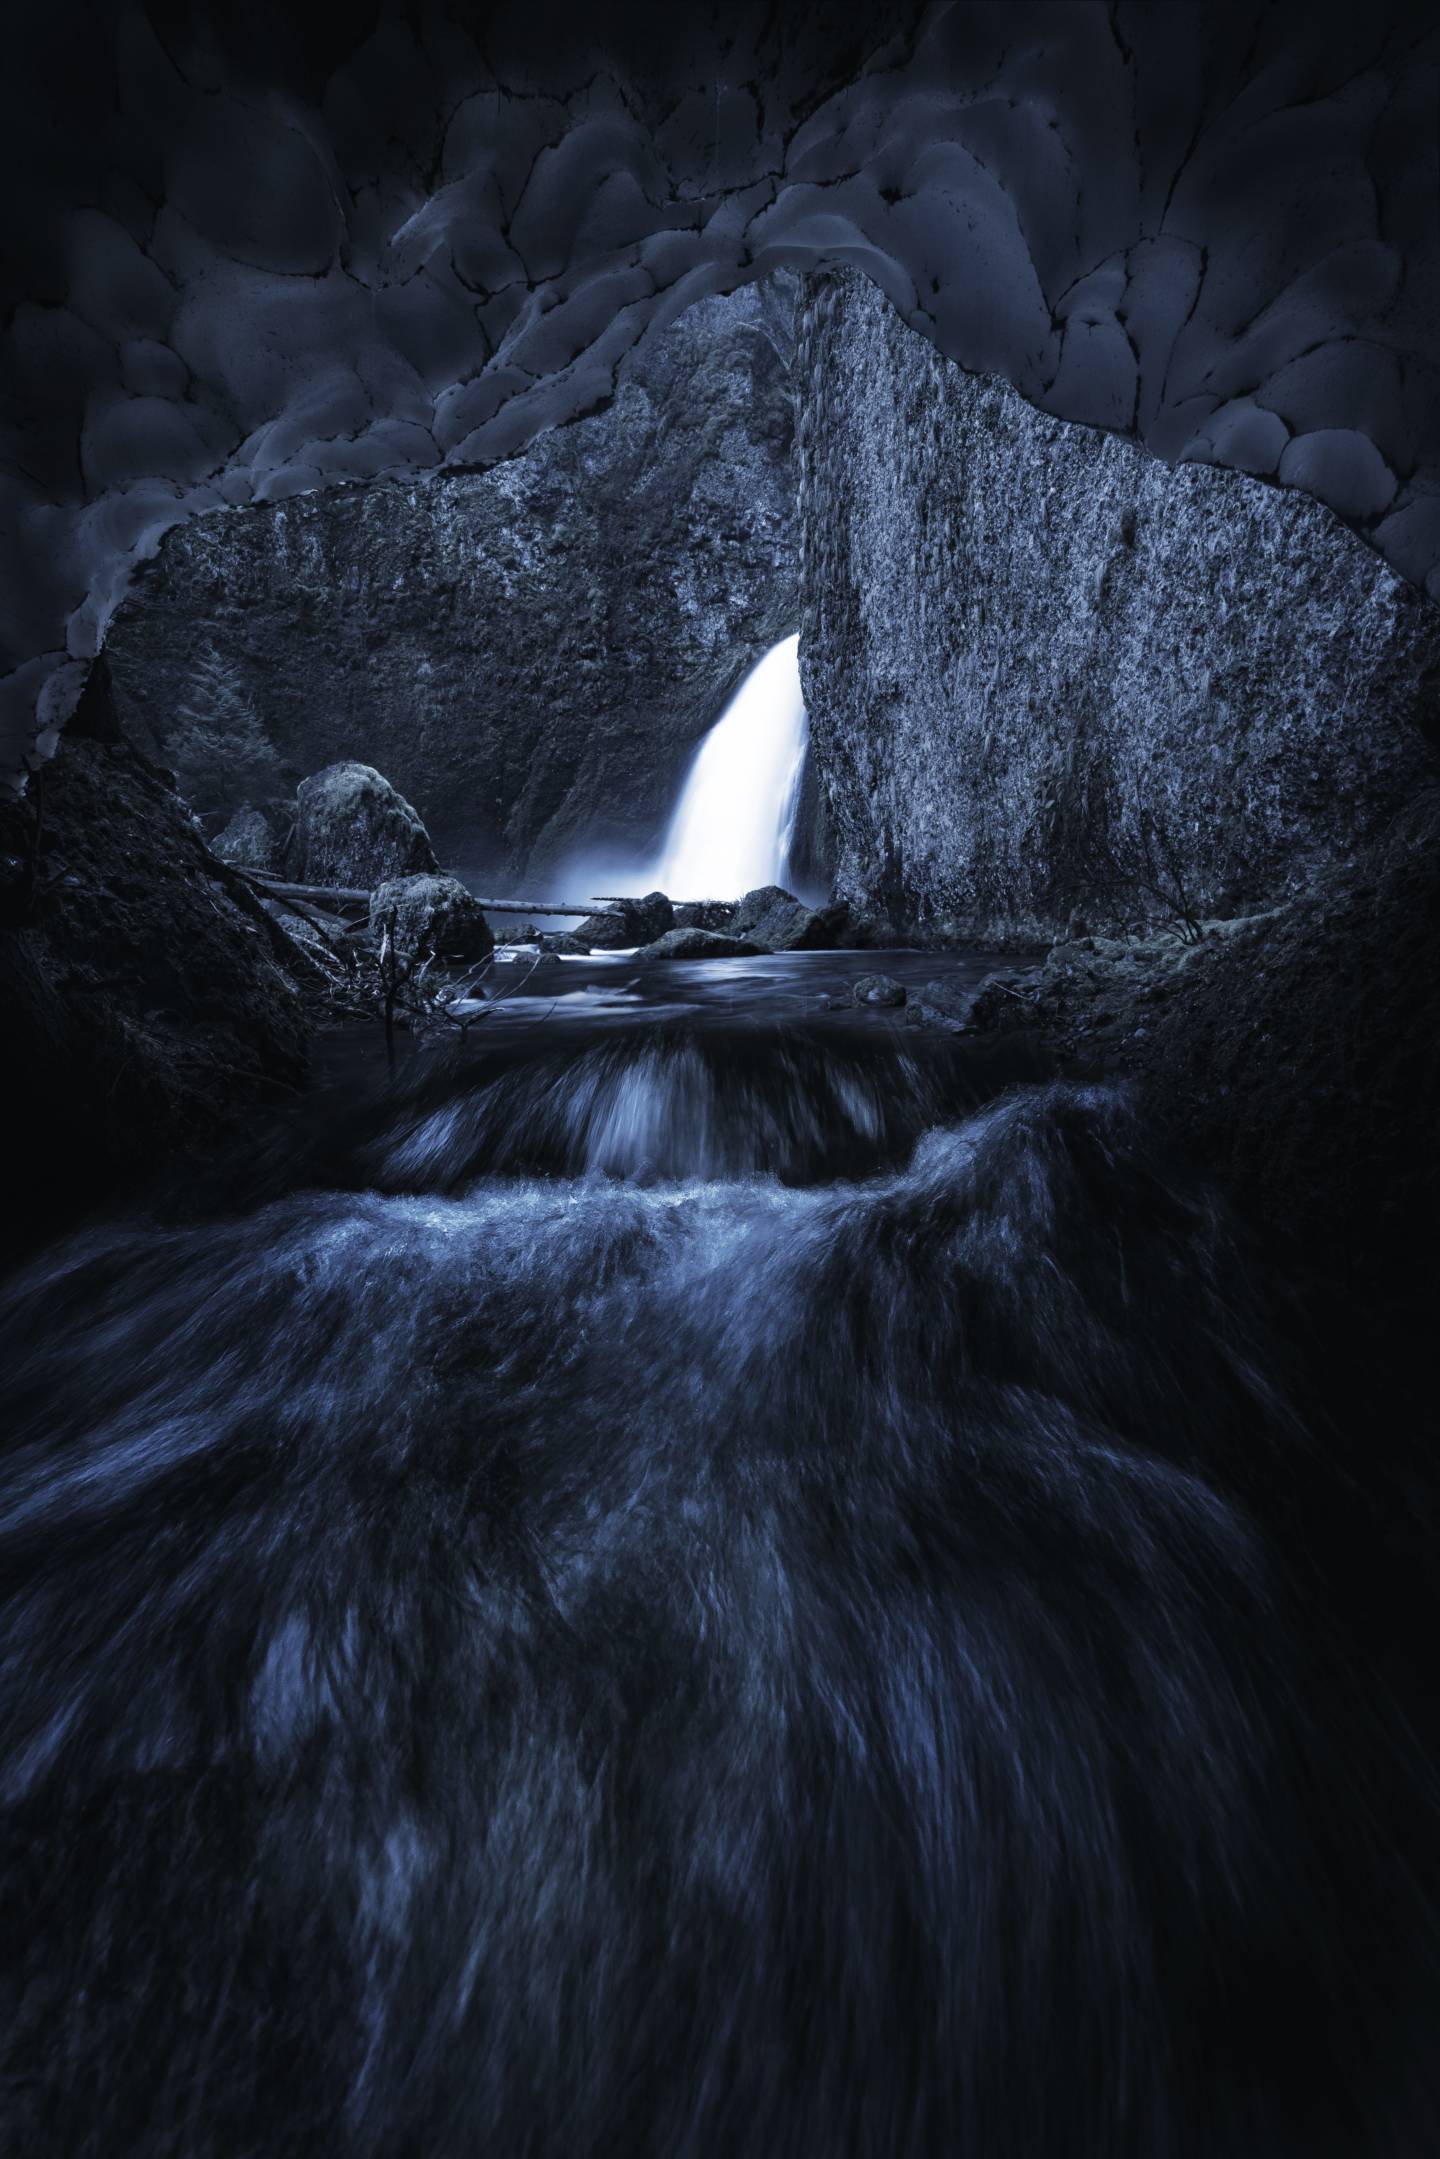
The image on the right is of Wahclella falls during the winter. I captured this image from inside a large frozen snow cave that had formed after a snow storm.
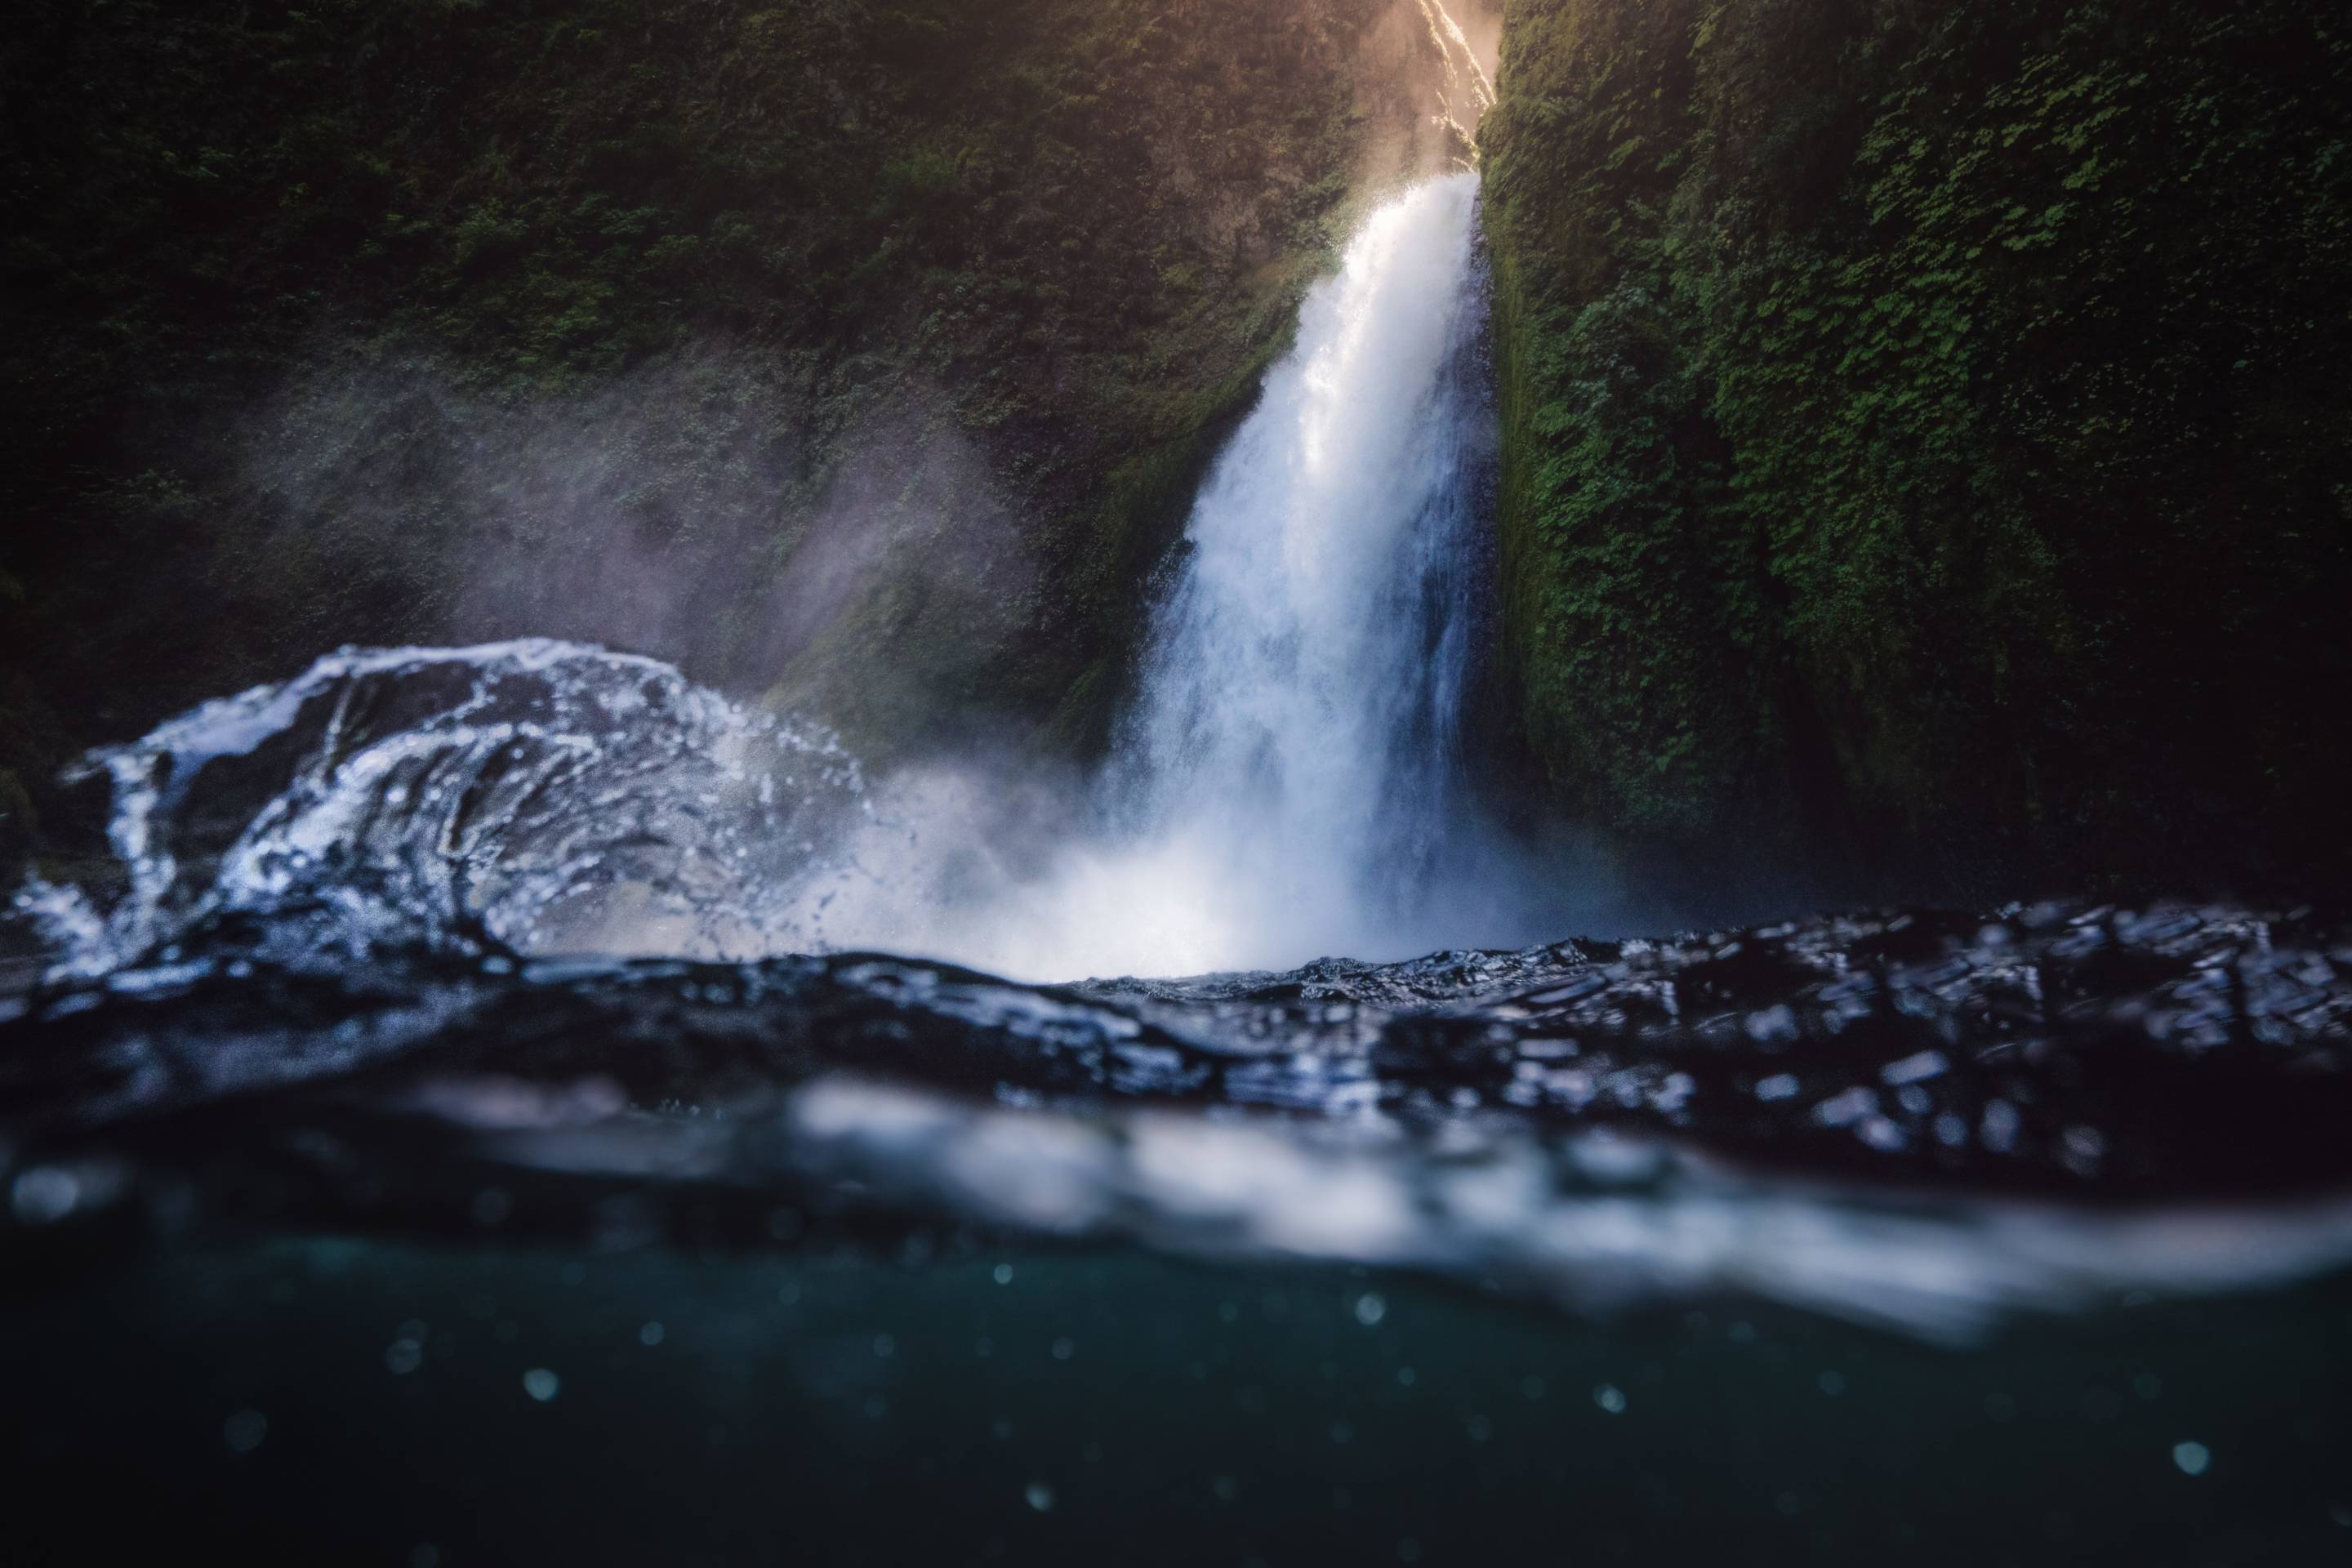
Here is an underwater image I captured at Wachella Falls Oregon during the summer time. I had so much fun swimming around the waterfall photographing the tiny waves and light beams that formed. I really enjoy using my underwater housing to photograph waterfalls in a non traditional fashion.
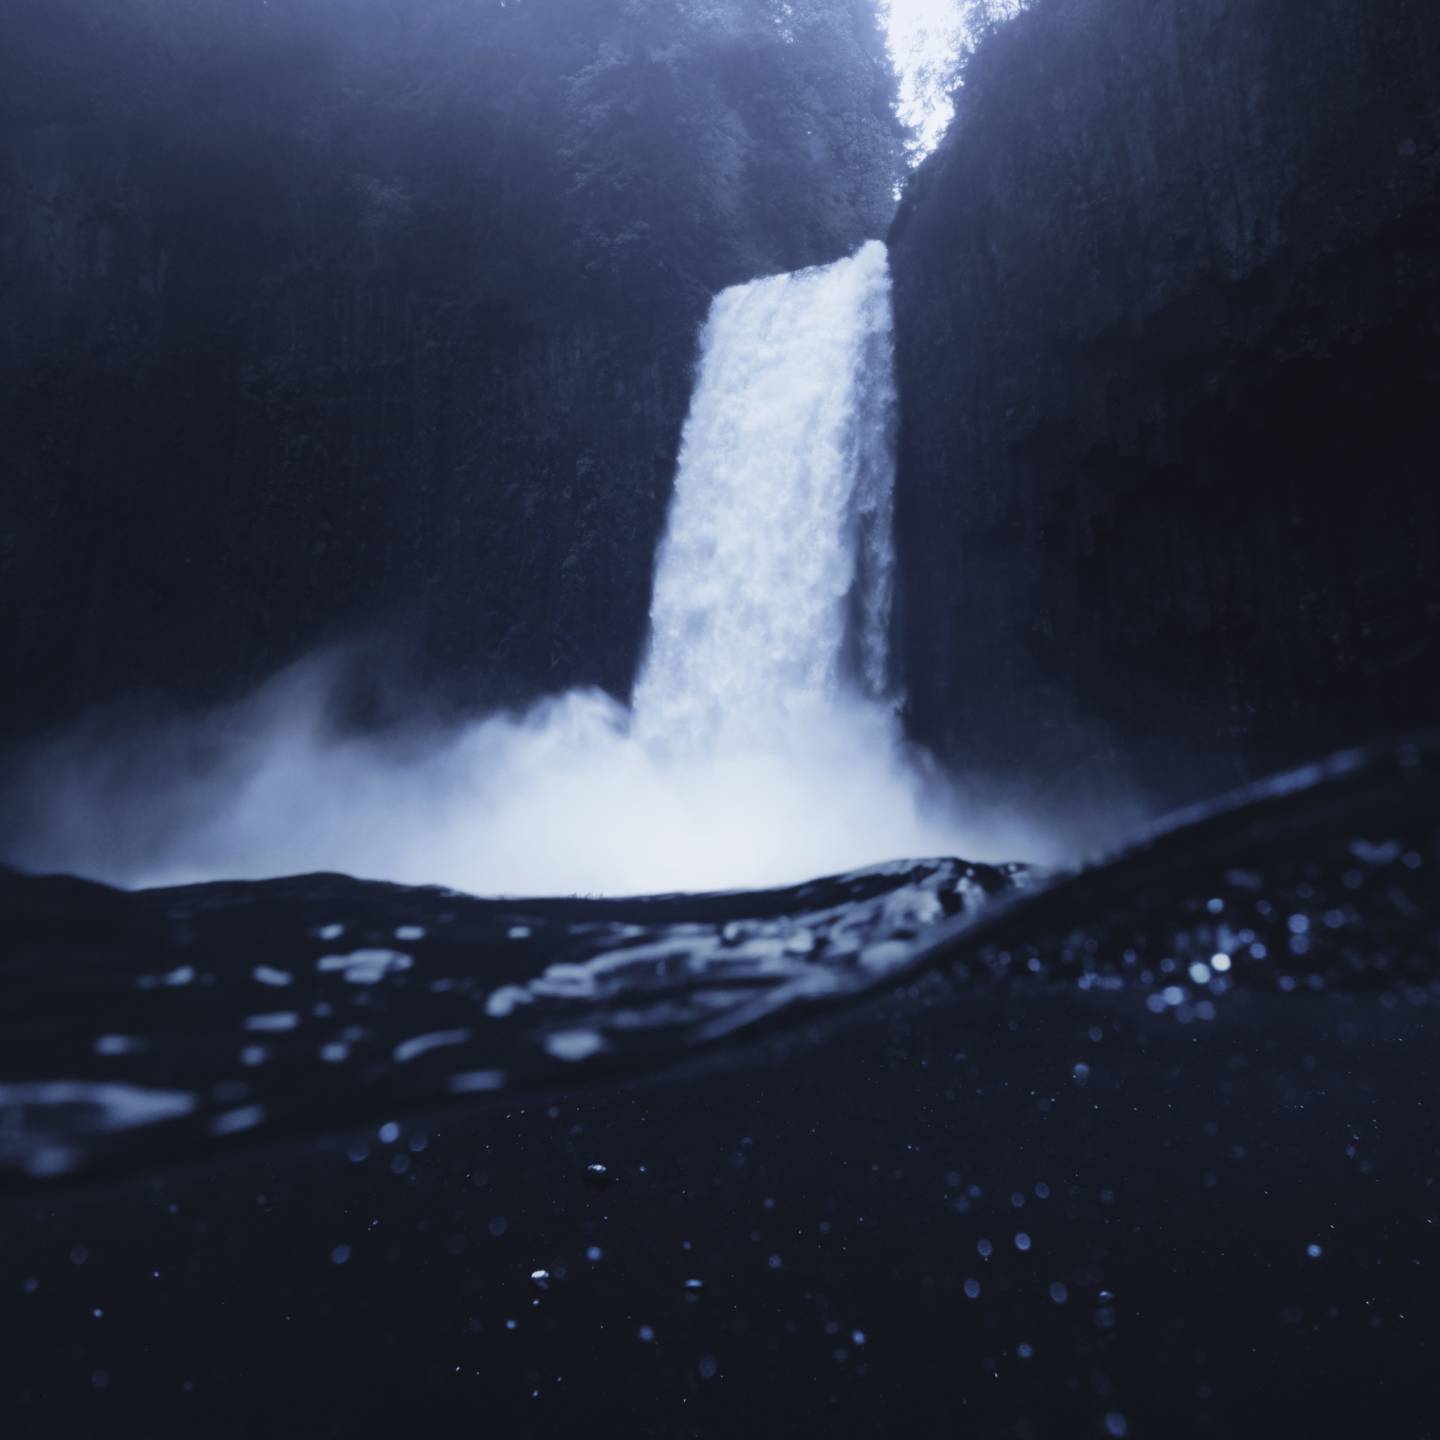

I also enjoyed shooting some underwater photography at Abiqua Falls near Silverton, Oregon. While at Abiqua Falls, I focused on capturing fast exposure images of the underwater bubbles and spray that came off the waterfall. Although it slightly made me look like a chipmunk, I really appreciated having my XCEL Wetsuitand dive gloves to keep me warm as I spent hours swimming in the cold water.
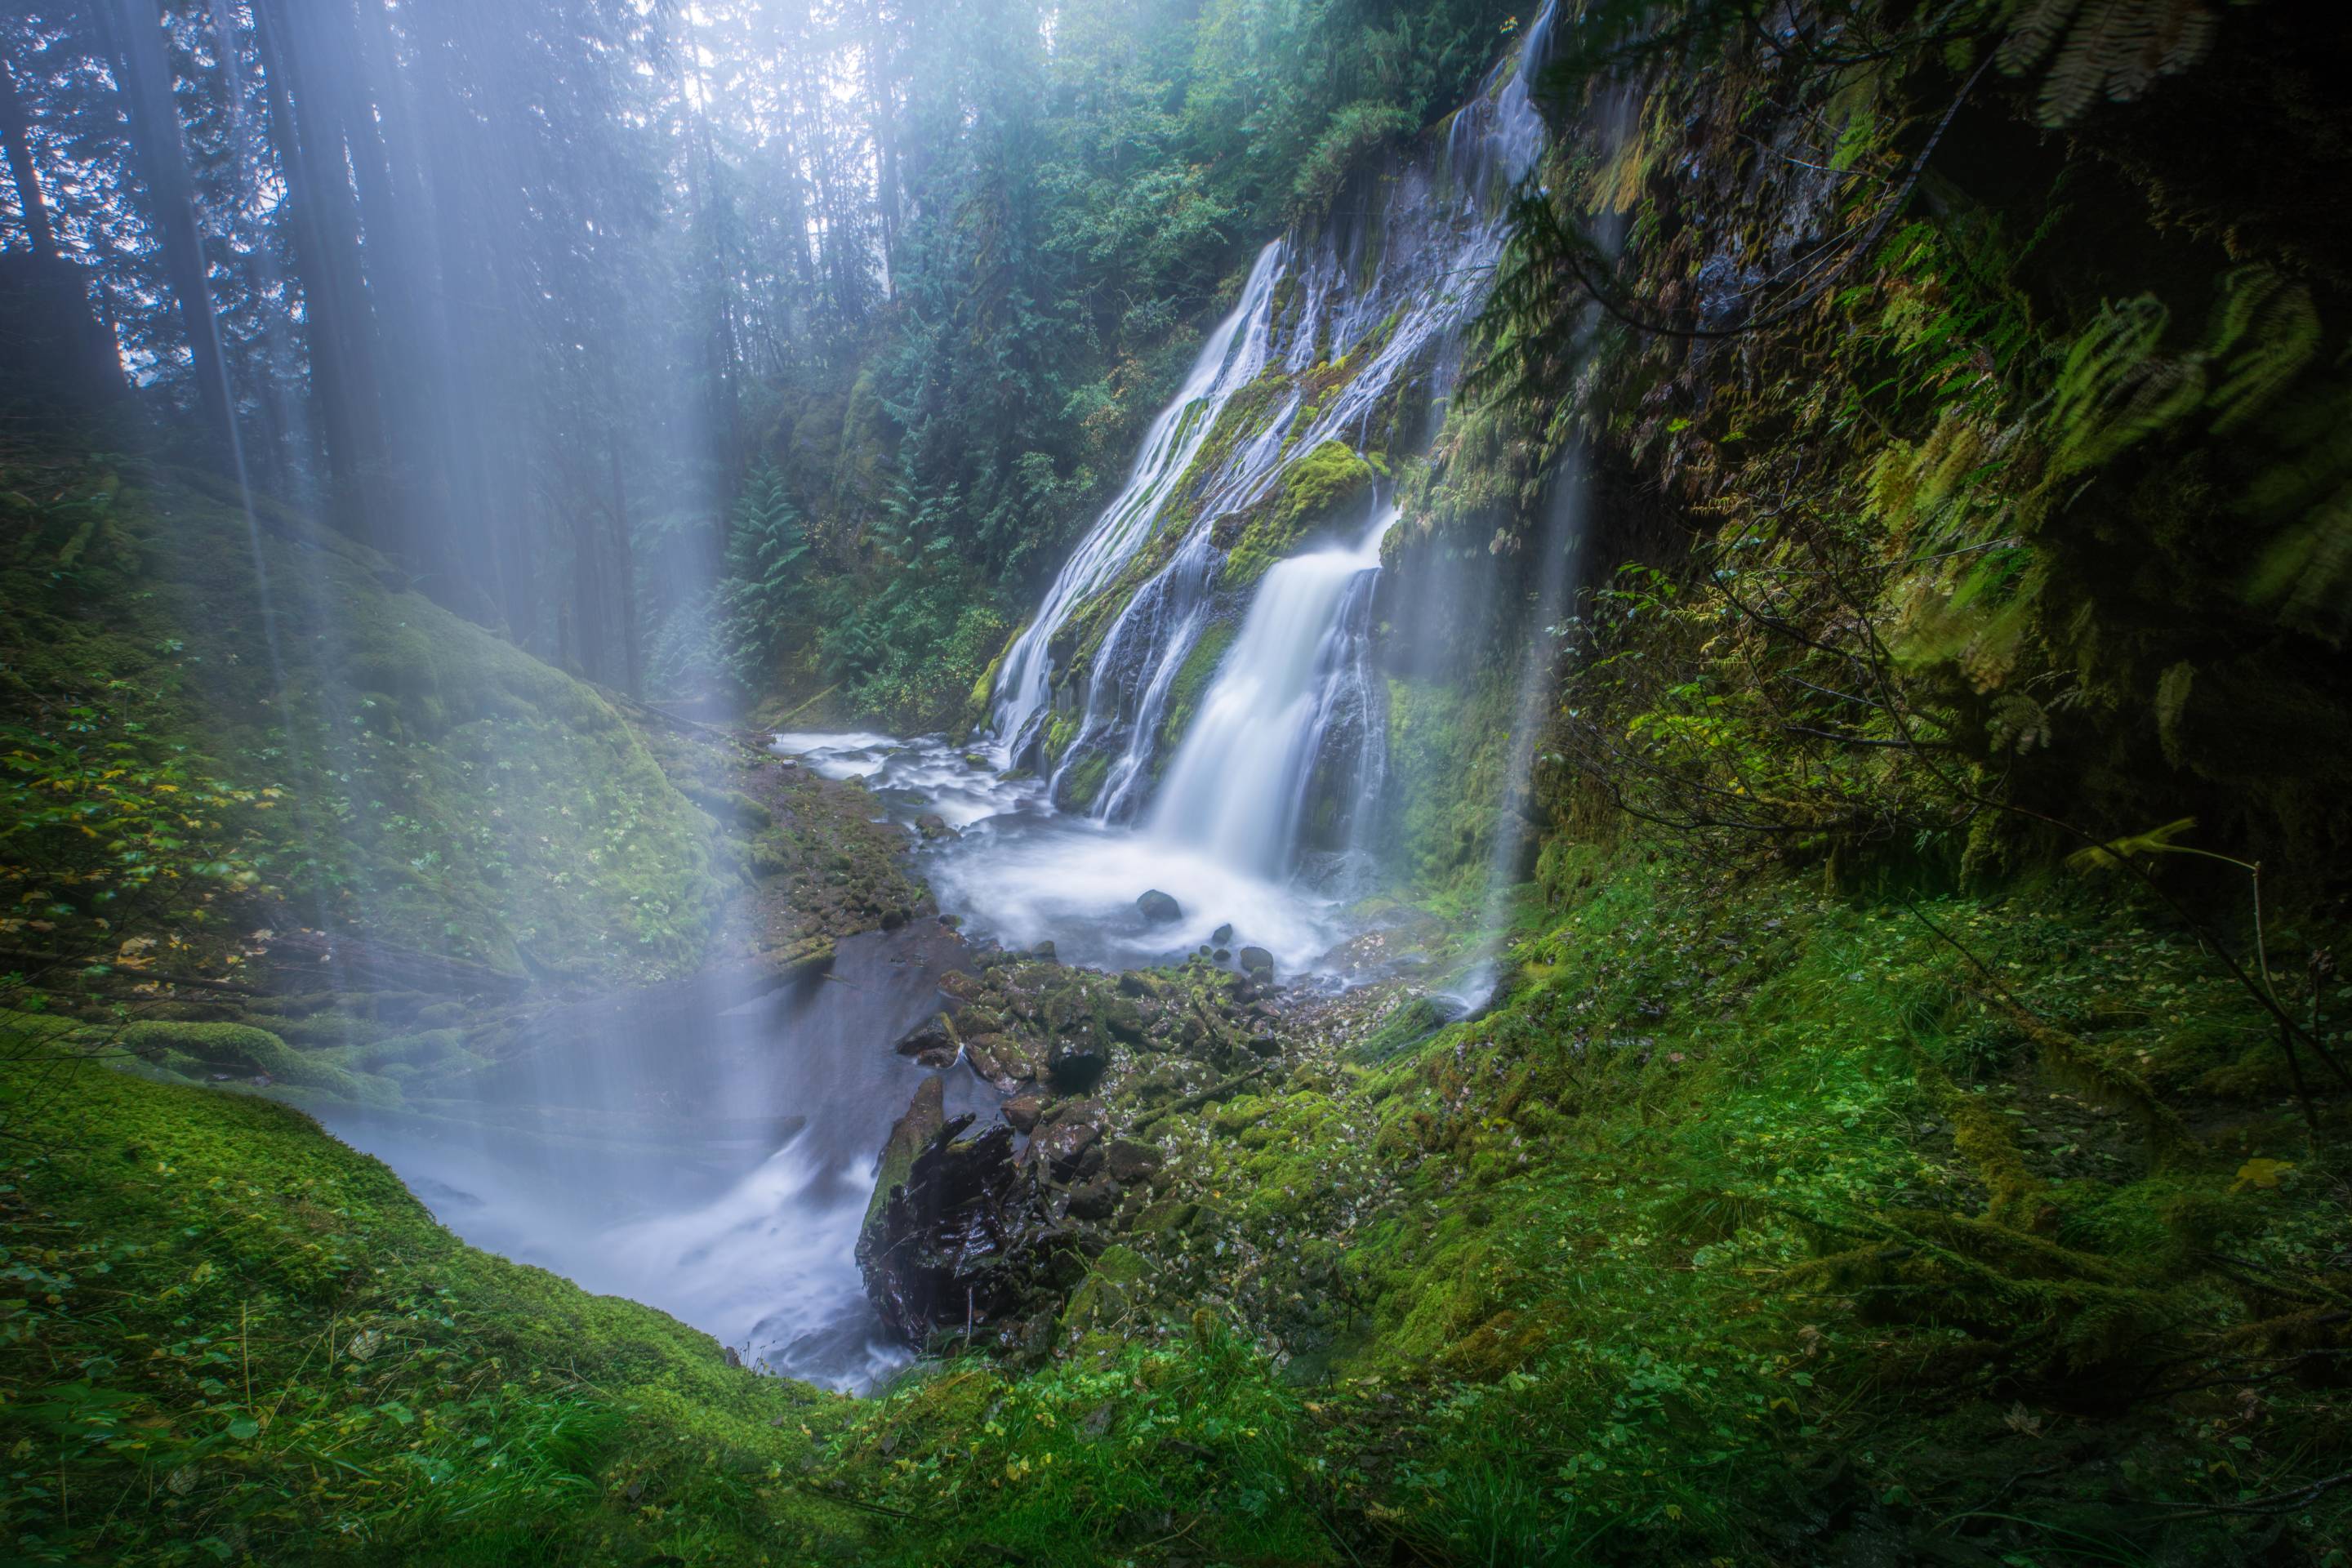
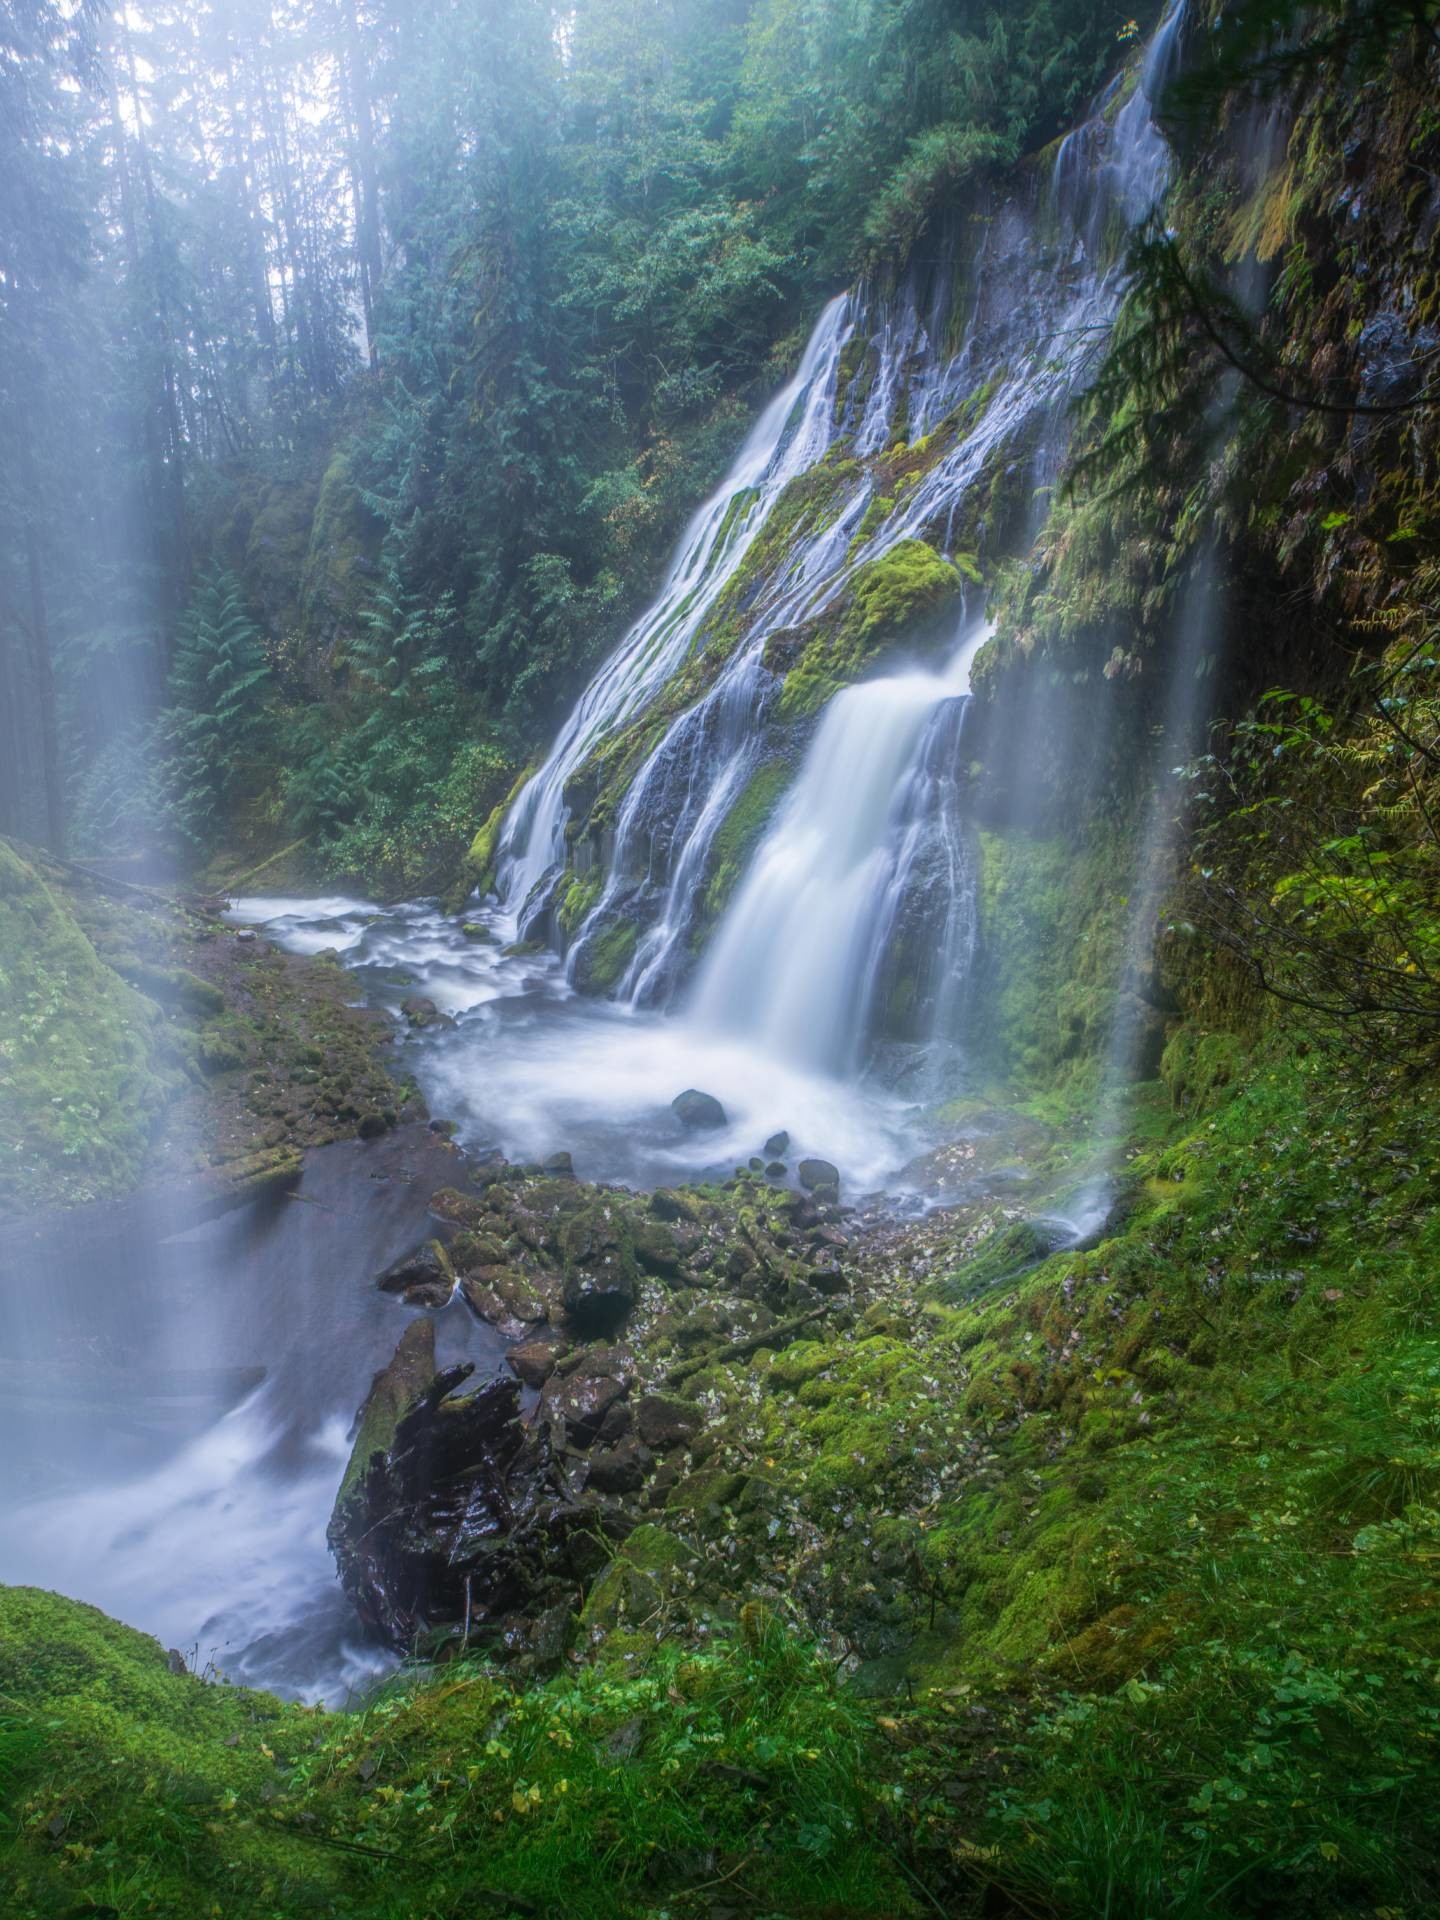
Finally, here is an image of Panther Creek Falls on the Washington side of the Columbia River Gorge.
I captured these two videos of Panther Creek Falls on two separate visits after a lot of rainfall.
My Favorite Moments from 2017
2017 was an amazing year full of some very fun trips and photoshoots. I explored new styles and forms of photography including underwater and portraiture photography that I hope to do more of in 2018. Last month, I shared a video highlighting my year. Now, I’m excited to share a short collection of just a couple of my favorite images taken during 2017.
Thanks for taking a look!


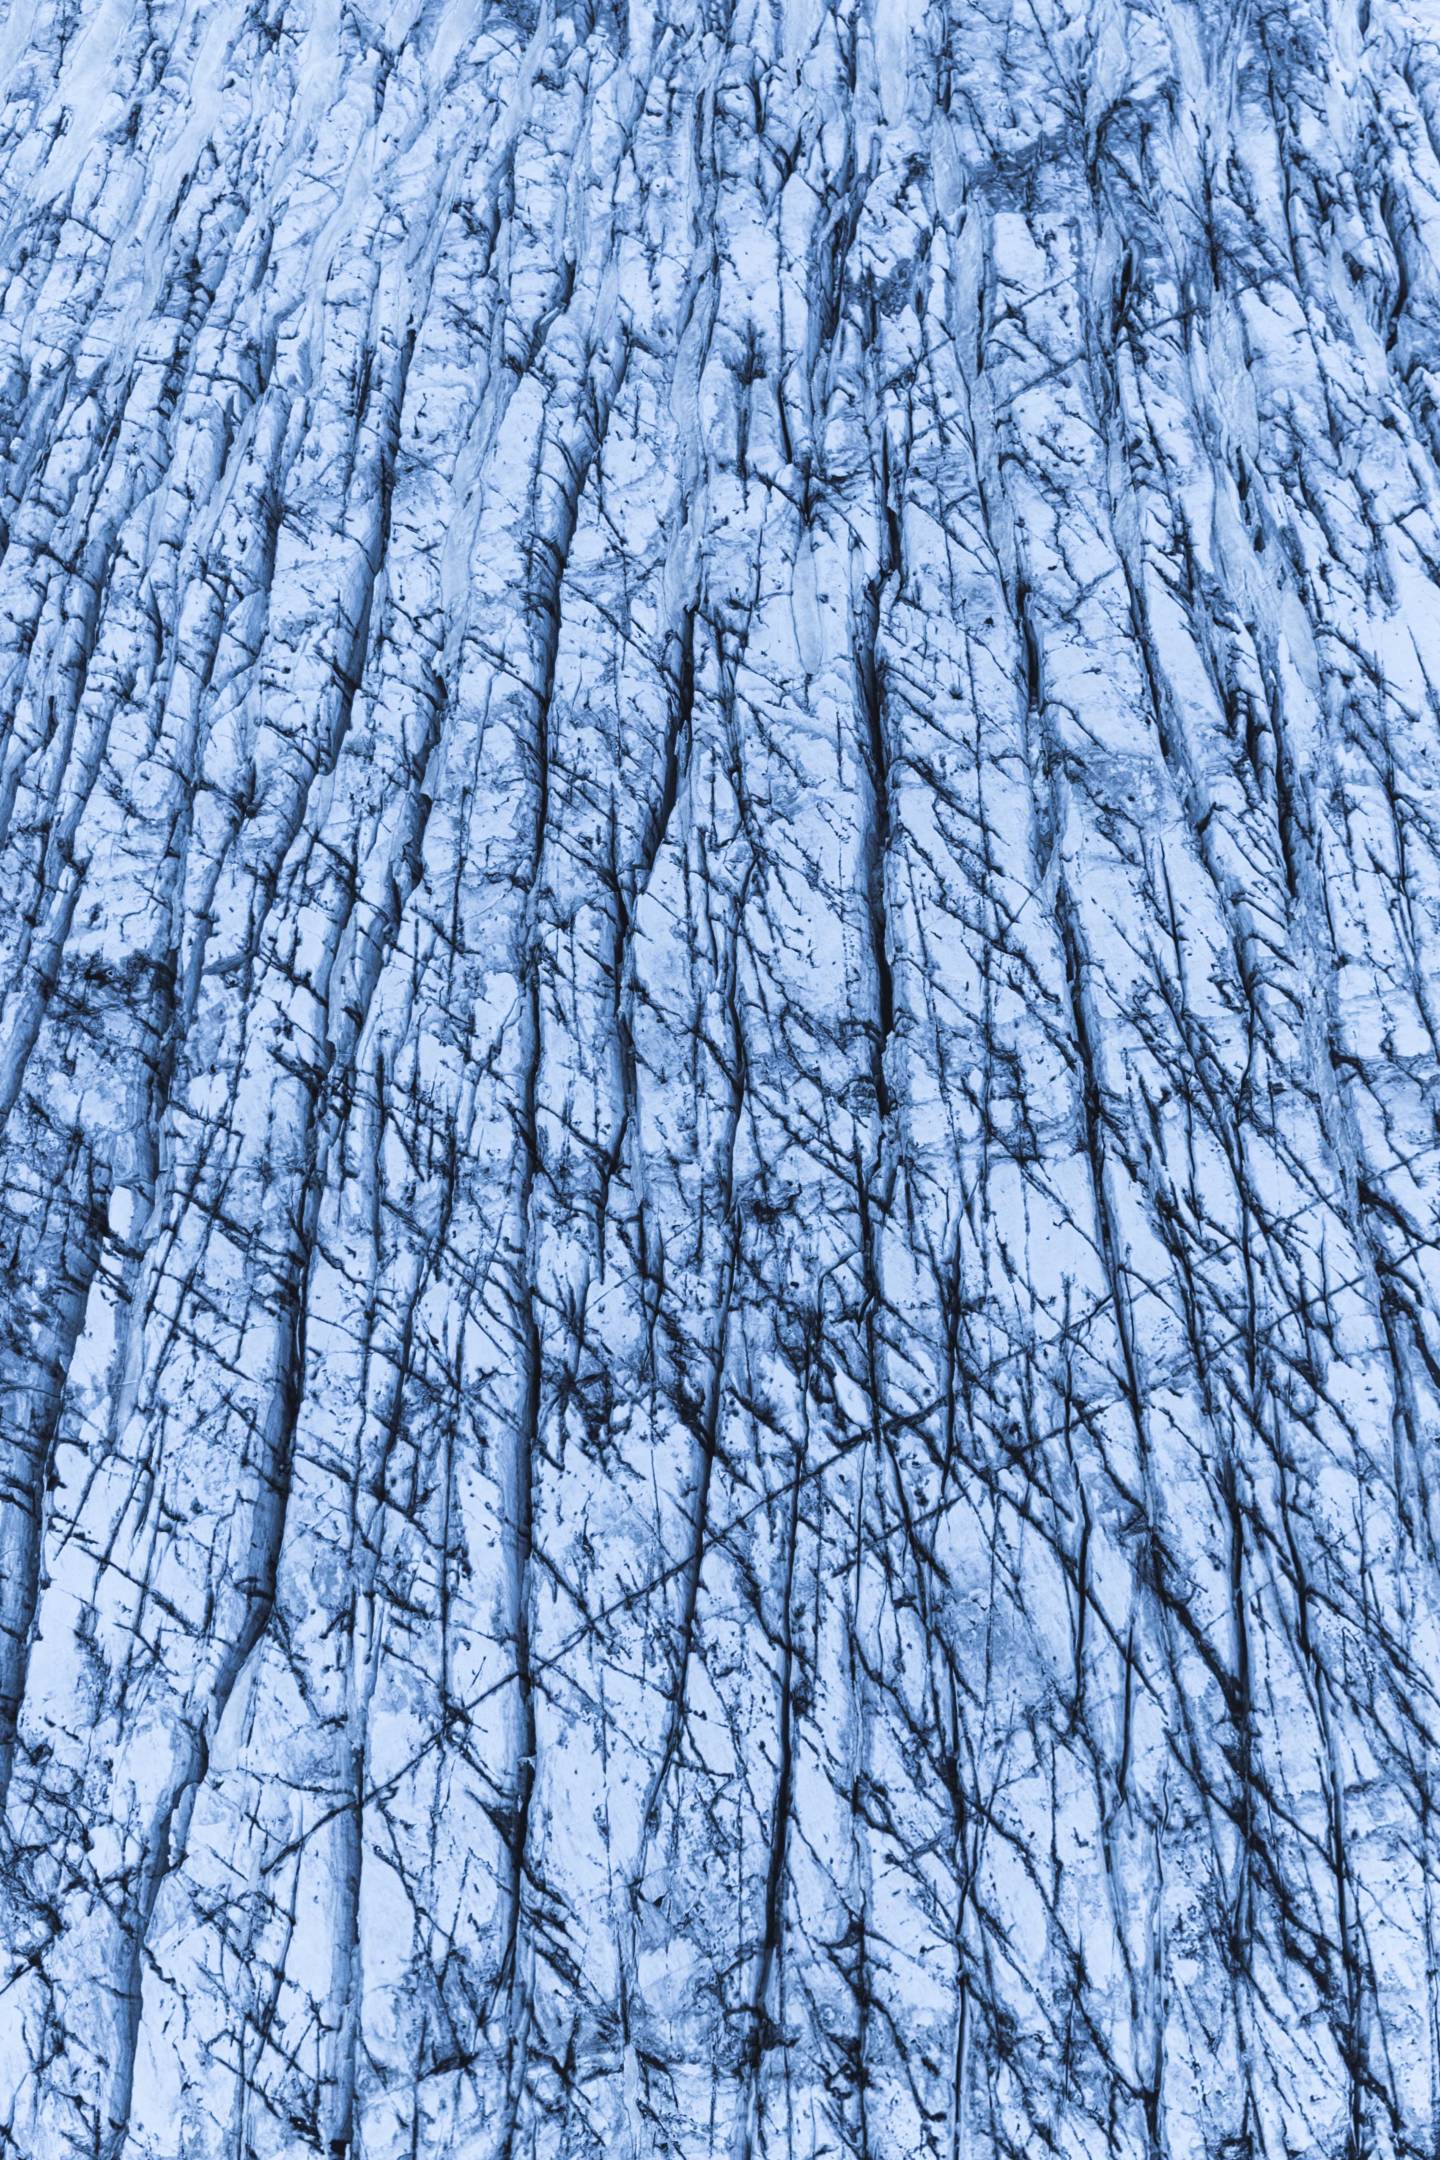
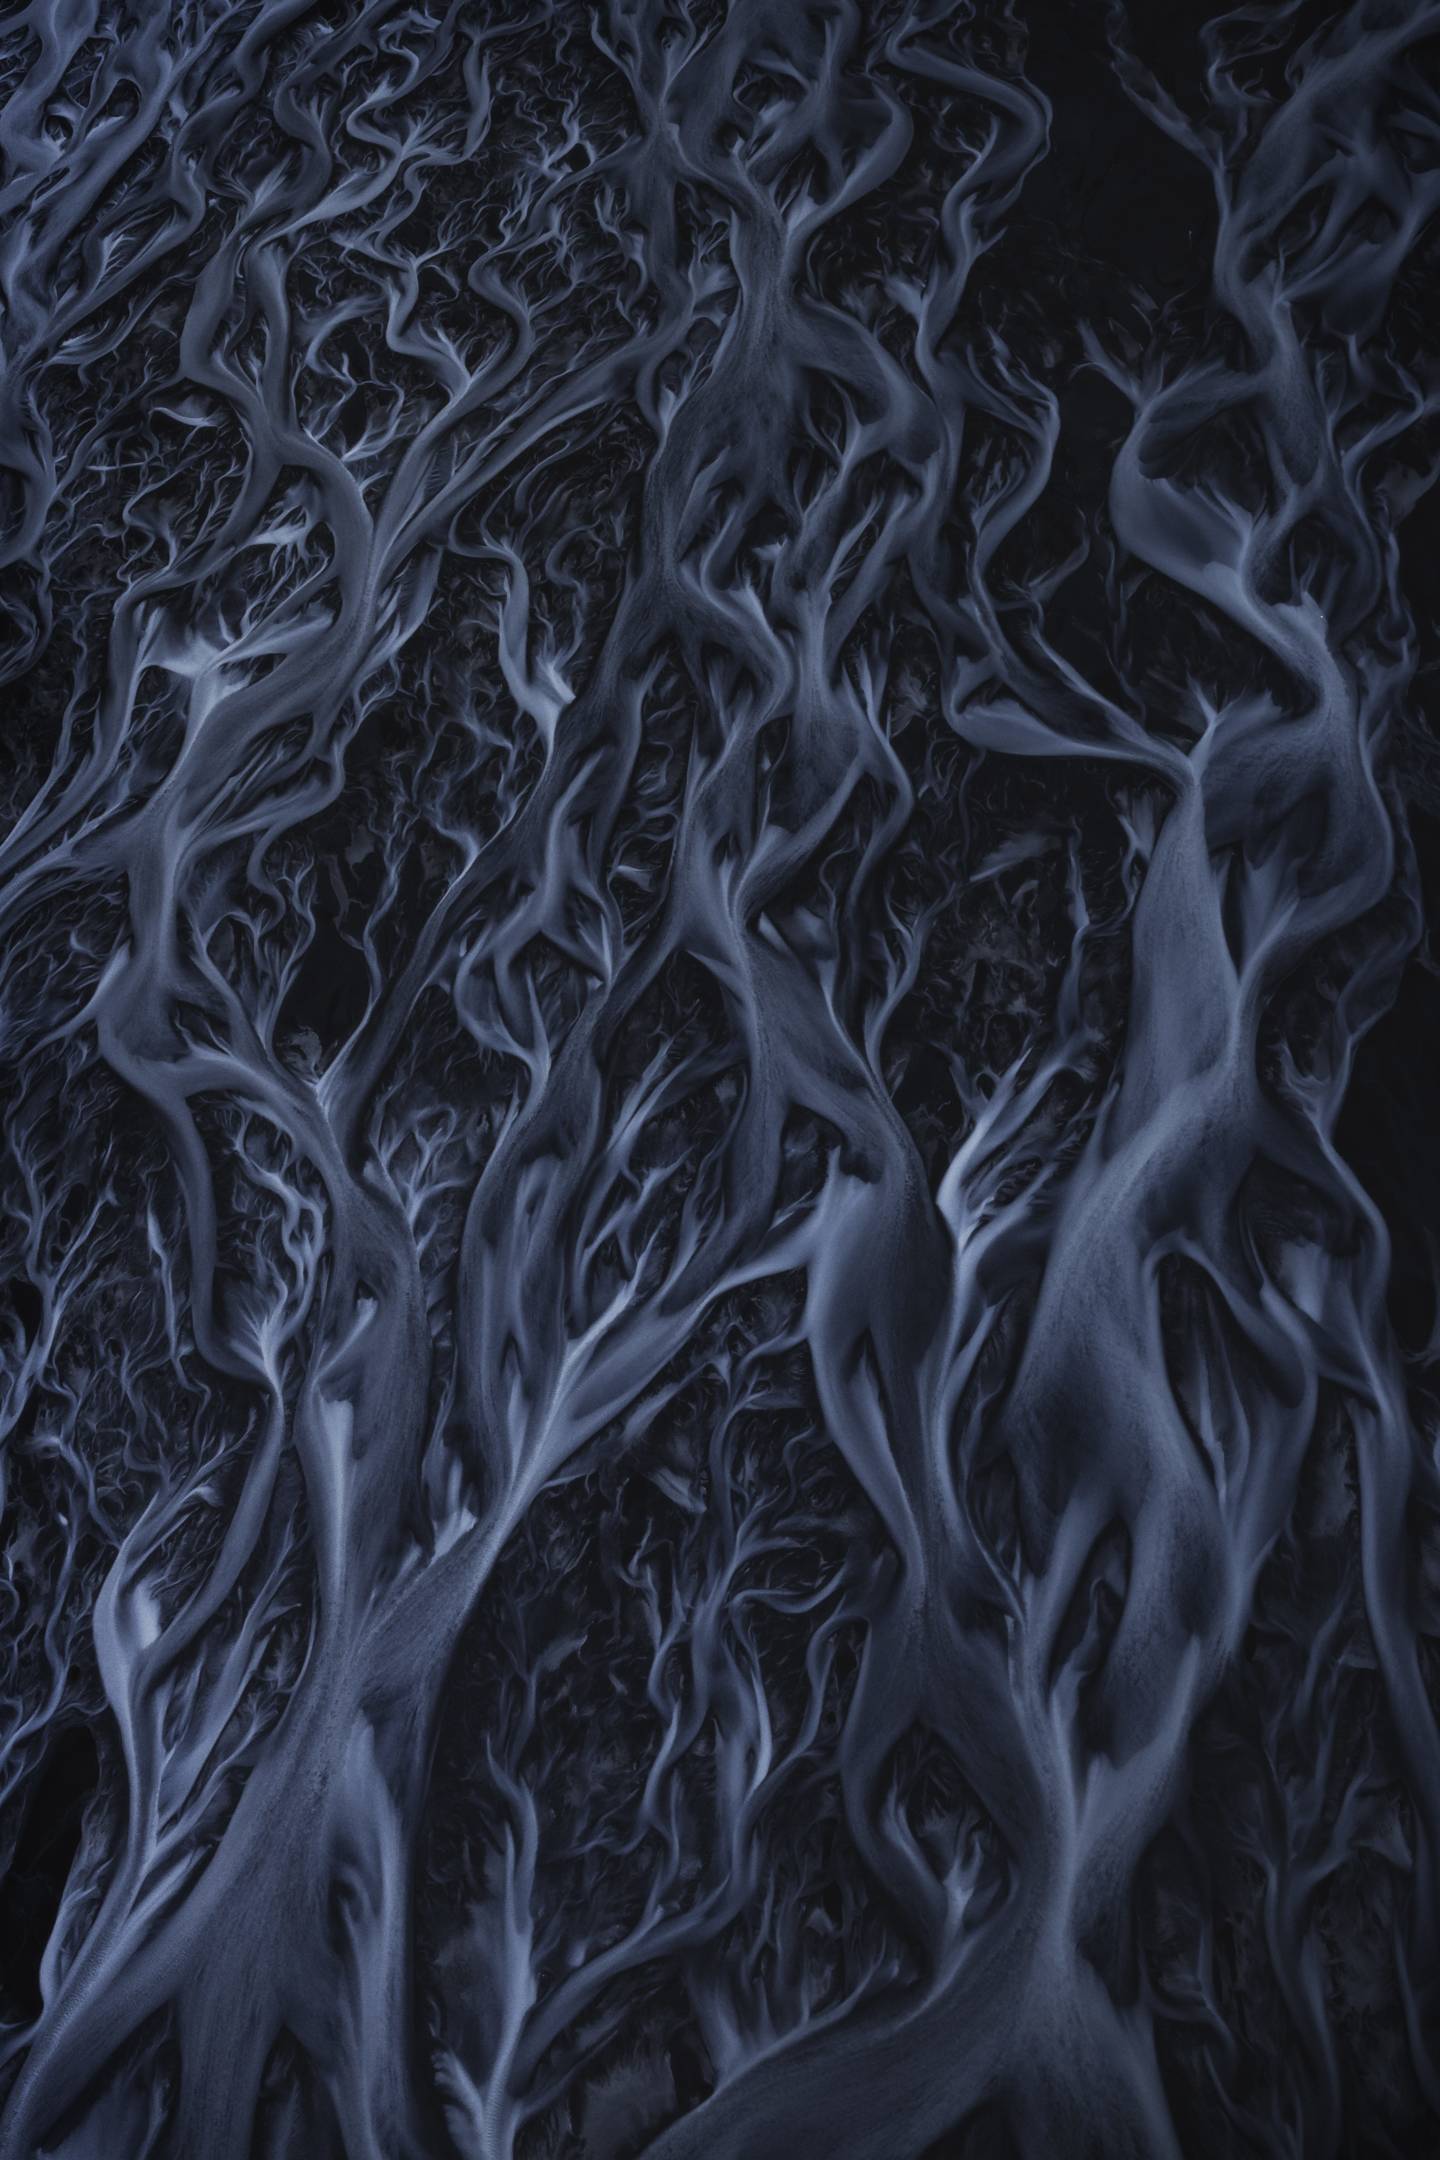
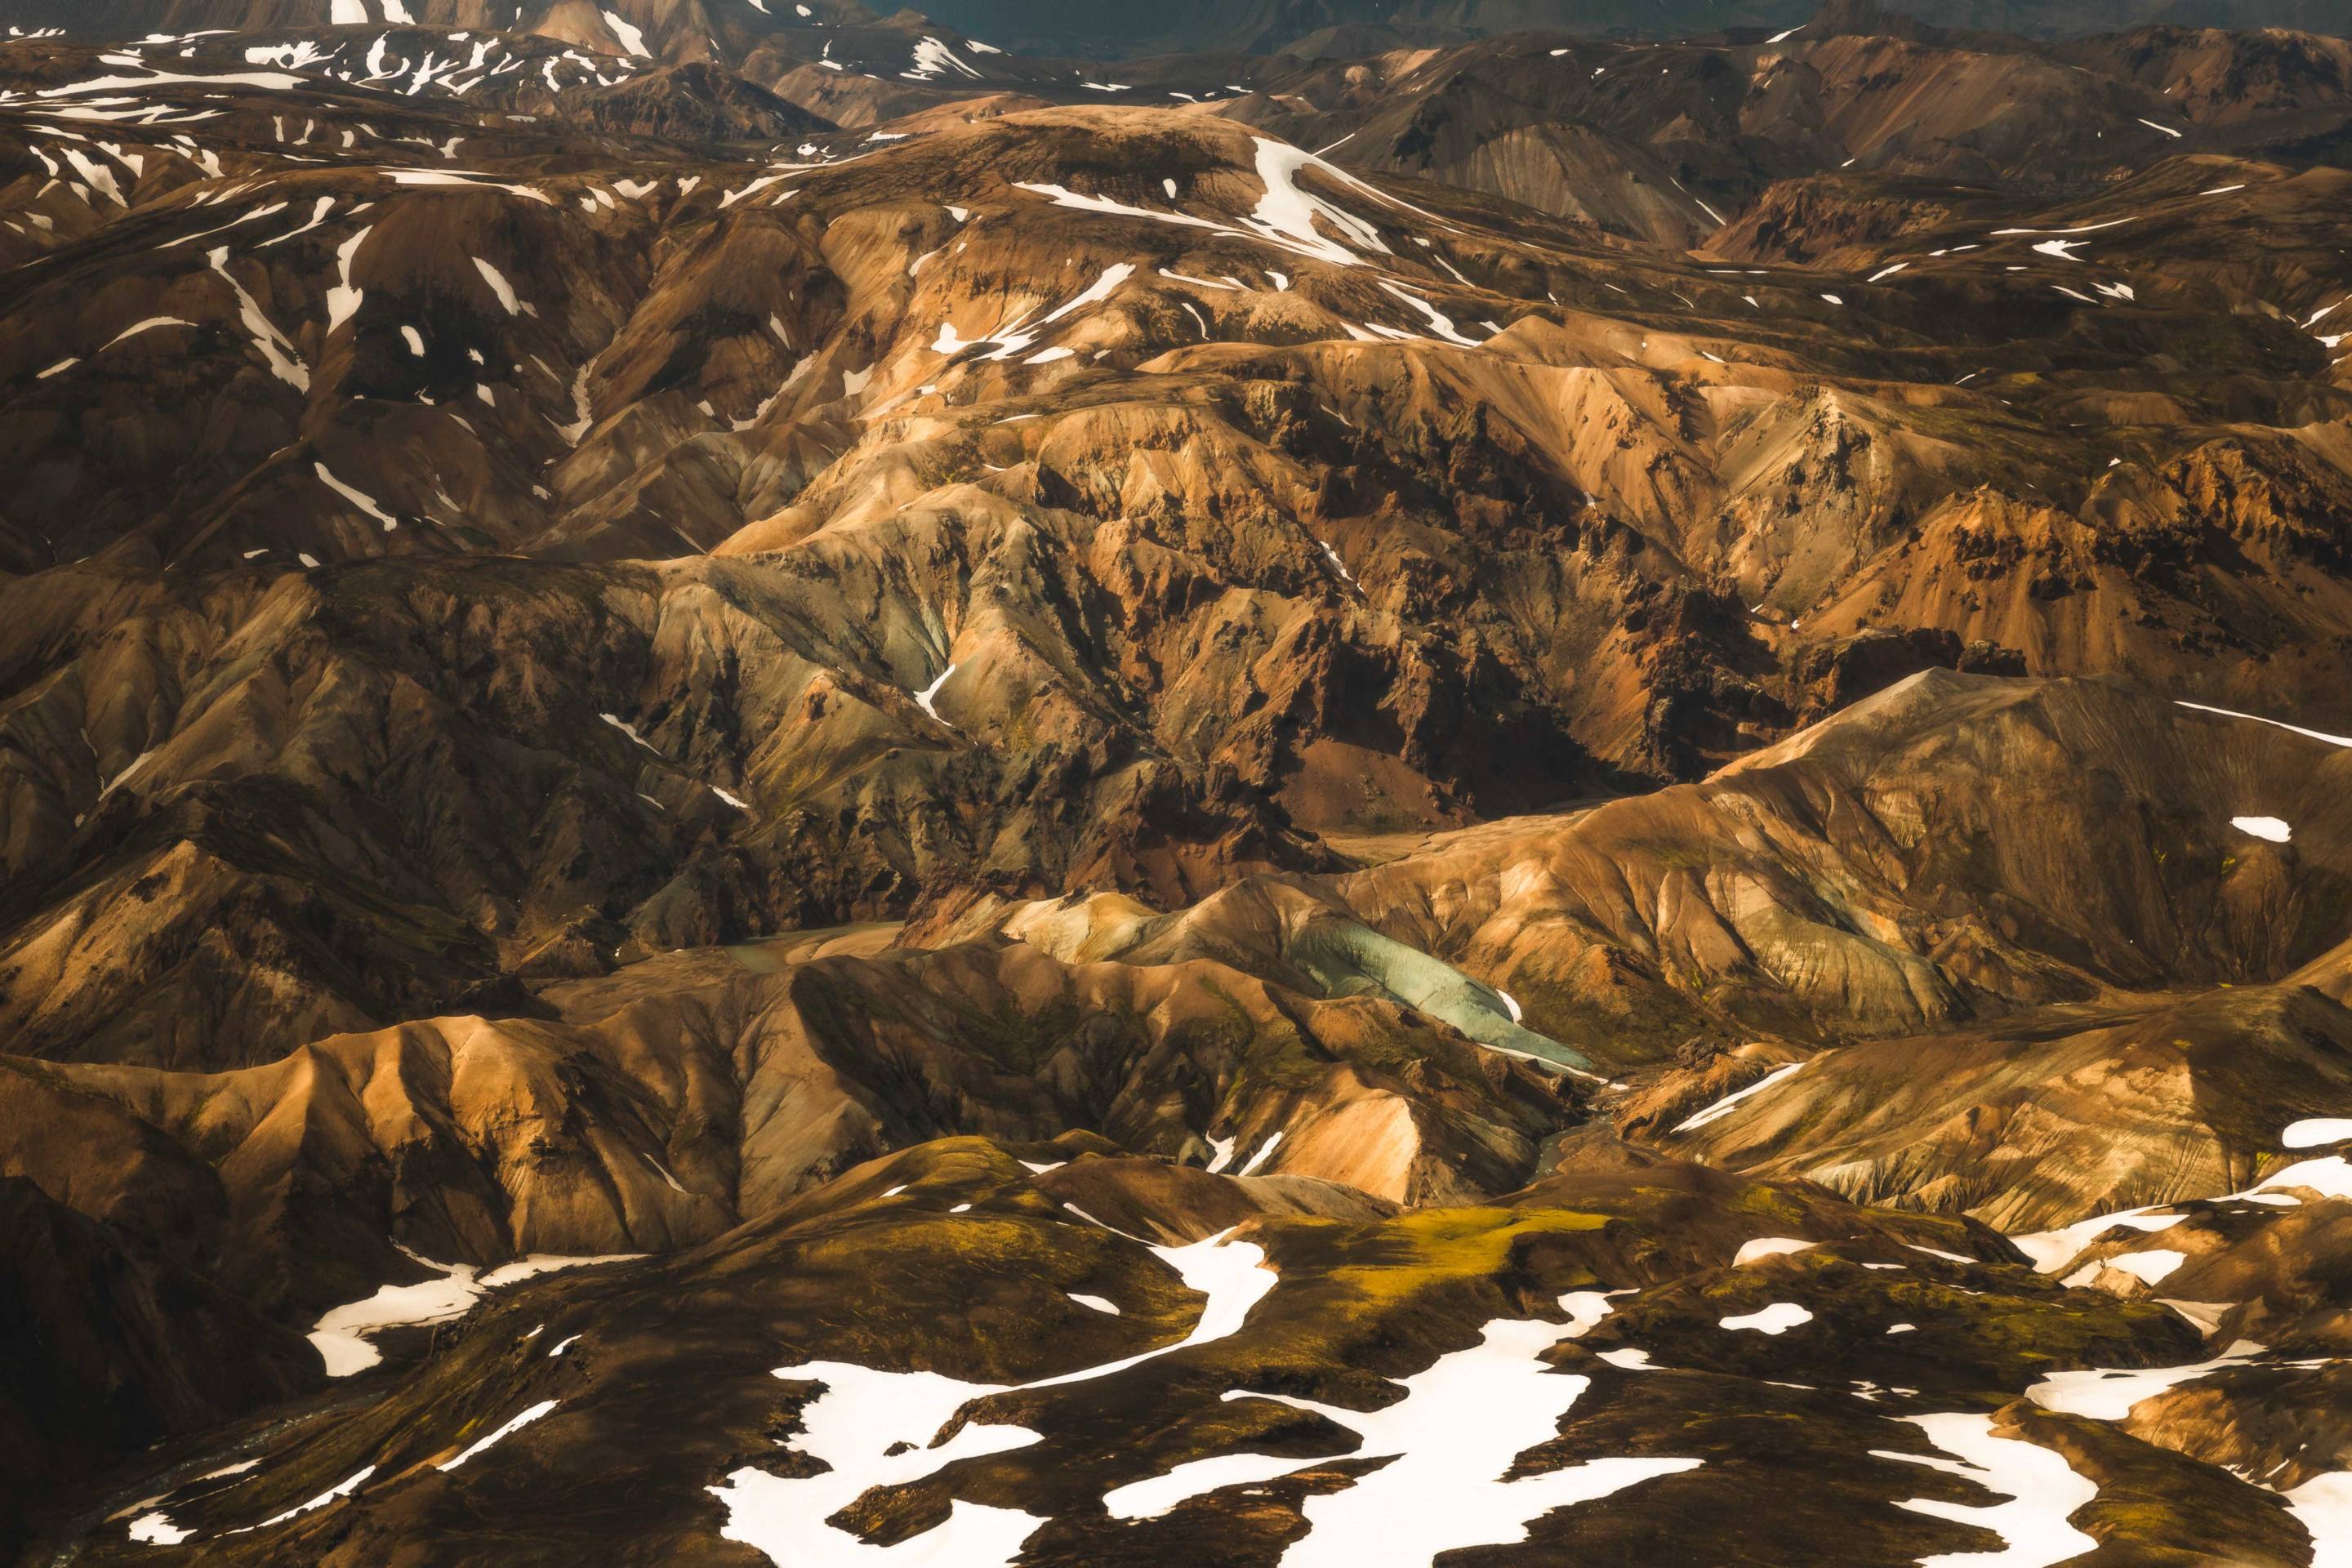
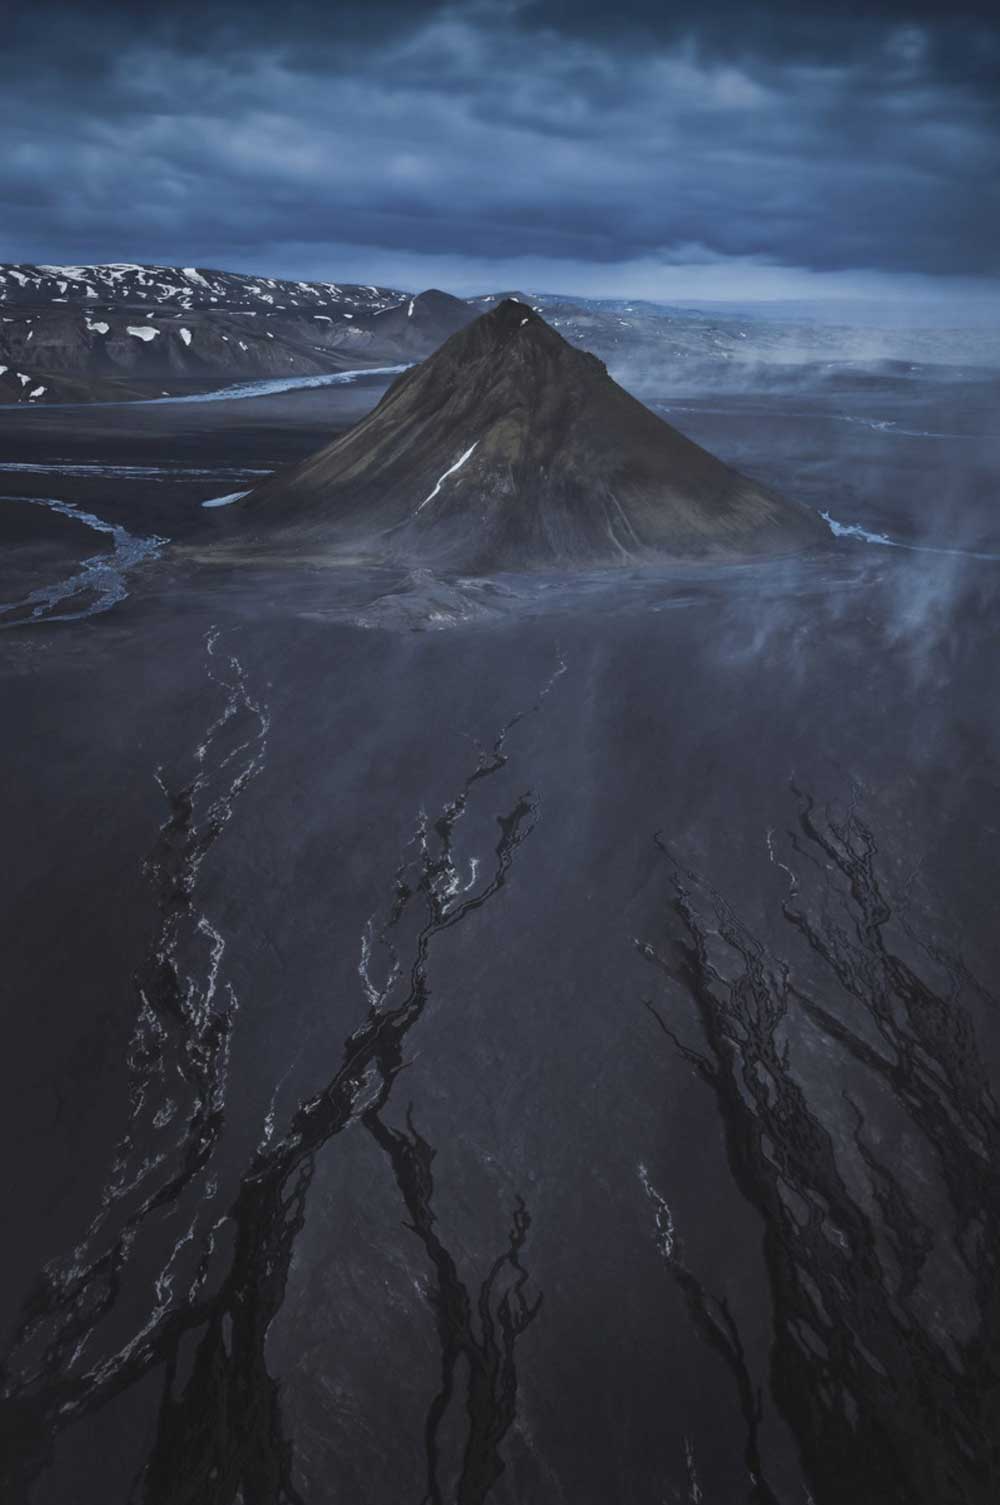
I’ve been fortunate enough to make a couple trips out to Iceland over the years but this was the first time I was able to photograph the beautiful landscapes from the air.
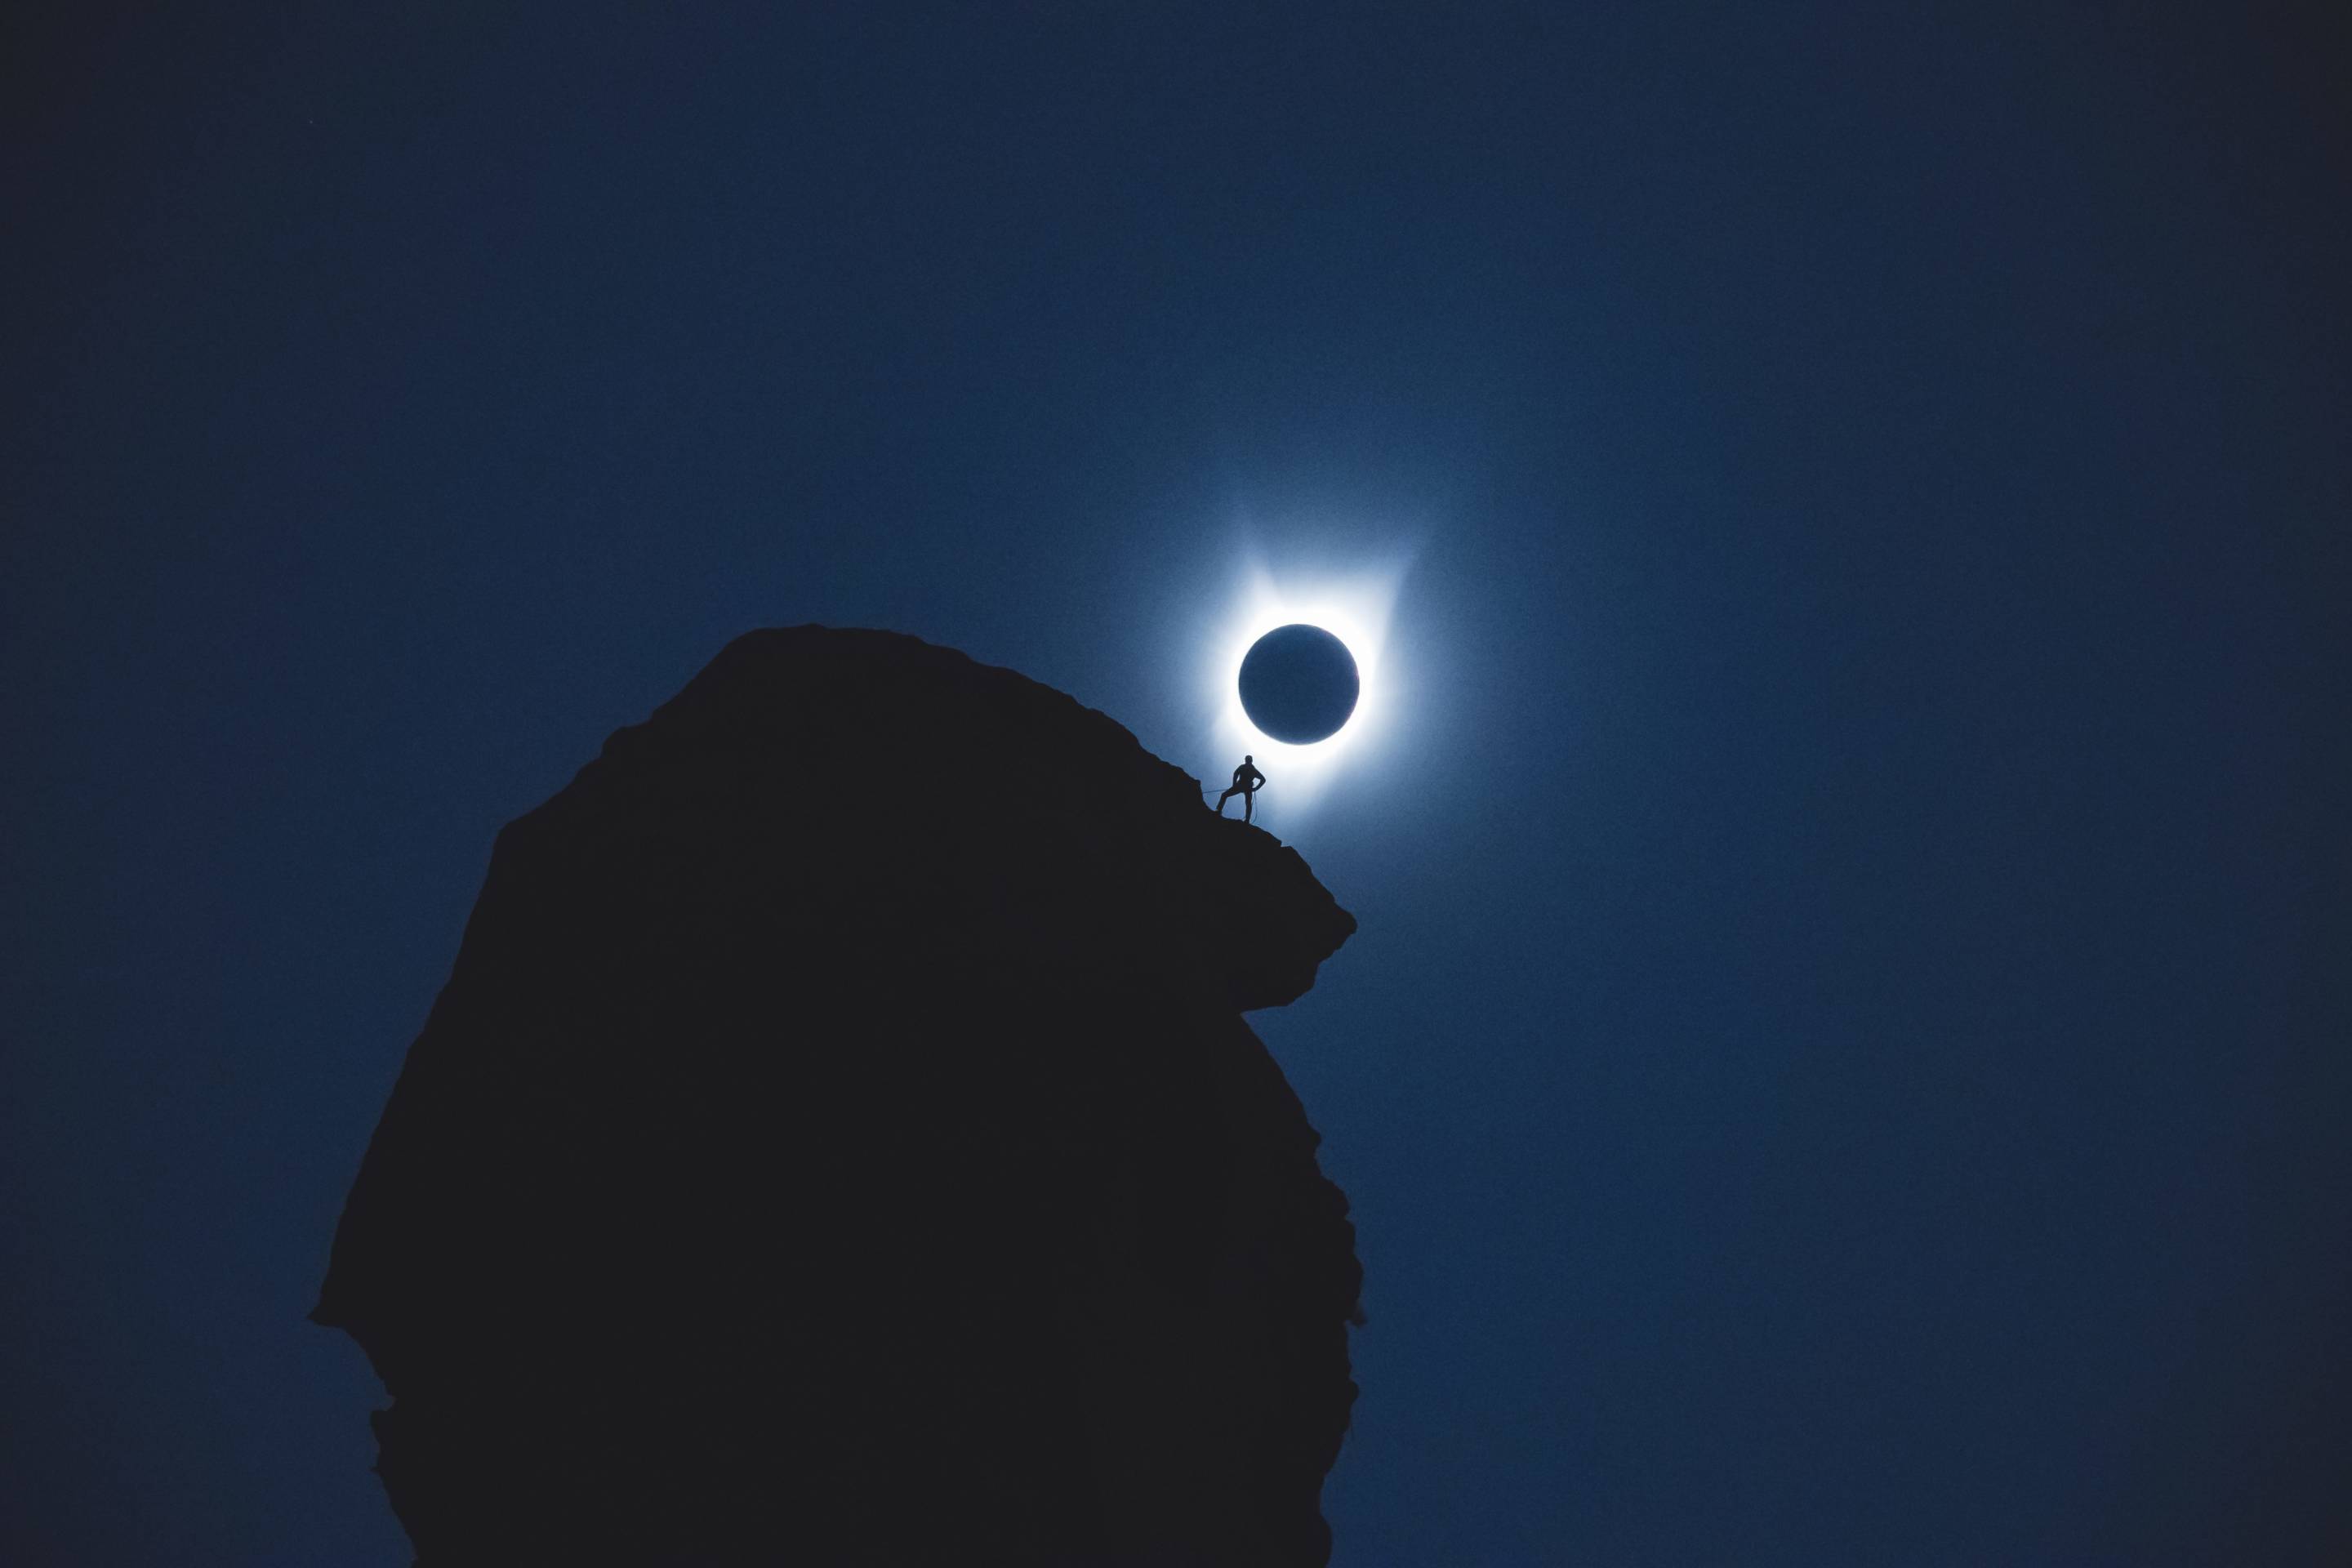
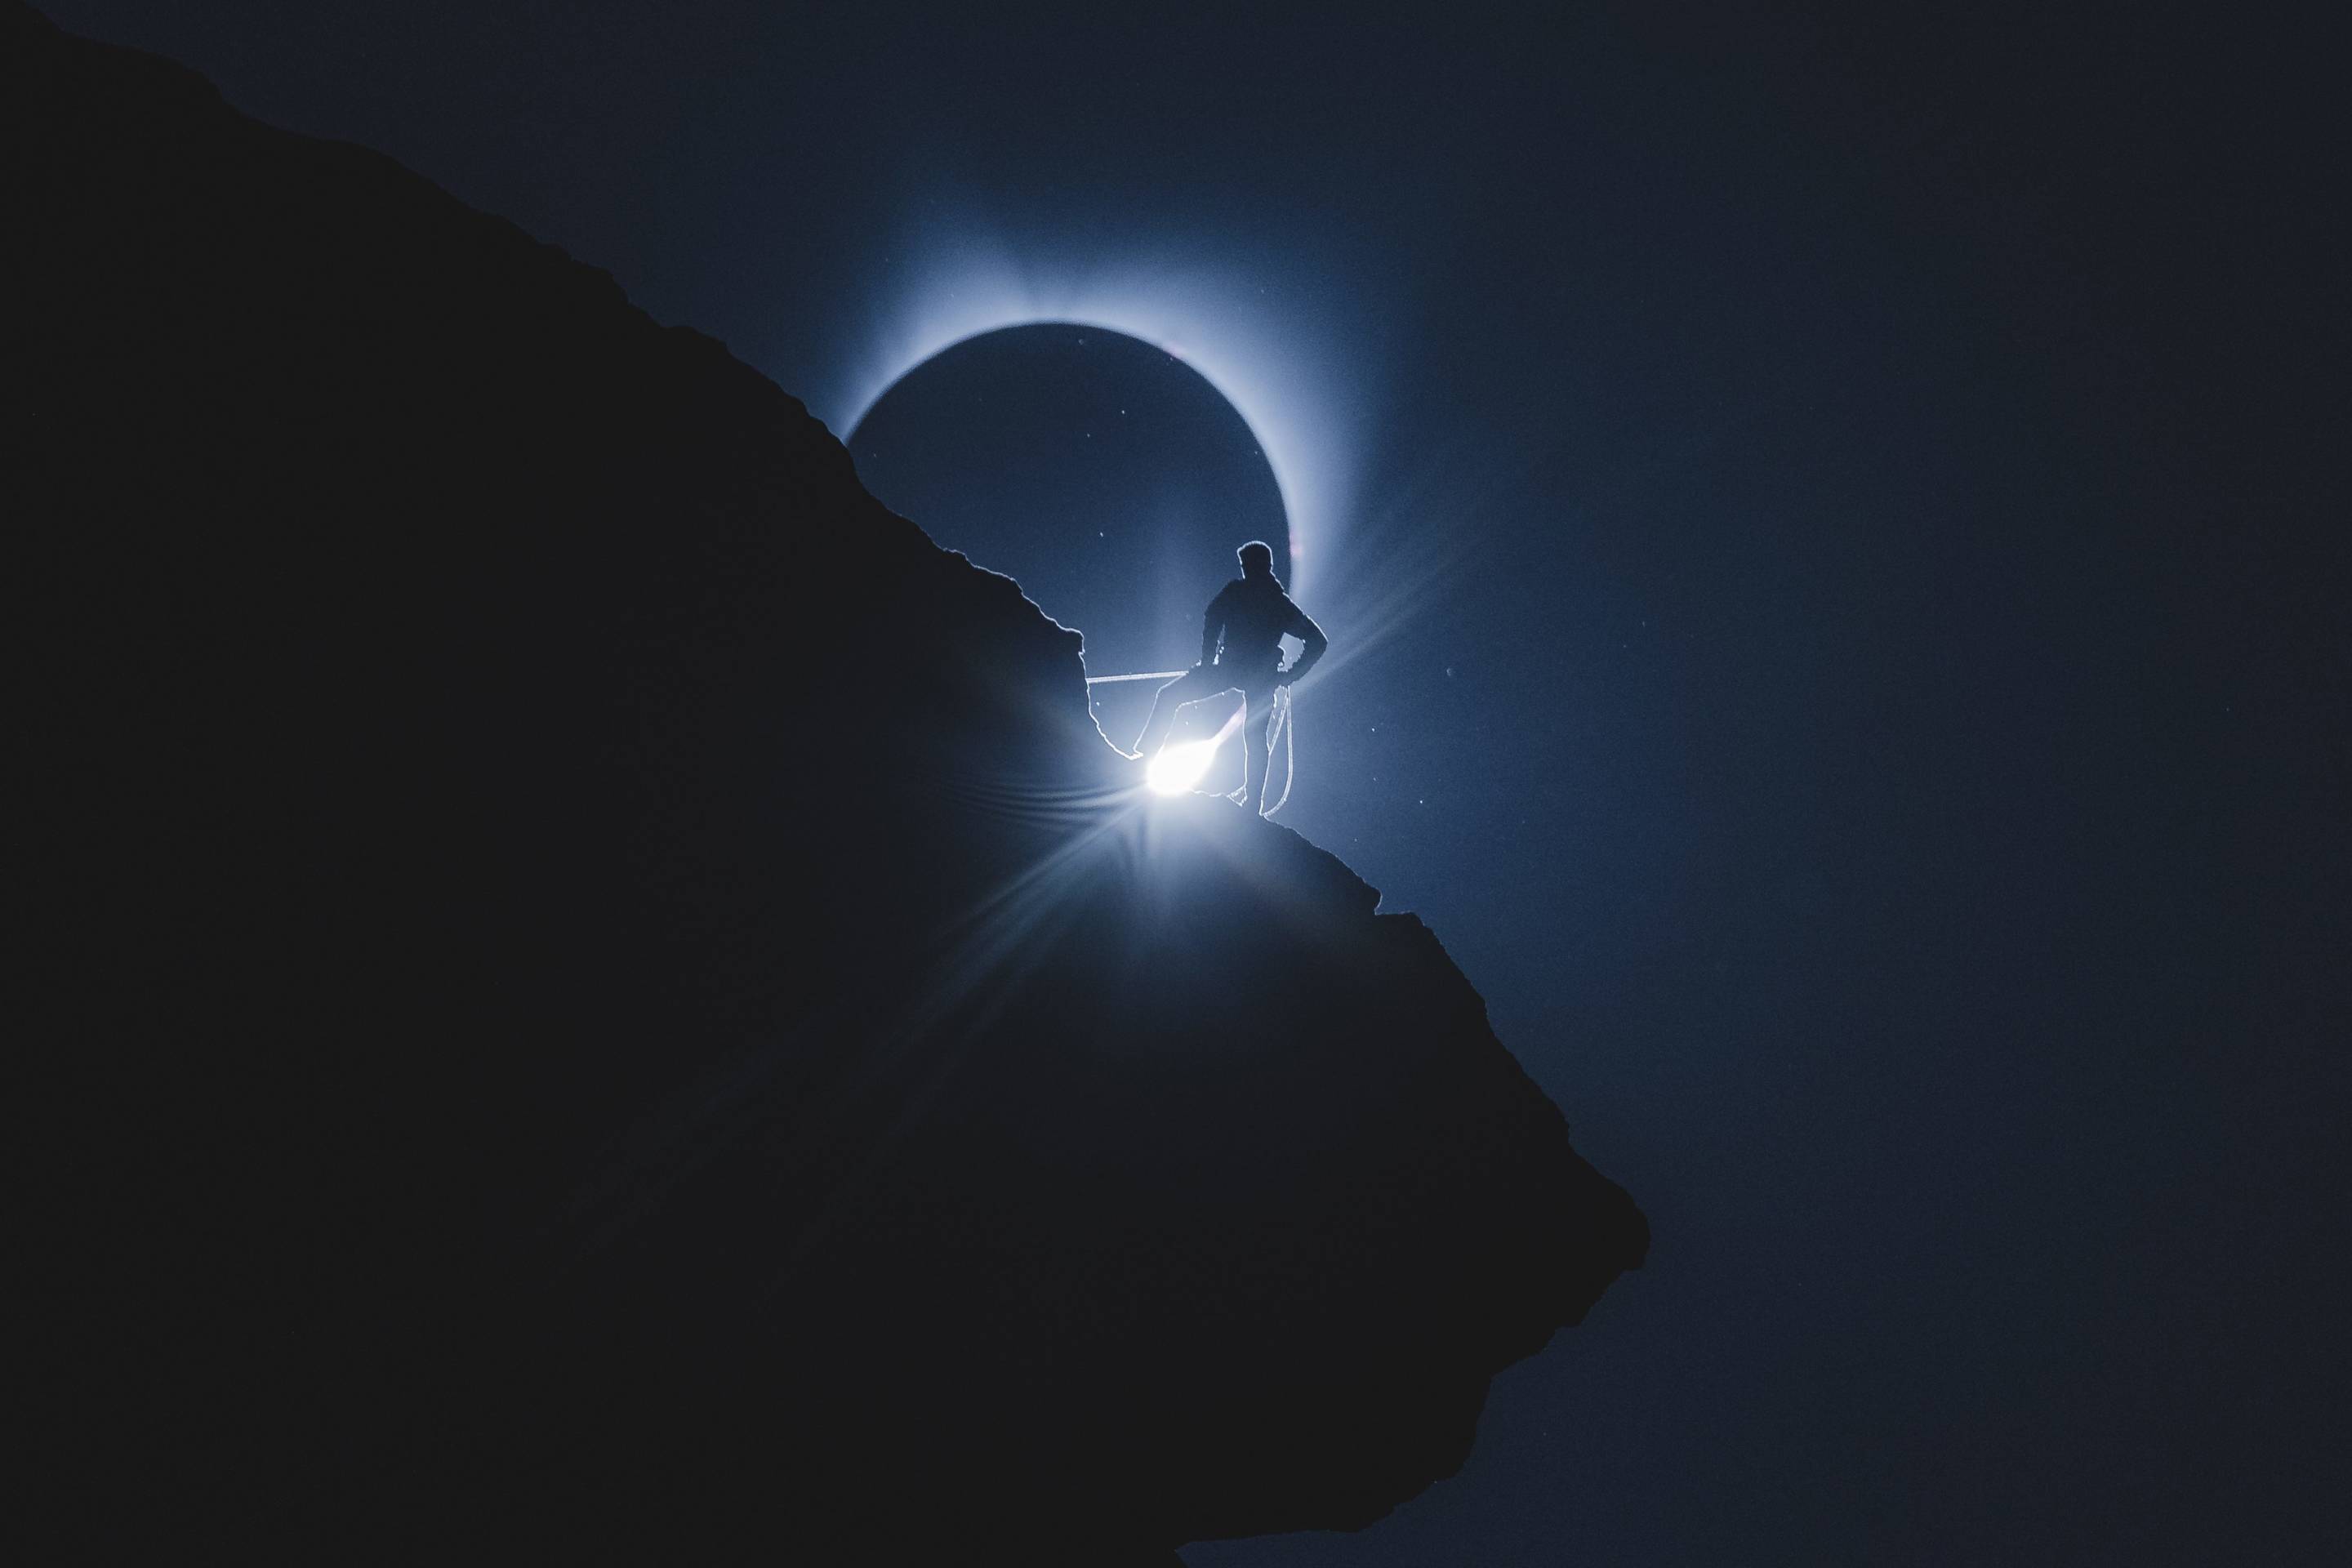
Witnessing totality during the solar eclipse was one of the most surreal moments of my life.
Getting into underwater photography was a big part of my year and I plan on doing more in 2018!
Ice made for some really interesting compositional opportunities this past winter.
Before my trip to Bhutan, I had never done any portraiture or street photography. On my first day in the country, I was hooked! I hope to do more in 2018.

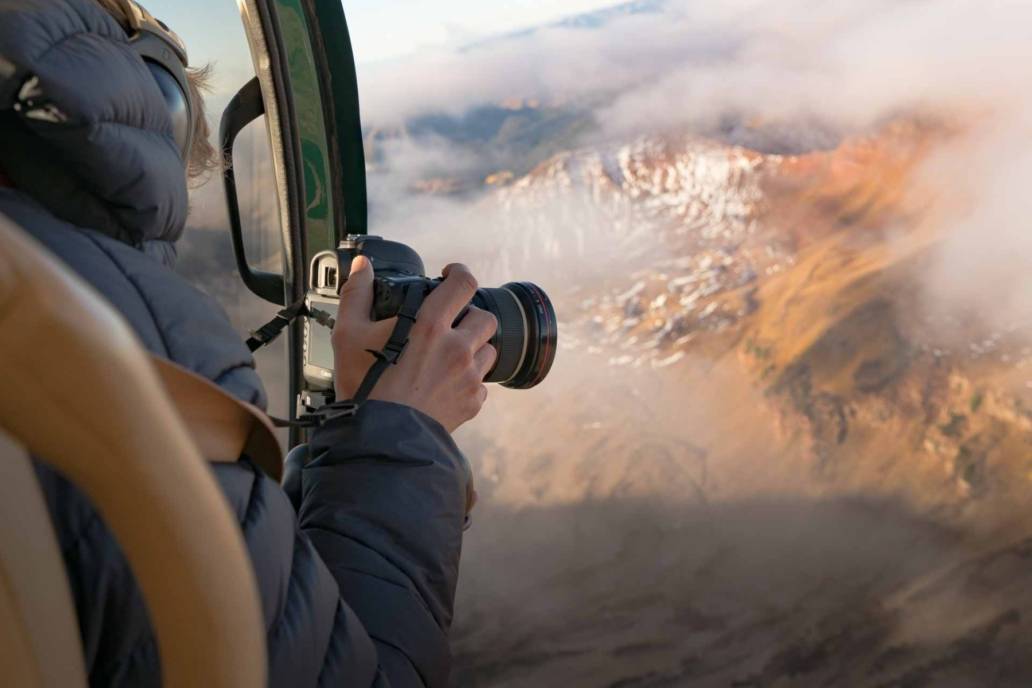
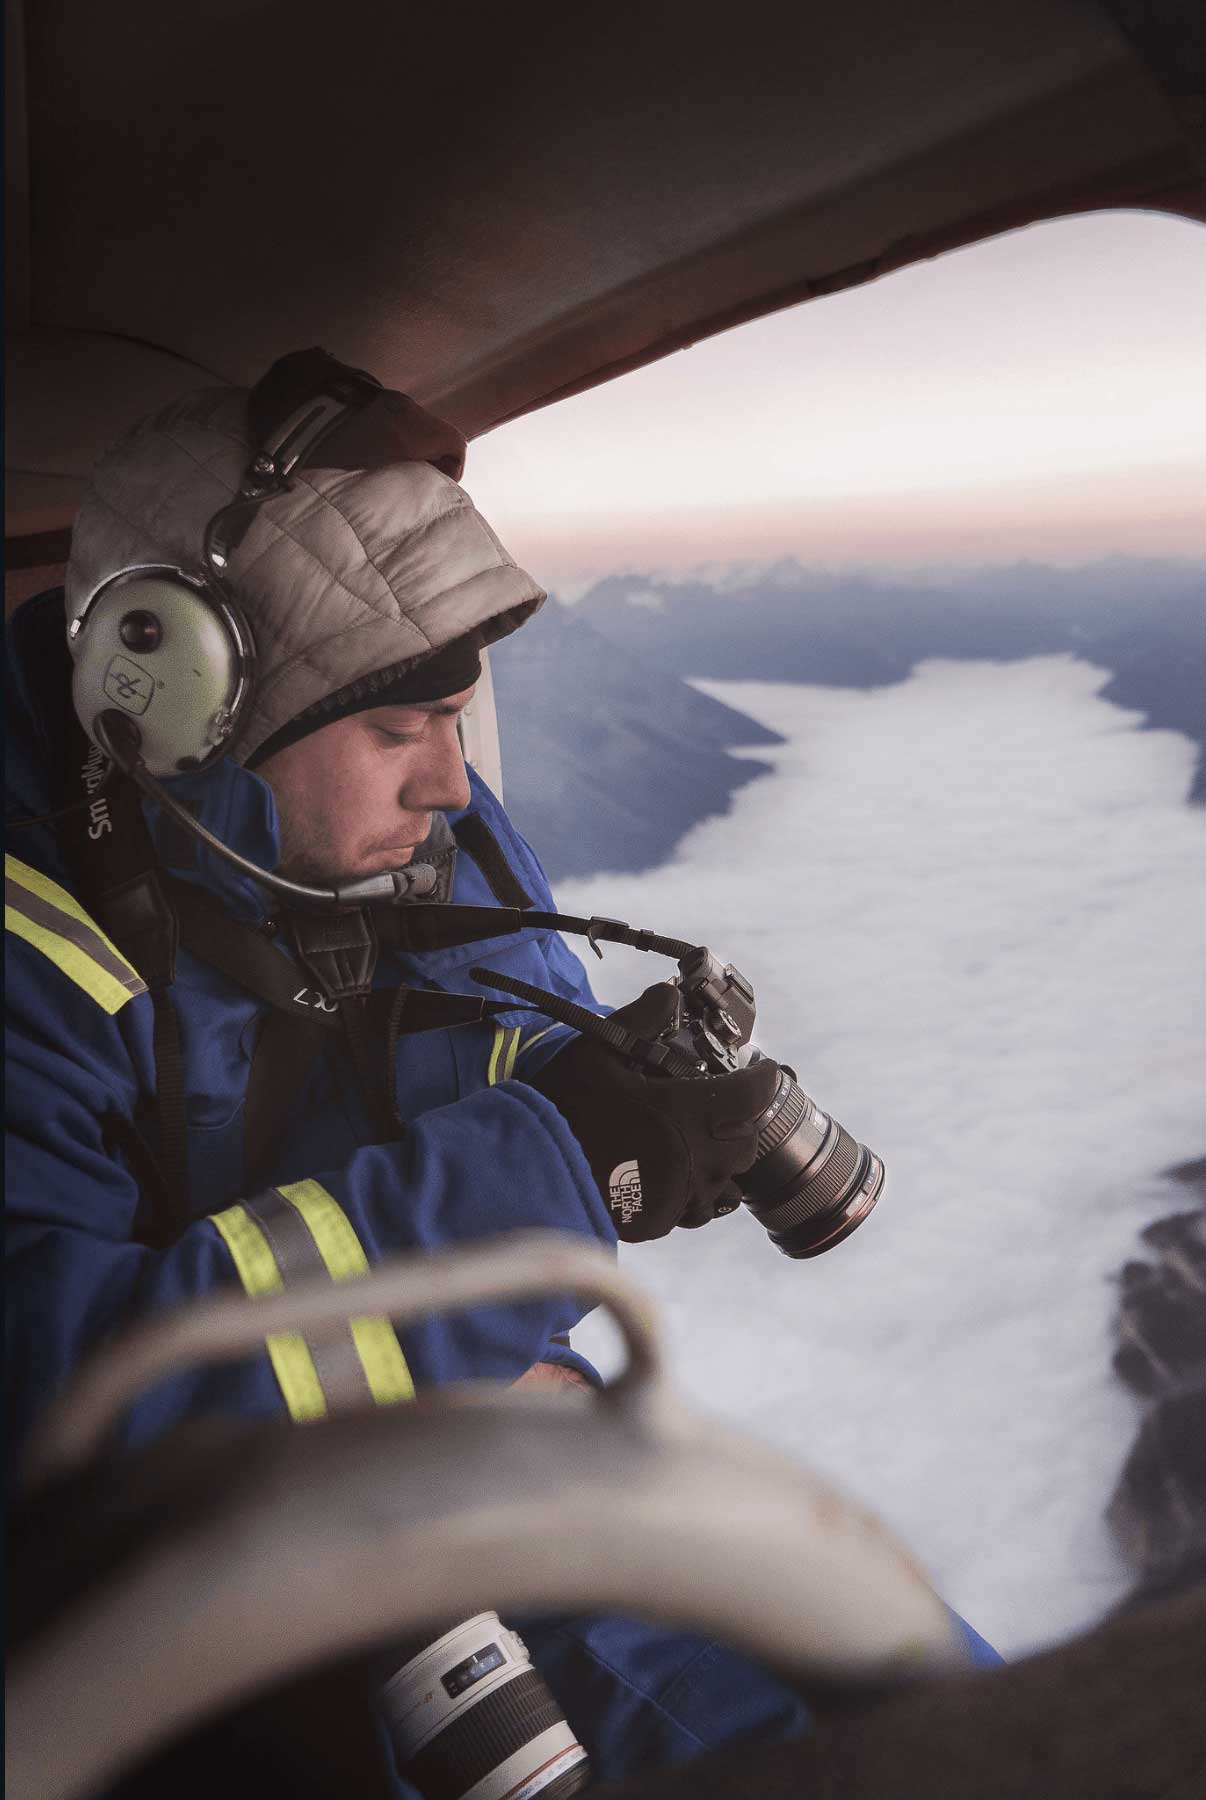
Tips for Aerial Photography
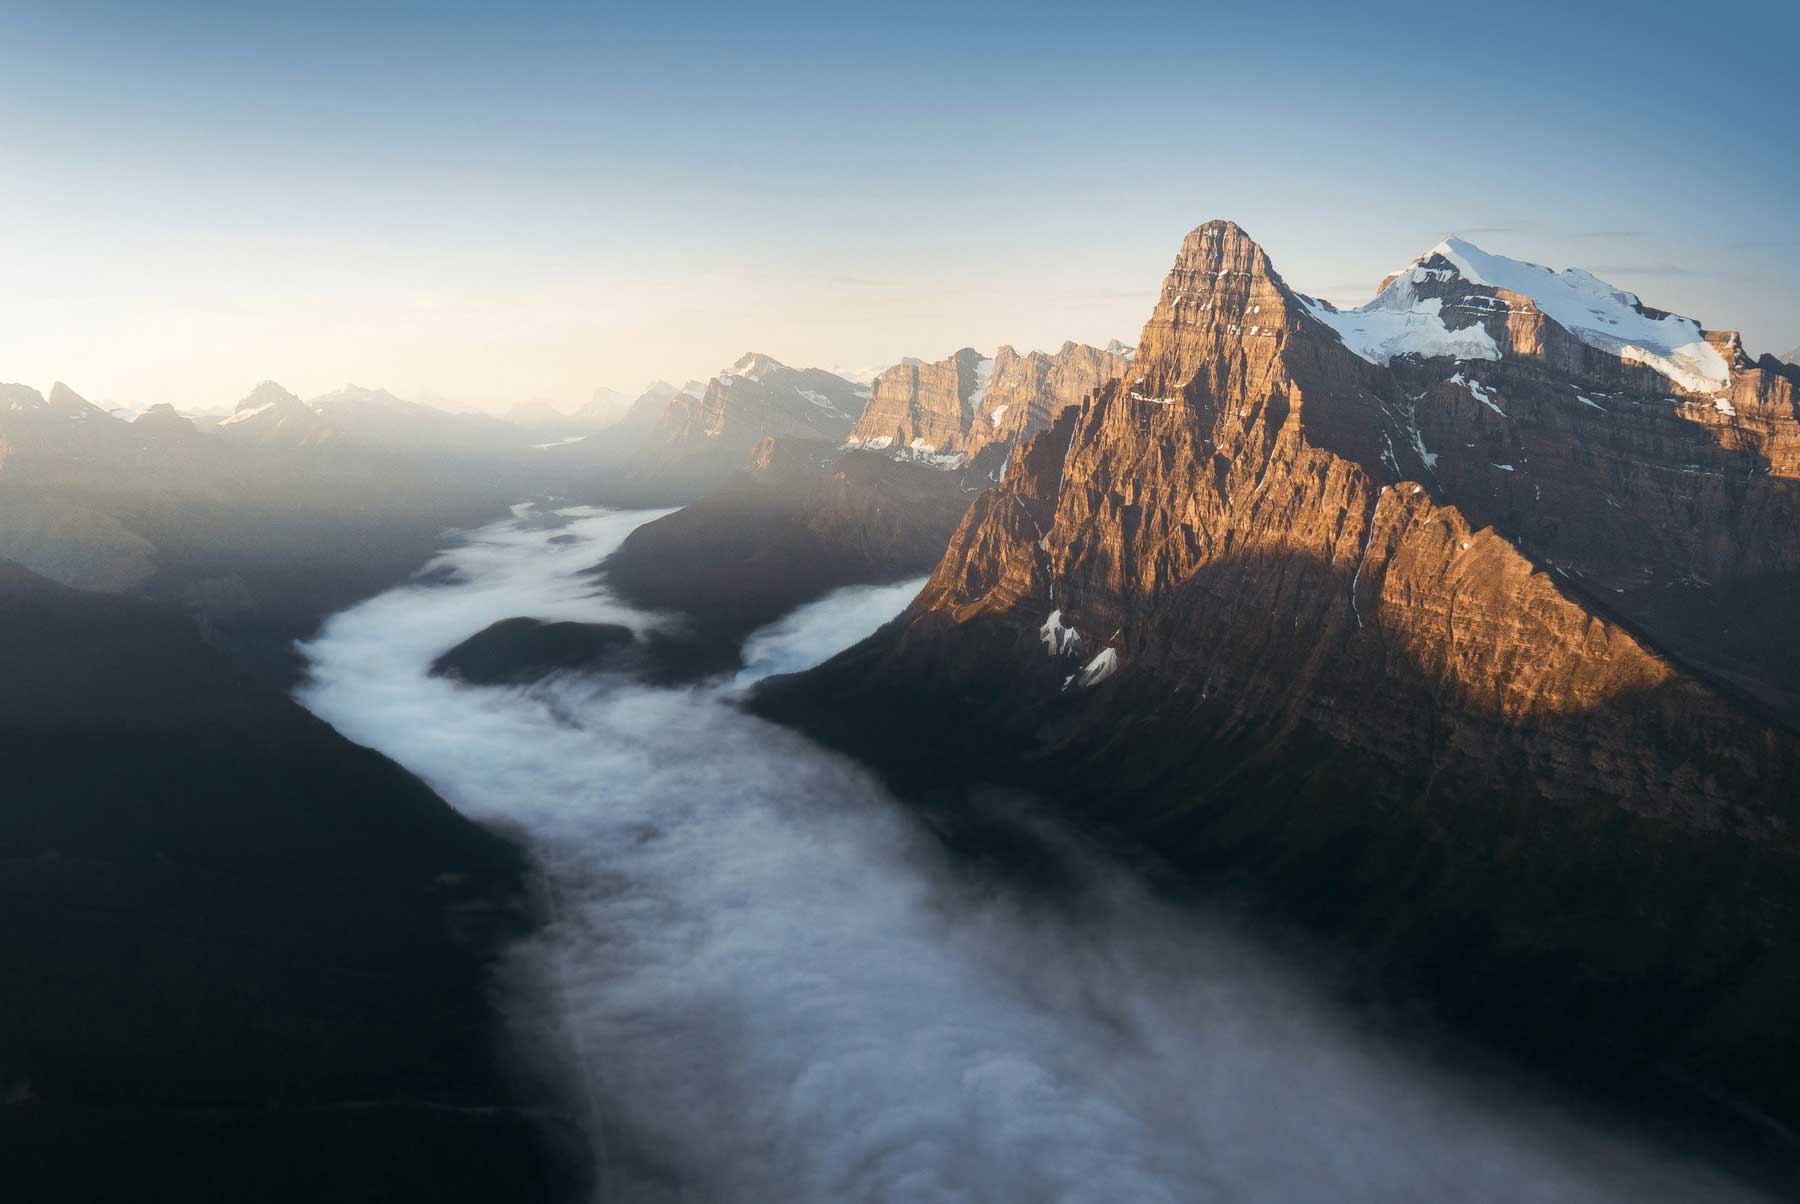
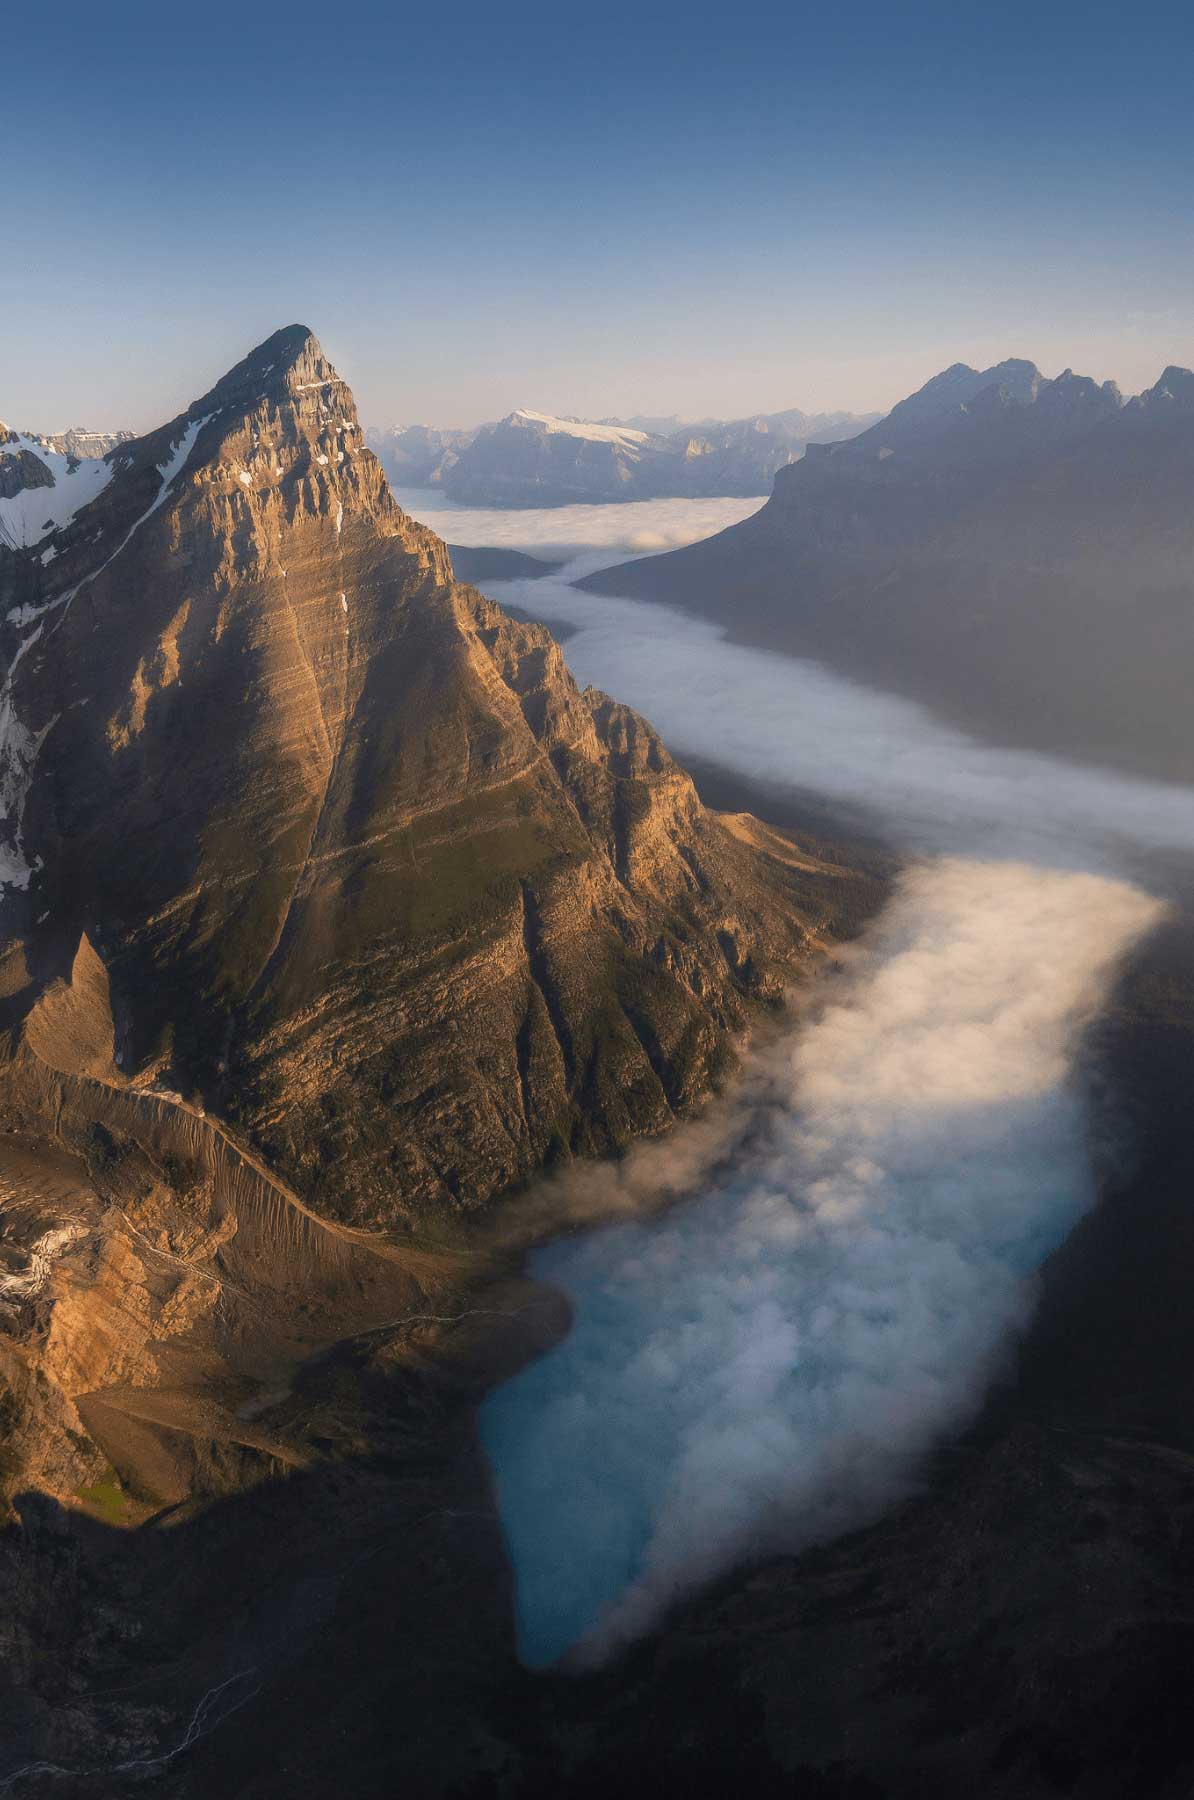
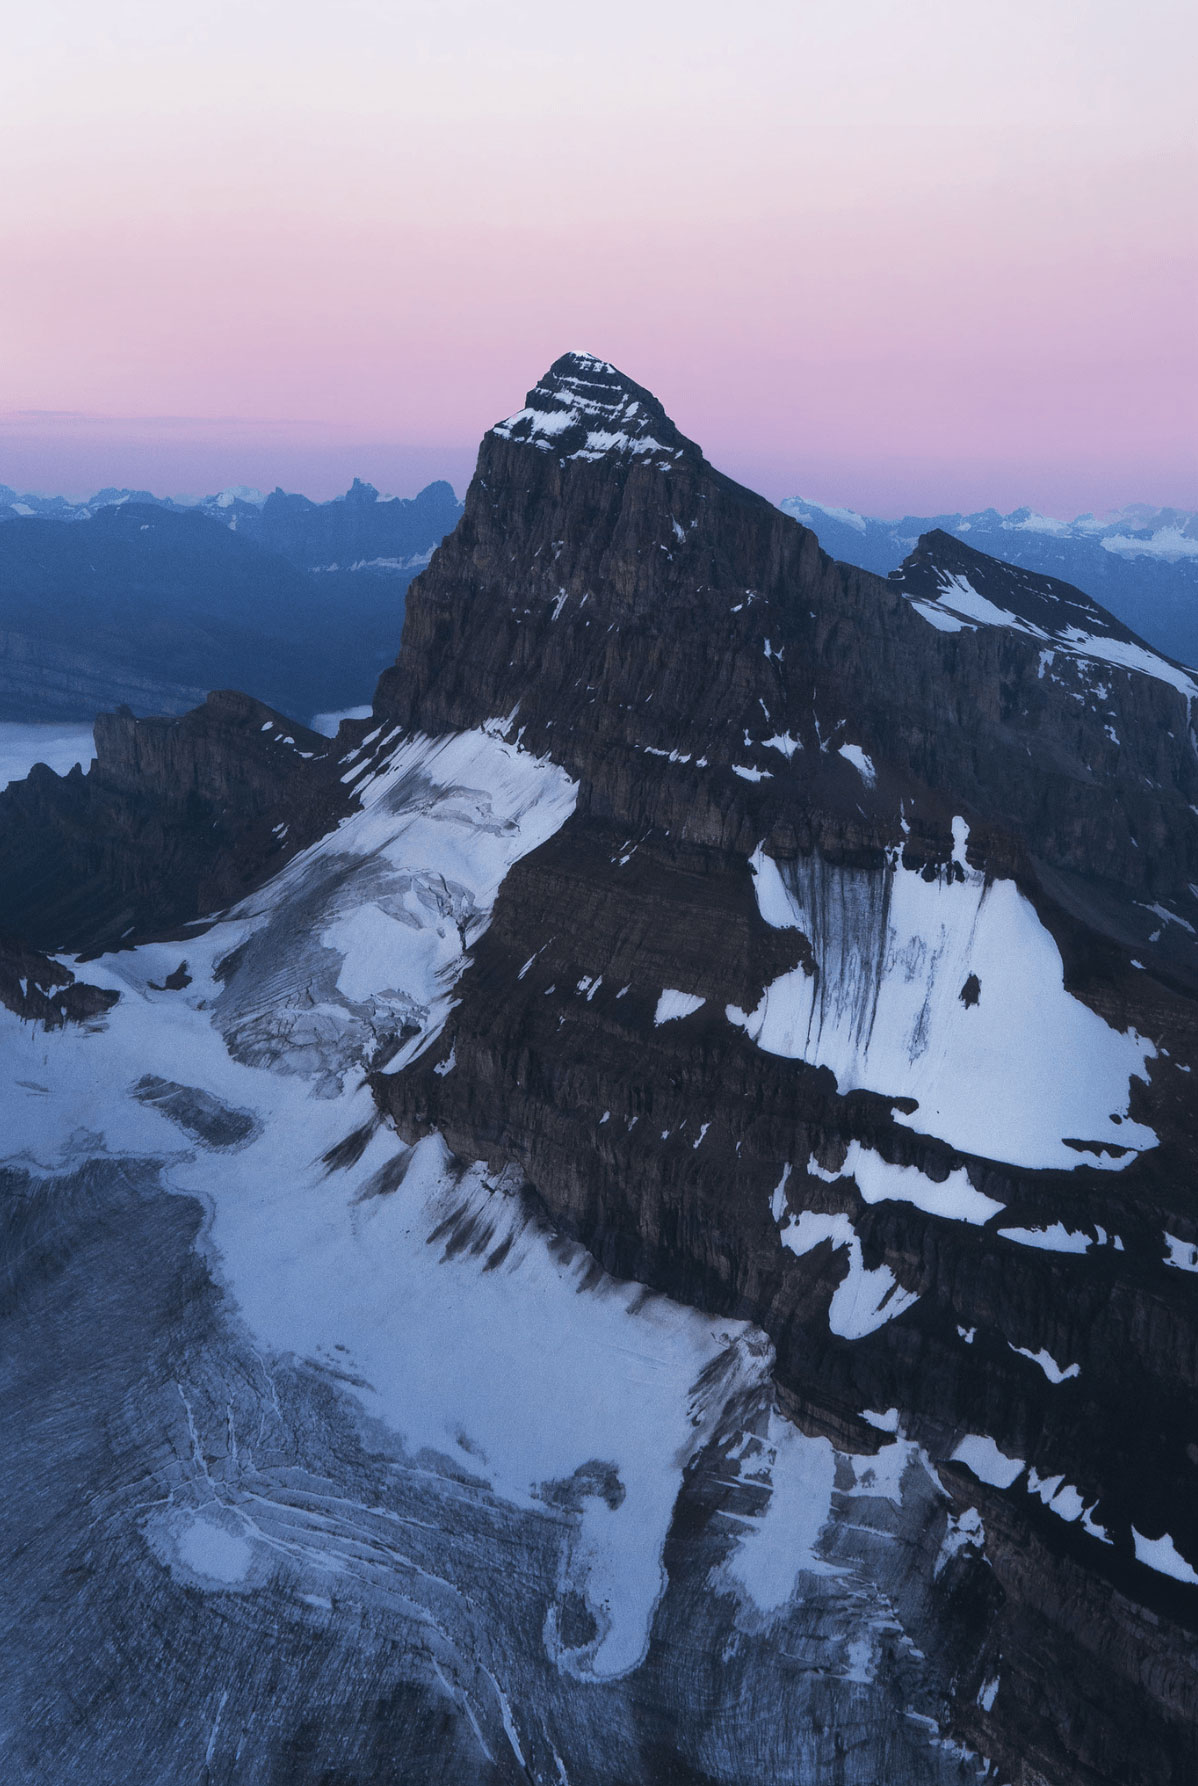
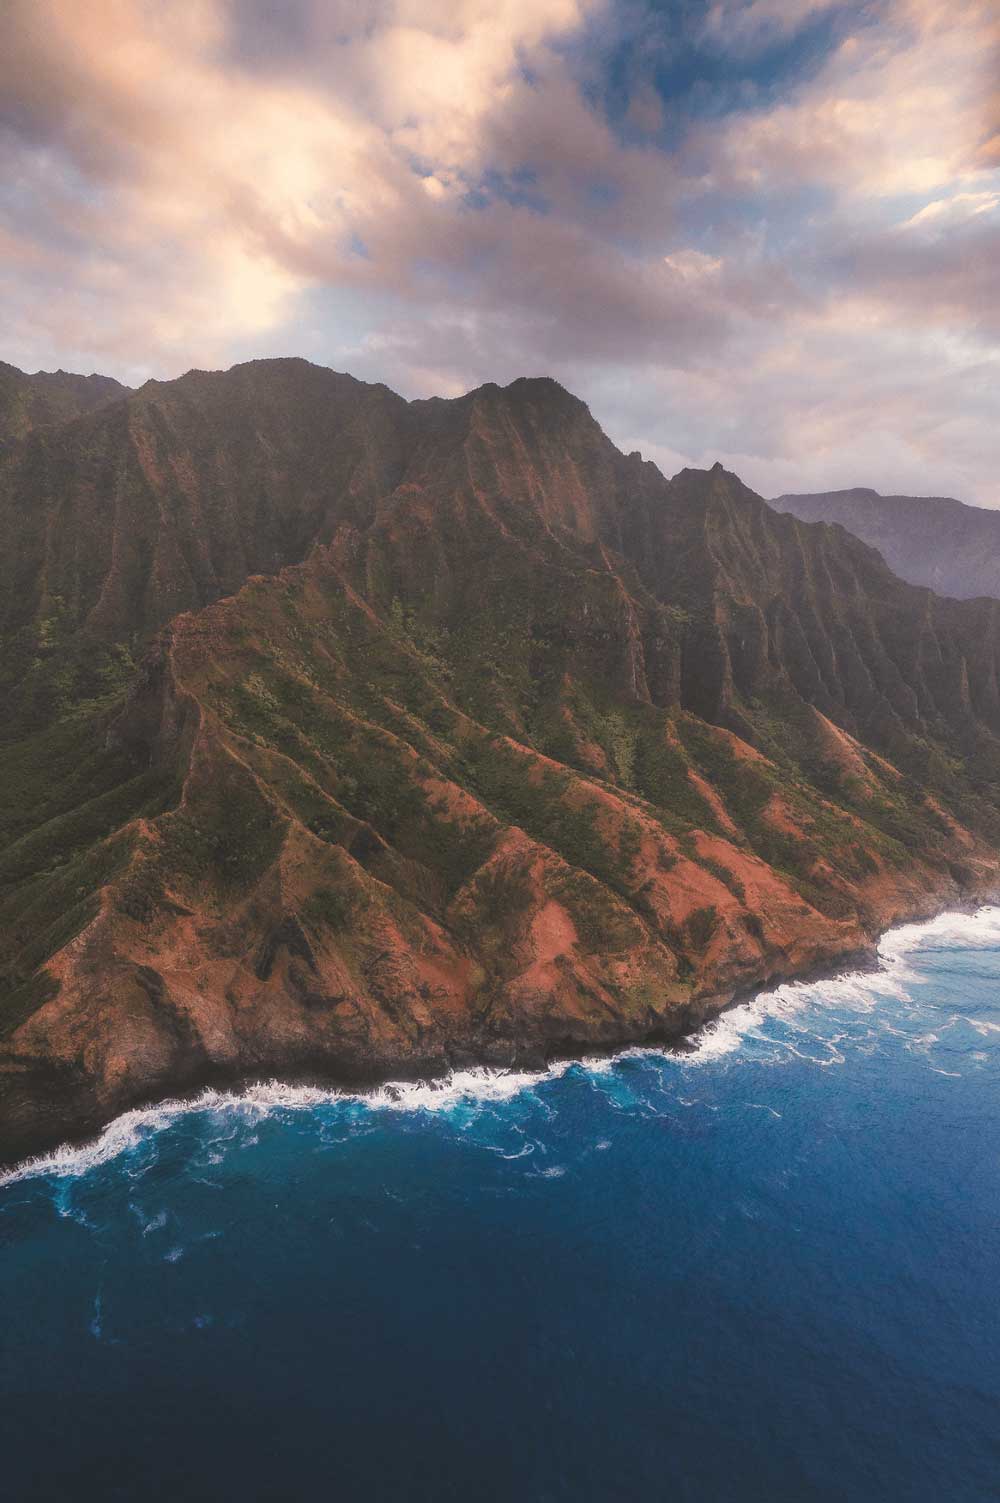
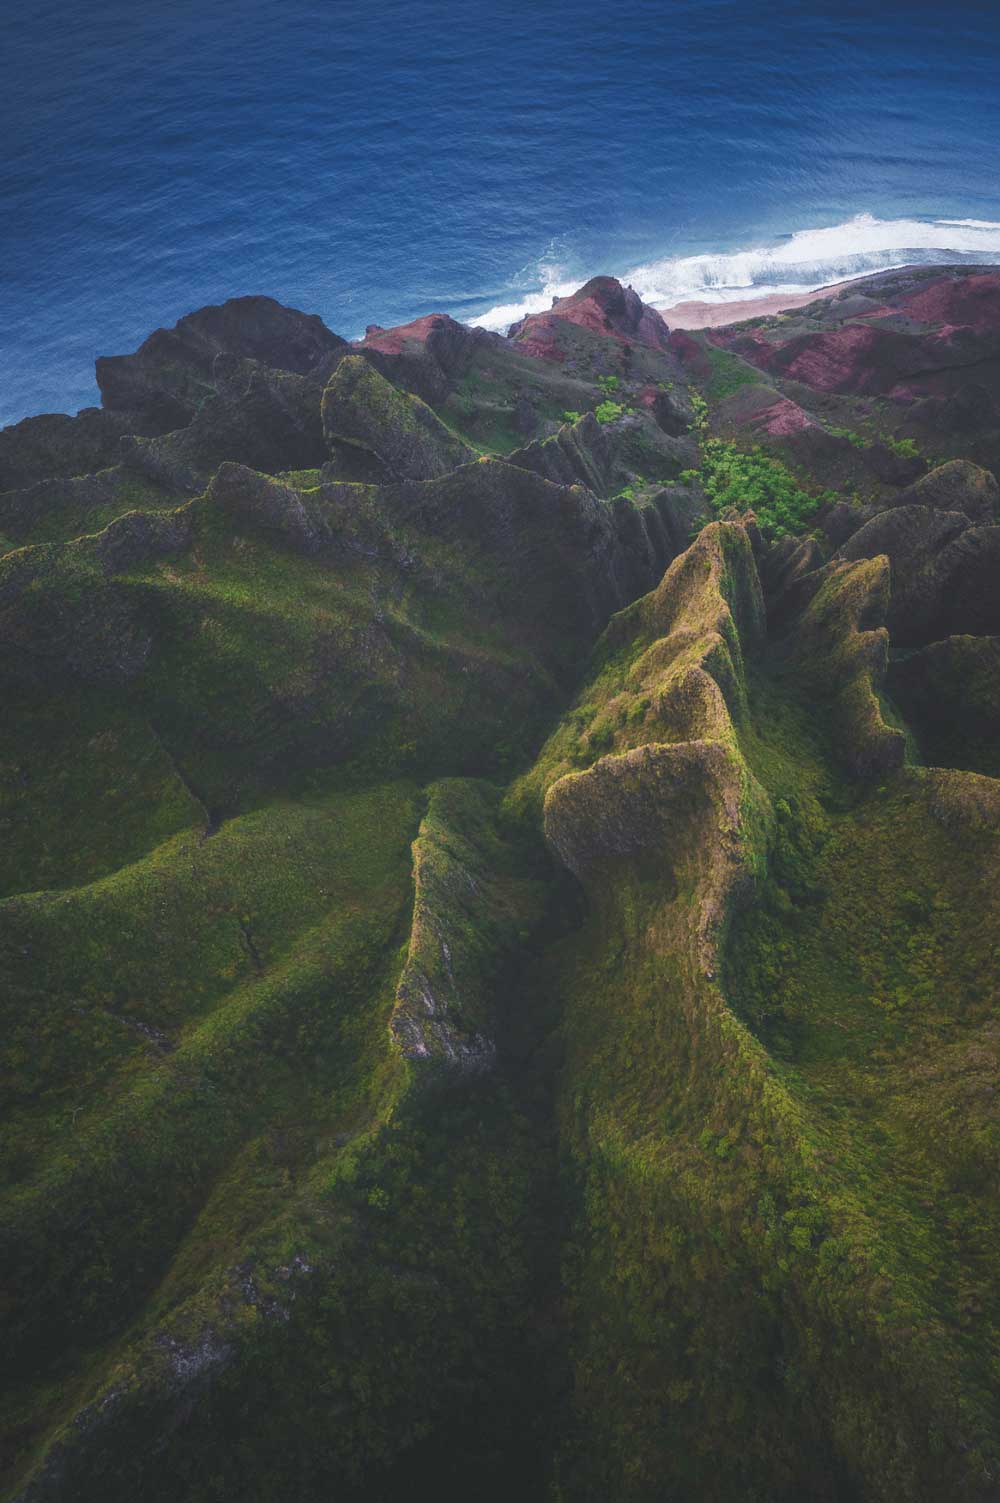
Aerial photography is an extremely fun and relatively easy way to create new and unique images. Over the past couple years I’ve been fortunate enough to have taken several flights over Iceland, Hawaii, NYC, the Canadian Rockies, and other stunning landscapes.
Through quite a lot of trial & error on these flights, I have learned a lot about aerial photography so I decided to share a short tips & tricks guide. I hope you find it helpful!
Typically, most flights range from $750 – $2,000/ hr. To reduce cost, bring friends!
Usually, helicopters & other aircraft allow for at least 2-3 people on board. Splitting a flight three ways can help to make aerial photography more affordable.
Use a fast shutter speed!Vibration from an aircraft and windy conditions can make it difficult to create sharp images. In most situations I’ve found that 1/250 of a second just won’t quite cut it. Depending on my focal length, I try to keep my shutter speed at around 1/500 or even higher if the light allows for it.
Just remember to bump your ISO or open up your aperture to compensate.
If you’re chartering a flight, you’re the boss! If there is a specific peak or valley you want to focus on shooting, communicate with your pilot over the radio or better yet, talk to them beforehand so you can maximize your time shooting.
If you find yourself wanting to reshoot a location or see what something looks like at a new altitude or positioning, communicate with your pilotand they’ll do what you need to get the shot. You’ll always walk away with more if you communicate!
Shooting through the glass window of a helicopter can be a nightmare. To avoid glare in your aerial photography, request that the doors be removed ahead of time. Trust me, it’s super funflying without doors.
While your overall flight experience and content will be drastically improved, you’ll also be quite a bit colder so come prepared with a warm jacket and glovesdepending on the season/ locations you’ll be at. Remember that it’s always colder the higher you are so even if it’s summer, be prepared with a jacket if not gloves!
Remember to use a polarizing filter! If you happen to be on a flight with the doors on, a polarizing filter will help you avoid glares.
Even if you’re flying doors off, a polarizer will help you reduce glare on lakes and rivers and help you maintain an overall cleaner image. I really enjoy using Benro Filters.
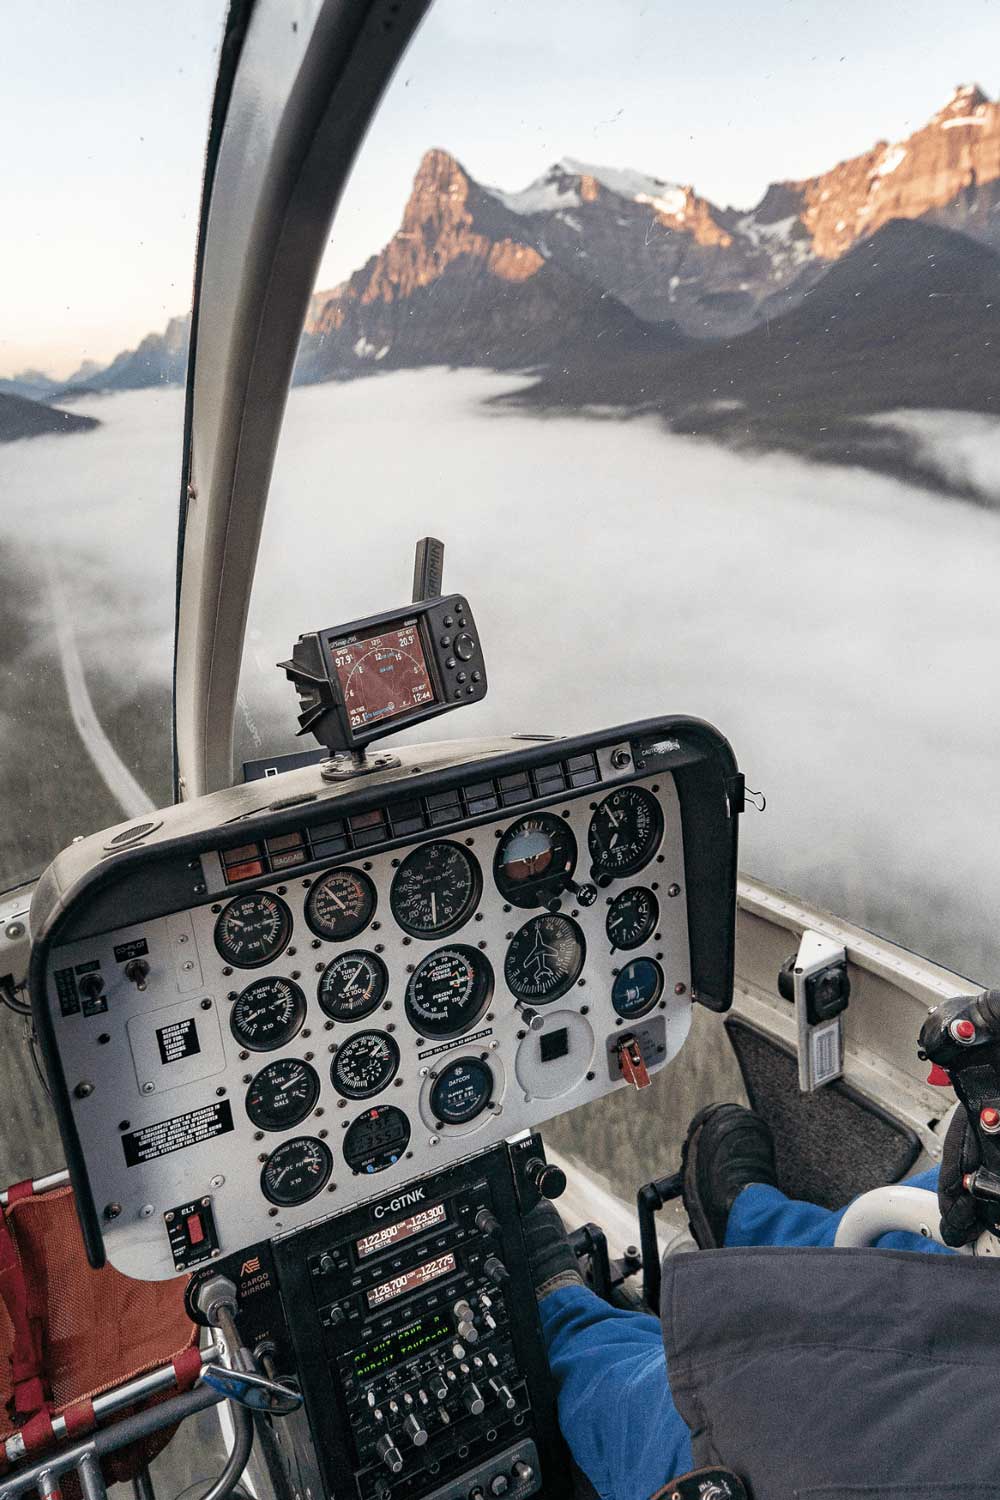
If you’re on a doors-off helicopter flight, It can be hard to safely switch between lenses.
I’ve found that the lens I use most on flights is a 24-70 f/2.8.
You can always bring multiple cameras with different lens setups, just make sure they all have straps! All pilots will require that you have your camera bodies properly secured during the flight.
For aerial flights, I’ve enjoyed using a wrist strap by Osiris & Co.

Remember to pull some cash before your flight for your pilot once you land. They work hard to keep you safe while you enjoy your flight and deserve a tip.
Thank you for reading! I hope you enjoyed this short tips & Tricks guide.
If you’d like to purchase a print of any of these photos, click on the print shop in the navigation. All profits directly support my aerial photography addiction.
Thanks!